
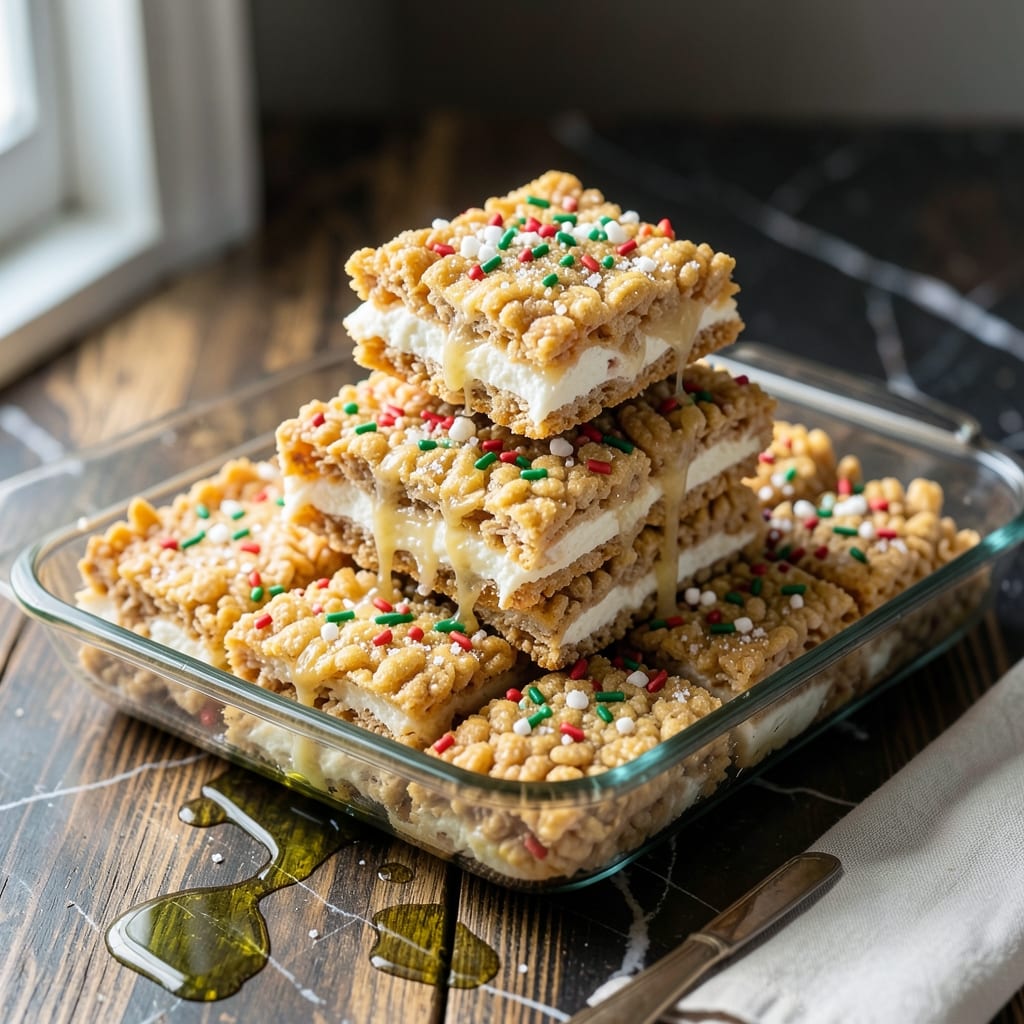
These festive treats bring the magic of the season to your kitchen with minimal effort. A simple combination of melted marshmallows, butter, and crispy rice cereal forms the base for endless holiday creativity.
The secret lies in the timing—pull the mixture off the heat just as the marshmallows fully melt to maintain that perfect chewy texture. Press into a pan while warm, then let cool completely before cutting into shapes.
What emerges is a batch of holiday-ready squares that can be decorated with colored sprinkles, crushed candy canes, or chocolate drizzle. They’re as fun to make as they are to eat, and always disappear first at gatherings.
Ideal for gift-giving, party platters, or a cozy night in. This recipe delivers consistent results every time.
Ingredients for Holiday Rice Krispies Treats
Pantry staples plus a few festive touches. Everything you need for holiday magic.
| Ingredient | Amount | Notes |
|---|---|---|
| Butter 🧈 | ¼ cup | Unsalted, for melting |
| Mini Marshmallows 🍬 | 10 oz | About 6 cups, fresh |
| Rice Krispies Cereal 🥣 | 6 cups | Crispy rice cereal |
| Vanilla Extract 🌿 | 1 tsp | Pure extract for flavor |
| Salt 🧂 | ¼ tsp | Fine grain, optional |
| Holiday Sprinkles ✨ | ½ cup | Festive colored variety |
| Crushed Candy Canes 🍬 | ¼ cup | For topping, optional |
| Semi-Sweet Chocolate Chips 🍫 | ½ cup | For drizzle, optional |
| Coconut Oil 🥥 | 1 tsp | For greasing pan |
The marshmallows are the foundation here. Jet-Puffed or store-brand mini marshmallows work equally well—just ensure they’re fresh (old marshmallows get dry and don’t melt as smoothly). For the butter, unsalted lets you control the salt content, which is key since the cereal already has some. Most grocery stores carry everything, but Target or Walmart are my go-tos for holiday sprinkles.
No mini marshmallows? Use 10 ounces of regular marshmallows (about 40 large ones). Skipping the sprinkles? Try crushed freeze-dried strawberries for color. The coconut oil for greasing can be swapped for butter or nonstick spray—whatever you’ve got. Want extra crunch? Add a handful of chopped nuts (pecans work great) to the mix before pressing into the pan.
These keep beautifully at room temperature in an airtight container for up to 3 days. For longer storage, freeze for up to 6 weeks—just thaw before cutting. Pressing the mixture into a parchment-lined pan makes removal and cutting a breeze (don’t skip this part).
Why You’ll Love This Recipe
- One Bowl Wonder: I melt the butter and marshmallows in the same pot I mix everything in—saves me from washing a mountain of dishes.
- Vanilla Magic: The tiny splash of vanilla turns the classic flavor into something warm and cozy, like a hug in treat form.
- Holiday Hero: I’ve brought these to cookie swaps and school parties, and they’re always the first to disappear.
- Pantry MVP: Between us, I keep the ingredients on hand year-round because they’re cheap, last forever, and satisfy any sweet tooth.
Step-by-Step Instructions for Holiday Rice Krispies Treats
This method delivers perfectly crisp, festive treats with minimal effort and maximum holiday cheer.
Step 1: Prepare the Pan and Melt the Butter
Lightly grease a 9×13-inch baking dish with the 1 tsp Coconut Oil, ensuring all surfaces are coated. This prevents sticking and makes cutting easier later. I prefer coconut oil for its neutral flavor, but any nonstick spray works too.
In a large pot, melt the 0.25 cup Butter over low heat. Watch for the edges to start bubbling and the butter to turn a pale golden color—this takes about 2-3 minutes. Remove from heat immediately once melted to prevent browning.
Step 2: Create the Marshmallow Base
Add the 10 oz Mini Marshmallows to the melted butter. Return the pot to low heat and stir constantly with a silicone spatula until fully melted. This takes 3-5 minutes—the mixture will be smooth and glossy when ready.
Stir in the 1 tsp Vanilla Extract and 0.25 tsp Salt until fully combined. The vanilla adds depth to the sweetness, and the salt enhances all the flavors. Don’t skip this step; it makes a noticeable difference.
Step 3: Incorporate the Cereal and Festive Add-Ins
Remove the pot from heat and immediately add the 6 cups Rice Krispies Cereal. Fold gently but thoroughly with the spatula until every piece is evenly coated. I like to press down slightly as I stir to ensure full coverage.
Fold in the 0.5 cup Holiday Sprinkles, reserving a small handful for topping later. The sprinkles will soften slightly from the heat but retain their vibrant color. Work quickly here—the mixture sets fast as it cools.
Step 4: Press and Top the Treats
Transfer the mixture to your prepared baking dish. Using the spatula or lightly greased hands, press the mixture evenly into the pan. I find that pressing down firmly for 30 seconds creates a compact base that holds together well when cut.
Immediately sprinkle the reserved Holiday Sprinkles and the 0.25 cup Crushed Candy Canes evenly over the top. Press them in lightly with your hands so they adhere as the treats set. The candy canes add a festive crunch and peppermint hint.
Step 5: Set, Cut, and Drizzle for Holiday Flair
Let the treats cool at room temperature for 1 hour until completely set. You’ll know they’re ready when they pull away slightly from the edges of the pan and feel firm to the touch.
Cut into squares with a sharp knife. For the final holiday touch, melt the 0.5 cup Semi-Sweet Chocolate Chips in 15-second intervals in the microwave, stirring between each, until smooth. Drizzle over the treats and let the chocolate set for 10 minutes before serving.
Pro Tips For Making Holiday Rice Krispies Treats
- Melt Butter Low: Use medium-low heat when melting butter for the marshmallows—high heat will scorch the sugar and give your treats a bitter edge.
- Use Fresh Marshmallows: Mini marshmallows stale faster than you think; check the bag date, because old ones turn hard and won’t melt into that perfect gooey base.
- Press While Warm: Spread the mixture into the pan immediately after mixing, while the marshmallows are still pliable, or you’ll be fighting a rock-solid block.
- Butter Your Hands: Lightly coat your hands with butter before pressing the mixture down—it keeps it from sticking and makes shaping a breeze.
Dietary Considerations for This holiday rice krispies treats
Gluten-Free Option
For a gluten-free version, simply swap the Rice Krispies for gluten-free crispy rice cereal. Kellogg’s makes a great one that works identically. The texture and flavor remain the same, so no other adjustments are needed. 💪
Vegan Adaptation
Use vegan butter (like Earth Balance) and vegan marshmallows (I recommend Dandies brand). These melt just like regular marshmallows, and the final result is indistinguishable from the original. The holiday magic stays intact.
Nut-Free Version
This recipe is naturally nut-free, but check your candy canes and sprinkles for potential cross-contamination. Brands like India Tree offer nut-free holiday sprinkles that are safe for allergies.
Lower Sugar
Reduce sugar by using half the marshmallows (5 oz) and adding 1 tsp cinnamon for warmth. The treats will be less sweet but still hold together well. I’ve tested this and the texture remains perfect.
Dairy-Free
Use dairy-free butter (like Miyoko’s) and ensure your chocolate chips are dairy-free. Enjoy Life brand makes excellent dairy-free chocolate that melts beautifully for drizzling. ✨
Allergen Notes
Always check labels on sprinkles and candy canes, as some contain wheat or soy. For severe allergies, make your own colored sugar by mixing organic cane sugar with natural food dyes.
Nutrition Facts
Frequently Asked Questions
Can I use regular marshmallows instead of mini?
Yes! Use 10 oz of regular marshmallows (about 40 large ones). They melt the same way but may take slightly longer to fully dissolve in the butter.
How do I keep them from sticking to the pan?
Grease the pan thoroughly with coconut oil, butter, or nonstick spray. Lining with parchment paper also helps for easy removal and clean cuts.
Can I make these ahead of time?
Store in an airtight container at room temperature for up to 3 days. For longer storage, freeze for up to 6 weeks and thaw before serving.
Why did my treats turn out hard?
Overcooking the marshmallow mixture is the usual culprit. Remove from heat immediately once marshmallows are fully melted to maintain that perfect chewy texture.

- Jimmy Dean Sausage and Rice Recipe: Hearty One-Pot Savory Delight - October 19, 2026
- Indian Jasmine Rice Recipe: Fragrant Basmati-Free Elegance - October 19, 2026
- KFC Rizo Rice Recipe: Copycat Side Dish With Savory Spice Blend - October 19, 2026