
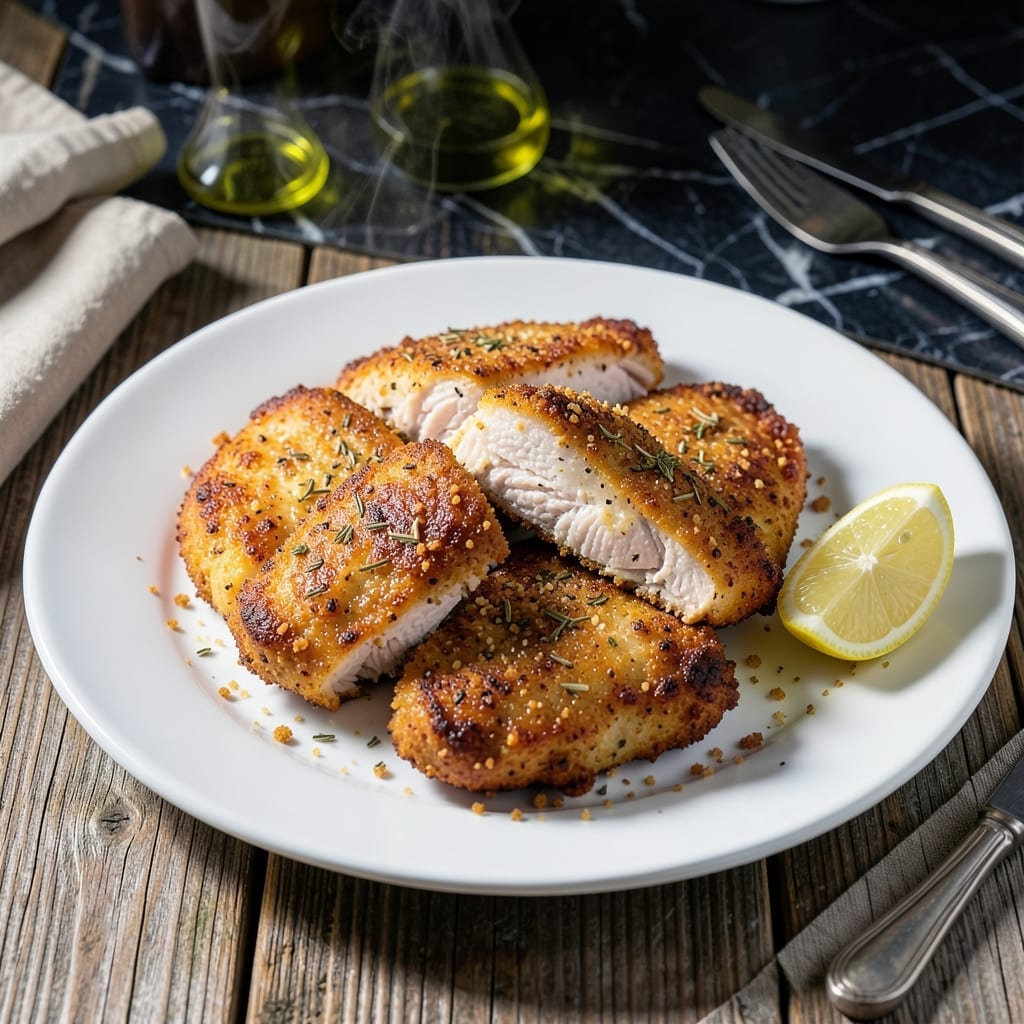
This dish redefines what chicken can be—crispy parmesan crust meets rich garlic butter glaze for an unforgettable experience. I developed this recipe after years of perfecting the balance between texture and flavor.
The secret lies in the double-coating method: first with flour, then with a parmesan-herb mixture that creates that signature crispy exterior. The garlic butter glaze adds a luxurious finish that takes this from great to extraordinary.
You’ll achieve restaurant-quality results at home with simple ingredients and precise technique. Each bite delivers the perfect contrast of textures and flavors—crunchy outside, tender inside, with a garlicky richness that lingers.
Serve this as a main course with roasted vegetables or a fresh salad. Here’s how to make it.
Ingredients for Holy Yum Chicken
Restaurant-quality ingredients create this showstopping crispy parmesan chicken with garlic butter glaze at home.
| Ingredient | Amount | Notes |
|---|---|---|
| Chicken Breast Cutlets 🍗 | 1 ½ lb | Boneless, skinless, pounded to 1/2-inch thickness |
| All-Purpose Flour 🌾 | 1 cup | For initial dredging |
| Large Eggs 🥚 | 2 whole | Beaten for egg wash |
| Panko Breadcrumbs 🍞 | 1 ½ cups | Japanese-style for extra crispiness |
| Parmesan Cheese 🧀 | 1 cup | Freshly grated from wedge |
| Dried Italian Herb Seasoning 🌿 | 2 tsp | Or mix of oregano, basil, thyme |
| Garlic Cloves 🧄 | 6 cloves | Minced, divided for coating and glaze |
| Unsalted Butter 🧈 | ½ cup | For garlic butter glaze |
| Fresh Parsley 🌿 | ¼ cup | Finely chopped for garnish |
| Kosher Salt 🧂 | 1 ½ tsp | Divided for seasoning |
| Freshly Ground Black Pepper 🌶️ | 1 tsp | Divided for seasoning |
| Olive Oil 🫒 | ½ cup | For pan-frying chicken |
| Lemon Wedges 🍋 | 4 pieces | For serving |
The chicken cutlets are non-negotiable for even cooking and that perfect crisp. Whole Foods or Costco sell pre-cut versions, but for best results, buy whole breasts and pound them yourself to an even 1/2-inch thickness. The Parmesan must be Parmigiano-Reggiano—pre-grated lacks the texture and depth. BelGioioso or Sartori are excellent domestic options that won’t break the bank.
No Panko? Crush cornflakes or melba toast for similar crunch. Dried herbs can replace the Italian seasoning at one-third the amount. For the glaze, ghee works if avoiding dairy, though the flavor will differ slightly. The eggs can be swapped with buttermilk for a tangier coating. Fresh thyme or rosemary would elevate the herb mixture if you’re feeling fancy.
Cooked chicken keeps 3-4 days refrigerated in an airtight container. The parmesan-herb mixture can be prepped 2 days ahead. For best results, serve immediately—the crust loses its crispness upon storage. Freezing isn’t recommended as it softens the breading significantly.
Why You’ll Love This Recipe
- 20-Minute Magic: I can bread and pan-fry these cutlets faster than ordering takeout.
- Crispy Cheesy Bliss: The panko and parmesan crust gives that golden crunch with a melty, savory bite.
- Crowd-Pleasing Star: I serve this for Sunday dinner, weeknight rush, or when the in-laws pop over unannounced.
- Leftovers? Yes Please: Honestly, it reheats beautifully—crispy outside stays intact, even in the microwave.
Step-by-Step Instructions for Crispy Parmesan Chicken
This method delivers an irresistibly crisp crust with juicy meat and a rich garlic butter finish every time.
Step 1: Prepare the Breading Stations
Set up three shallow dishes for breading. In the first, combine the 1 cup all-purpose flour with ½ teaspoon kosher salt and ½ teaspoon freshly ground black pepper. In the second, beat the 2 whole large eggs until uniform. In the third, mix the 1.5 cups panko breadcrumbs, 1 cup parmesan cheese, and 2 teaspoons dried Italian herb seasoning.
This three-step process creates layers of texture. The flour adheres to the chicken, the egg acts as glue, and the panko-parmesan mixture forms that signature crispy, golden crust. I always use freshly grated parmesan for better melt and flavor distribution.
Step 2: Bread and Rest the Chicken
Pat the 1.5 lb chicken breast cutlets dry with paper towels—moisture prevents the breading from sticking. Season both sides with the remaining 1 teaspoon kosher salt and ½ teaspoon freshly ground black pepper. Dredge each cutlet in flour, shaking off excess, then dip in egg, letting any extra drip off. Finally, press firmly into the panko mixture, ensuring complete coverage.
Place the breaded cutlets on a wire rack set over a baking sheet. Let them rest for 10 minutes—this crucial step helps the coating adhere during cooking and prevents it from sliding off. The rack allows air circulation, keeping the bottom crisp as the top sets.
Step 3: Pan-Fry to Golden Perfection
Heat ½ cup olive oil in a large skillet over medium-high heat until shimmering. Working in batches to avoid crowding, add the cutlets and cook for 3-4 minutes per side until deep golden brown and the internal temperature reaches 165°F. The panko should sizzle immediately upon contact with the oil.
Don’t move the chicken for the first 2 minutes—this allows a proper crust to form. Use tongs to flip gently, and regulate the heat to maintain a steady sizzle without burning. Transfer cooked cutlets to a paper towel-lined plate to drain excess oil.
Step 4: Create the Garlic Butter Glaze
While the chicken rests, wipe the skillet clean and melt the ½ cup unsalted butter over medium heat. Add 4 cloves minced garlic cloves and cook for 30-45 seconds until fragrant but not browned. Stir in the remaining 2 cloves minced garlic cloves and remove from heat.
Pour this garlic butter over the crispy chicken, allowing it to soak into the crust. The residual heat will melt the butter slightly, creating a glossy, flavorful glaze that complements the parmesan perfectly. Garnish with ¼ cup finely chopped fresh parsley for a pop of color.
Step 5: Serve Immediately with Lemon
Arrange the chicken on a serving platter with the 4 pieces lemon wedges on the side. The acidity from the lemon cuts through the richness of the garlic butter and parmesan. Serve immediately while the crust is at its crispiest—the texture deteriorates as it sits, so timing is everything.
Each piece should have an audible crunch when cut, with the golden panko-parmesan crust giving way to tender, juicy meat beneath. The garlic butter should pool slightly on the plate, ready for dipping or drizzling over each bite.
Pro Tips For Making Holy Yum Chicken
- Pound Even Thickness: I learned this the hard way—uneven cutlets cook unevenly. Use a rolling pin or meat mallet to get them to about 1/2-inch thickness so every bite is perfectly crispy and done at the same time.
- Grate Fresh Parmesan: Skip the pre-shredded stuff. Freshly grated Parmesan melts better and sticks to the panko like glue, giving you that golden, cheesy crust we all want.
- Rest Before Frying: After breading, let the cutlets sit for 10 minutes on a wire rack. This keeps the coating from sliding off when it hits the hot oil—I was skeptical until I tried it.
- Double Fry for Crisp: Sounds weird, but it works: Fry once at 350°F until golden, then rest 2 minutes and fry again at 375°F. The crust stays shatteringly crisp even after saucing.
Health Benefits of These Flavors
Lean Protein Power
This dish delivers a solid 40 grams of protein per serving from chicken breast, supporting muscle maintenance and keeping you full for hours. The lean nature of chicken breast makes it ideal for active lifestyles. 💪
Calcium Boost
The 1 cup parmesan cheese provides about 30% of your daily calcium needs, crucial for bone health. Parmesan also contains phosphorus, which works with calcium to strengthen bones and teeth.
B Vitamin Rich
Chicken is packed with B vitamins, especially B6 and B12, which support energy metabolism and brain function. The garlic in the glaze adds additional immune-boosting properties.
Healthy Fats
While the dish contains fats from butter and oil, they’re mostly unsaturated fats from olive oil, which support heart health. The ½ cup olive oil provides beneficial monounsaturated fats.
Low Carb Option
With about 20g net carbs per serving, this fits well into moderate carb diets. For lower carbs, you could reduce the panko by half, though the texture would be less crispy.
Quick Energy
The combination of protein and fats provides sustained energy without blood sugar spikes. I find this meal keeps me energized through long days at the restaurant. ✨
Nutrition Facts
Frequently Asked Questions
Why use panko instead of regular breadcrumbs?
Panko creates a lighter, crispier crust due to its coarser texture. Regular breadcrumbs compact more, resulting in a denser coating. It absorbs less oil, keeping the exterior crunchier longer.
Can I bake instead of pan-fry?
Yes, bake at 400°F for 15-18 minutes on a wire rack. The crust won’t be quite as crispy, but it’s a healthier option. Flip halfway through for even browning.
How do I prevent the breading from falling off?
Pat the chicken completely dry first. The 10-minute rest after breading is crucial—it helps the coating set. Avoid moving the chicken too soon during cooking.

- Jollof Rice Sauce Recipe: West African Tomato and Spice Infusion - September 25, 2026
- Japanese Rice Soup Recipe: Umami-Rich Comfort in a Bowl - September 25, 2026
- Homemade Cream Of Rice Recipe: Silk-Smooth Breakfast in Minutes - September 25, 2026