
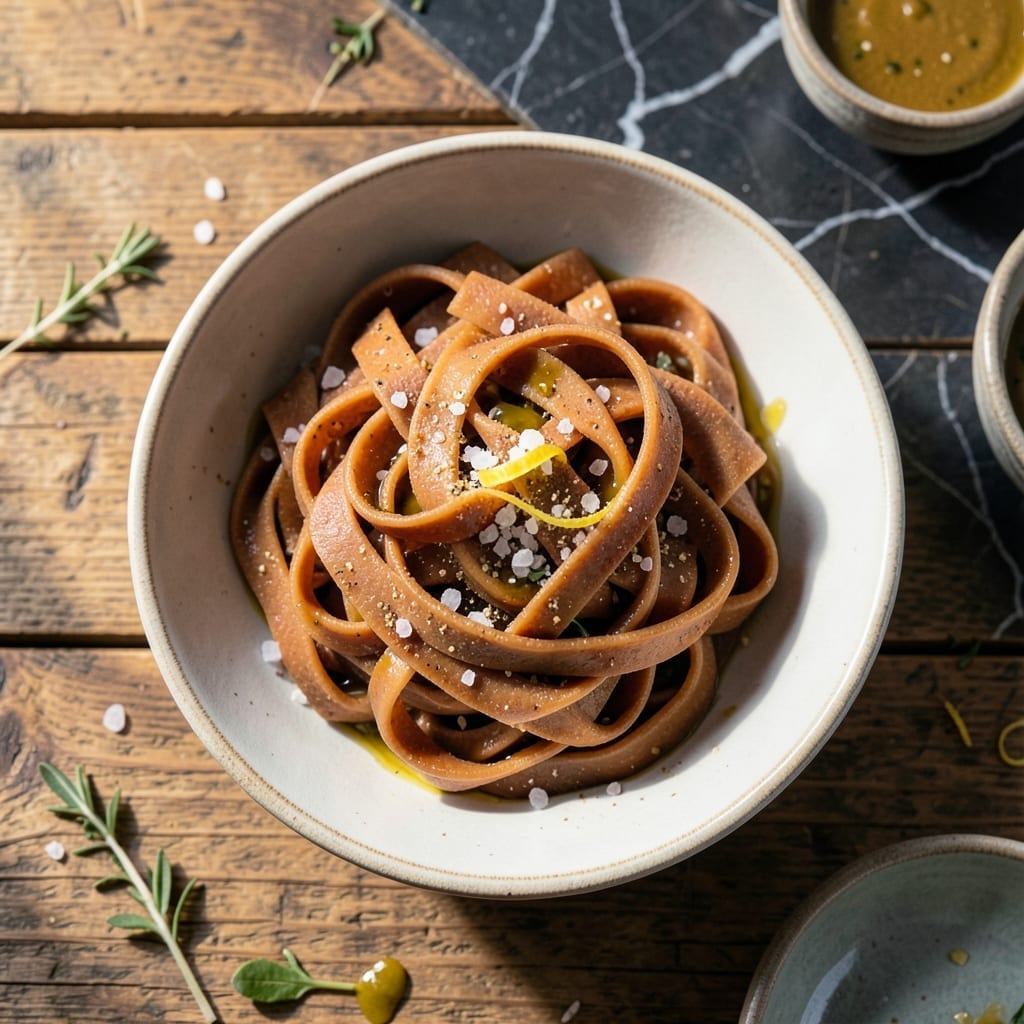
Making fresh pasta at home transforms your cooking game, and this version proves gluten-free can be just as satisfying. I developed this after my Italian Nonna taught me the importance of texture in every bite.
The brown rice flour creates a nutty depth that standard pasta lacks. The dough comes together quickly with simple ingredients, then rests for just 30 minutes before rolling.
You’ll end up with strands that hold their shape perfectly, with a perfect chew that rivals any wheat-based pasta. The natural sweetness of the rice flour shines through in every forkful.
Serve with your favorite sauce or simply tossed with olive oil and herbs. This recipe makes fresh pasta accessible to everyone.
Ingredients for Homemade Brown Rice Pasta
Simple gluten-free staples create pasta with nutty depth and perfect texture every time.
| Ingredient | Amount | Notes |
|---|---|---|
| Brown Rice Flour 🌾 | 2 cups | Fine, well-sifted texture |
| Tapioca Starch 🌾 | ½ cup | For elasticity and chew |
| Xanthan Gum 🧂 | 1 tsp | Helps bind gluten-free dough |
| Sea Salt 🧂 | ½ tsp | Fine grain for even distribution |
| Extra-Virgin Olive Oil 🫒 | 1 tbsp | For dough pliability |
| Warm Water 💧 | ¾ cup | Adjust as needed for texture |
| Arrowroot Powder 🌾 | ¼ cup | Optional for extra smoothness |
| Garlic Powder 🧄 | ½ tsp | Adds subtle depth |
| Nutritional Yeast 🧀 | 1 tbsp | For umami boost |
| Olive Oil 🫒 | 2 tbsp | For tossing finished pasta |
The brown rice flour is everything here. Bob’s Red Mill or Anthony’s Goods have the finest grind—avoid coarse or gritty brands. Xanthan gum might seem niche, but Whole Foods and Natural Grocers carry it in the baking aisle. I buy mine in bulk (it lasts forever) from Amazon. For the tapioca starch, look for pure starch, not flour—different texture entirely.
No xanthan gum? Psyllium husk powder at half the amount works in a pinch, though the texture won’t be quite as smooth. Short on tapioca starch? Cornstarch can substitute, but your pasta might be slightly more brittle. The olive oil can be any neutral oil (avocado, grapeseed), but extra-virgin adds that Italian restaurant touch. Don’t skip the resting time—30 minutes is non-negotiable for workability.
Dough balls keep wrapped in plastic for 24 hours in the fridge. Fresh pasta cooks immediately or freezes beautifully on a tray before bagging—lasts 2 months. Bring water to a rolling boil before adding, and don’t overcrowd the pot (this isn’t wheat pasta, it cooks faster).
Why You’ll Love This Recipe
- One Bowl Wonder: I just dump the brown rice flour, tapioca starch, and a pinch of xanthan gum in a bowl—no fancy equipment, no mess.
- Nutty Depth: That toasty brown rice flavor shines through, and the olive oil adds this rich, silky finish I didn’t expect from gluten-free pasta.
- Meal Prep Hero: I roll out a big batch on Sunday and portion it for quick dinners all week—holds up beautifully in the fridge.
Step-by-Step Instructions for Homemade Brown Rice Pasta
Here’s the method I rely on for consistently perfect results with gluten-free pasta.
Step 1: Combine Dry Ingredients for a Smooth Foundation
In a large mixing bowl, whisk together the 2 cups Brown Rice Flour, 0.5 cup Tapioca Starch, 0.25 cup Arrowroot Powder, 1 tsp Xanthan Gum, 0.5 tsp Sea Salt, 0.5 tsp Garlic Powder, and 1 tbsp Nutritional Yeast. I always sift the brown rice flour first to eliminate any grainy texture that could affect the pasta’s mouthfeel.
The xanthan gum is crucial here—it replaces the binding properties of gluten in traditional pasta. Make sure it’s evenly distributed throughout the dry mixture, as clumps can create uneven texture in your finished dough.
Step 2: Form the Dough with Careful Hydration
Create a well in the center of your dry ingredients and add the 1 tbsp Extra-Virgin Olive Oil and 0.75 cup Warm Water. Using a fork, gradually incorporate the dry ingredients into the wet until a shaggy dough begins to form. The water should be warm to the touch but not hot—about 110°F is ideal.
I’ve found that starting with slightly less water and adding more as needed prevents a sticky, unmanageable dough. The dough is ready when it holds together when pressed but isn’t wet. If it feels too dry, add warm water 1 teaspoon at a time until it reaches the right consistency.
Step 3: Knead and Rest for Optimal Texture
Turn the dough onto a clean surface dusted lightly with brown rice flour. Knead for 5-7 minutes until smooth and elastic. The dough will be slightly tacky at first but should become smoother as you work it. If it sticks to your hands, dust with a bit more flour.
Once kneaded, shape the dough into a ball, wrap it tightly in plastic wrap, and let it rest at room temperature for 30 minutes. This resting period allows the flour to fully hydrate and the xanthan gum to work its magic, resulting in a more pliable dough that’s easier to roll out.
Step 4: Roll and Cut the Pasta Sheets
Divide the rested dough into 4 equal portions and work with one at a time, keeping the others covered. Using a pasta machine or rolling pin, roll the dough to your desired thickness—about 1/16 inch for most pasta shapes. I prefer using a pasta machine for consistent thickness.
For fettuccine or tagliatelle, roll the sheet to the second-thinnest setting on your machine, then cut into ¼-inch wide strips. For lasagna sheets, stop at the third-thinnest setting. Dust the cut pasta with a bit of brown rice flour to prevent sticking while you work with the remaining dough.
Step 5: Cook and Finish with Flavor
Bring a large pot of salted water to a rolling boil. Add the fresh pasta and cook for 2-3 minutes—it cooks much faster than dried pasta. You’ll know it’s done when the pasta floats to the surface and has a slight bite when tasted.
Drain the pasta and immediately toss with 2 tbsp Olive Oil to prevent sticking. The pasta should have a pleasant, slightly nutty flavor from the brown rice flour with a satisfying chew from the tapioca starch. Serve immediately with your favorite sauce.
Pro Tips For Making Homemade Brown Rice Pasta
- Knead Thoroughly: Work the dough for at least 5-7 minutes—brown rice flour needs extra time to develop the right elasticity. I learned this the hard way after my first batch crumbled apart.
- Use Warm Water: Mix your dry ingredients with warm (not hot) water, about 110°F. It activates the xanthan gum better and makes the dough easier to handle.
- Rest the Dough: Let it sit covered for 20 minutes after kneading. Sounds weird, but it works—the starches hydrate fully and the pasta holds together better when rolled.
- Roll It Thin: Aim for about 1/16 inch thickness. Any thicker and your brown rice pasta will turn out gummy, even if it feels sturdy when cutting.
Regional Styles of This Recipe
Northern Italian Style
In Lombardy, they incorporate buckwheat flour with brown rice for an earthier flavor. Replace ½ cup Brown Rice Flour with buckwheat, and add 1 tsp dried rosemary to the dough. The pasta pairs beautifully with hearty ragùs. I love this rustic approach for chilly New England evenings. 💛
Sicilian Citrus Twist
For a brighter profile, Sicilians add zest of 1 lemon and 1 tsp orange blossom water to the warm water. This version shines with seafood sauces. The citrus oils enhance the natural nuttiness of the brown rice flour.
Emilian Egg Enrichment
Emilia-Romagna chefs often add 2 large eggs to their gluten-free pasta for richness. Reduce water to ⅓ cup and whisk eggs in first. The result is a dough that’s easier to handle and has a silky finish. Perfect for wider noodles like pappardelle.
Tuscan Herb Blend
Mix in 1 tbsp chopped fresh rosemary and 1 tsp dried sage with the dry ingredients. This Tuscan-inspired version works wonderfully with wild mushroom sauces. I tested this variation in my tiny Boston kitchen with great success.
Calabrian Spicy Kick
Add ½ tsp Calabrian chili paste to the warm water for a subtle heat. This southern Italian approach creates pasta that stands up to bold tomato sauces. The spice complements the nutty brown rice base without overpowering it. 🔥
Nutrition Facts
Frequently Asked Questions
Can I use white rice flour instead of brown?
Yes, but the texture and flavor will differ. Brown rice flour adds a nutty taste and slightly chewier texture. White rice flour will make a milder, softer pasta. Adjust water slightly as white rice flour may absorb liquid differently.
Why does the dough need to rest for 30 minutes?
The resting period lets the flour fully hydrate and the xanthan gum activate. This creates a more elastic, workable dough that rolls out smoothly. Skipping this step often results in brittle or difficult-to-handle pasta.
How do I prevent the pasta from sticking together after cutting?
Dust the cut pasta generously with brown rice flour and spread strips in a single layer on a floured surface. Alternatively, hang them on a drying rack. Cook immediately or freeze in a single layer before transferring to a bag.

- Ground Beef Rice and Beans Recipe: Slow-Simmered Savory Harmony - October 17, 2026
- Guyanese Fried Rice Recipe: Caribbean Spice With Wok-Charred Aromatics - October 17, 2026
- Hakka Thunder Tea Rice Recipe: Wok-Charred Herbal Infusion - October 17, 2026