
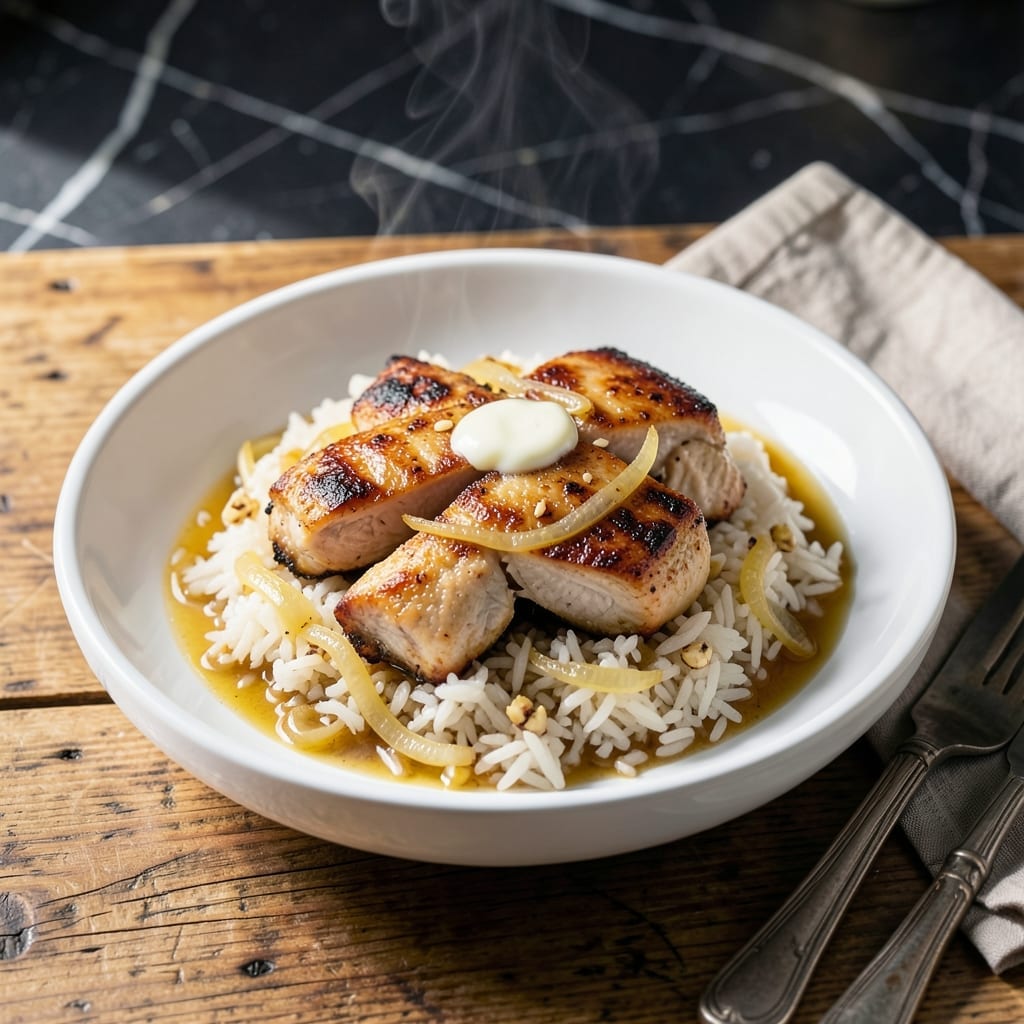
There’s nothing quite like the comforting aroma of chicken and rice cooking together in one pot. This homemade version captures all the nostalgic flavors of the classic boxed dish, but with fresh ingredients and restaurant-quality results.
I developed this recipe to replicate that familiar taste while giving you complete control over the ingredients. The secret is toasting the rice first, which creates a nutty depth that makes the dish special. It’s a one-pot meal that’s both simple and satisfying.
What you’ll get is tender chicken, perfectly cooked rice, and a savory broth that ties it all together. The flavors meld beautifully, delivering that warm, homey feeling with every bite. It’s comfort food at its best.
Ready in about 30 minutes, this dish is perfect for busy weeknights when you crave something hearty and familiar. Here’s how to make it.
Ingredients for Homemade Chicken Rice a Roni
Fresh ingredients and a few pantry staples bring this nostalgic one-pot meal to life beautifully.
| Ingredient | Amount | Notes |
|---|---|---|
| Boneless Skinless Chicken Thighs 🍗 | 1 ½ lb | Cut into bite-sized pieces |
| Long-Grain White Rice 🍚 | 1 ½ cups | Uncooked, for toasting |
| Chicken Broth 🥣 | 3 cups | Low-sodium preferred |
| Unsalted Butter 🧈 | 4 tbsp | Divided for toasting and finishing |
| Yellow Onion 🧅 | 1 whole | Medium, finely diced |
| Garlic Cloves 🧄 | 3 cloves | Minced for depth |
| Celery Stalks 🌿 | 2 whole | Finely diced for aroma |
| Dried Parsley Flakes 🍃 | 1 tbsp | For color and flavor |
| Dried Thyme 🌿 | 1 tsp | Crushed for intensity |
| Dried Basil 🌿 | 1 tsp | For herbal notes |
| Salt 🧂 | 1 ½ tsp | Divided to taste |
| Black Pepper 🌶️ | ½ tsp | Freshly ground preferred |
| Paprika 🌶️ | ½ tsp | Sweet or smoked variety |
| Worcestershire Sauce 💧 | 1 tsp | Adds umami depth |
The chicken is key here. Thighs stay juicier than breasts in the long cook time, and the skinless/boneless kind saves prep. I grab mine from Costco for bulk savings, but any grocery store works. The rice needs to be long-grain white (jasmine or basmati) for that classic texture—avoid instant or parboiled. Toasting the rice in butter first is non-negotiable for that nutty flavor.
No chicken thighs? Breasts work in a pinch but watch the cook time—they dry out faster. Out of fresh garlic? Garlic powder at half the amount gets you close. The Worcestershire is the secret umami boost, but soy sauce works too. Vegetable broth can swap for chicken, though the flavor will be milder. Frozen onion/celery blends (like Trader Joe’s mirepoix) save chopping time.
This tastes even better the next day. Keeps 4-5 days in the fridge, freezes for 3 months. I portion leftovers into containers for easy lunches. The rice absorbs more liquid as it sits, so add a splash of broth when reheating.
Why You’ll Love This Recipe
- One Pot Wonder: I love that everything—chicken, rice, broth—simmers together in one pan. Honestly, cleanup is almost nonexistent.
- Buttery Richness: The combo of unsalted butter and chicken broth makes this taste like a restaurant dish. That golden, savory flavor is unreal.
- Weeknight Hero: Between us, this is my go-to when I need dinner ready in 30 minutes flat. (Yes, even on a Tuesday night)
- Budget Stretcher: Boneless thighs and long-grain rice feed my family for two meals. I’ll be real: it’s saved me on more than one grocery run.
Step-by-Step Instructions for Homemade Chicken Rice-A-Roni
This one-pot method delivers all the nostalgic flavor with none of the boxed mix shortcuts.
Step 1: Toast the Rice and Aromatics
In a large pot or Dutch oven with a tight-fitting lid, melt 2 tbsp of the unsalted butter over medium heat. Add the 1.5 cups long-grain white rice and stir for 2-3 minutes until the grains turn light golden brown and smell nutty.
Immediately add the finely diced yellow onion, 2 finely diced celery stalks, and minced garlic cloves. Cook for 3 minutes, stirring often, until the vegetables soften and the onion turns translucent. This builds a flavor base that’s deeper than any store-bought mix.
Step 2: Brown the Chicken and Build the Base
Push the rice and vegetables to one side of the pot. Add the remaining 2 tbsp unsalted butter to the cleared space. When it melts, add the 1.5 lb boneless skinless chicken thighs (cut into bite-sized pieces) in a single layer.
Sear the chicken for 4-5 minutes until the pieces develop a light golden crust. Sprinkle 1 tsp salt, 0.5 tsp black pepper, 0.5 tsp paprika, 1 tsp dried thyme, and 1 tsp dried basil over everything. Stir to coat the rice and chicken evenly with the spices.
Step 3: Deglaze and Simmer
Pour in the 3 cups chicken broth and 1 tsp Worcestershire sauce. Use a wooden spoon to scrape up any browned bits from the bottom of the pot—this is where the big flavor lives. Stir in the 1 tbsp dried parsley flakes and the remaining 0.5 tsp salt.
Bring the mixture to a boil. Once boiling, reduce the heat to low, cover the pot, and let it simmer for 20-25 minutes. The liquid should be mostly absorbed, and the rice should be tender but not mushy. Don’t peek—every time you lift the lid, you lose precious steam and add to the cooking time.
Step 4: Rest and Finish
Remove the pot from the heat and let it sit, covered, for 10 minutes. This final rest allows the rice to steam in its own residual heat, ensuring every grain is perfectly cooked. The chicken will be fall-apart tender, and all those spices will have melded into a rich, savory broth.
Fluff the mixture gently with a fork, breaking up the chicken slightly so it distributes evenly. Taste and adjust the seasoning if needed, though the blend of herbs and spices should give you that classic comfort-food flavor you remember. Serve hot, straight from the pot.
Pro Tips For Making Homemade Chicken Rice A Roni
- Brown the Chicken First: Sear the boneless thighs in butter until golden—about 4-5 minutes per side—before adding liquids. I learned this the hard way: skipping this step leaves the chicken bland and the rice tasteless.
- Toast the Rice: After sautéing the onion, let the rice cook in the butter for 2 minutes until slightly nutty. Sounds weird, but it works: this prevents mushy grains and adds depth.
- Use Warm Broth: Pour in chicken broth that’s hot from the tap or microwave, not cold. After burning three batches, I finally figured out that cold broth stalls the cooking and makes the rice uneven.
- Cover and Wait: Once everything’s simmering, resist the urge to peek—keep the lid on for the full 18-20 minutes. My grandmother swore by this, and she was right: lifting the lid releases steam and messes with the texture.
Common Mistakes When Making This Recipe
Skipping the Toast
I can’t stress this enough: toasting the rice in butter first is what gives this dish its signature nutty flavor. Skipping this step results in bland, mushy rice that lacks depth. Take your time—2-3 minutes of stirring until golden is worth it.
Overcrowding the Pot
Using a pot that’s too small means uneven cooking and steamed chicken instead of properly browned pieces. I use my 5-quart Dutch oven for perfect results. Ensure the chicken has space to sear in a single layer for that golden crust. 🔥
Peeking While Simmering
Every time you lift the lid during the 20-25 minute simmer, you release steam and lower the temperature. This extends cooking time and can lead to undercooked rice. Resist the urge—trust the process and keep that lid on tight.
Incorrect Rice Ratio
The 1.5 cups rice to 3 cups broth ratio is critical. Too much liquid makes soggy rice, while too little leaves it undercooked. Use a measuring cup for accuracy, and remember that long-grain white rice is non-negotiable here.
Rushing the Rest
That final 10-minute rest off the heat isn’t optional. It allows the rice to absorb the last bit of moisture and the chicken to become fall-apart tender. I set a timer so I don’t forget—this step makes all the difference.
Underseasoning
With 1.5 tsp salt divided throughout the cooking process, don’t be shy. Taste as you go and adjust if needed. The Worcestershire and herbs add layers, but salt brings all those flavors together beautifully. 💡
Nutrition Facts
Frequently Asked Questions
Can I use chicken breasts instead of thighs?
Yes, but they dry out faster. Use 1.5 lb and reduce simmer time to 15-18 minutes. Thighs are recommended for juicier results.
Why toast the rice first?
Toasting enhances the nutty flavor and prevents mushiness. Cook for 2-3 minutes until golden—this step builds the dish’s signature depth.
What if my rice is undercooked?
Add 1/4 cup hot broth, cover, and simmer 5 more minutes. Ensure your lid stays on—peeking releases steam and slows cooking.
Can I make this in a slow cooker?
Yes! Sear chicken first, then combine all ingredients. Cook on low for 3-4 hours or high for 2 hours. Skip toasting rice.

- Jollof Rice Sauce Recipe: West African Tomato and Spice Infusion - September 25, 2026
- Japanese Rice Soup Recipe: Umami-Rich Comfort in a Bowl - September 25, 2026
- Homemade Cream Of Rice Recipe: Silk-Smooth Breakfast in Minutes - September 25, 2026