
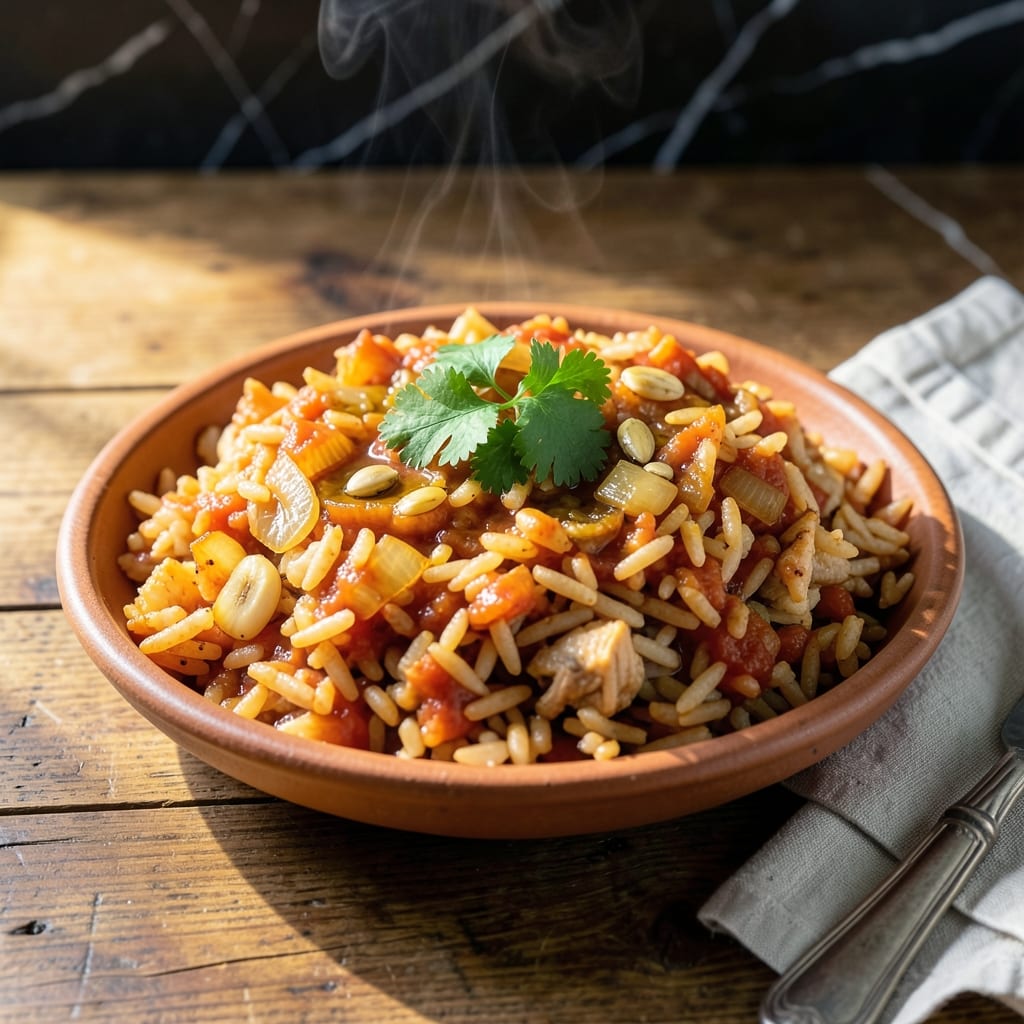
This recipe delivers perfectly fluffy grains every time, infused with vibrant spices that define authentic Mexican flavors.
I’ve refined this method to ensure the rice cooks evenly, absorbing all the rich tomato and garlic essence without turning mushy. The result is a homemade side dish that pairs beautifully with any meal.
Ingredients for Homemade Mexican Rice
Long-grain rice, vibrant spices, and rich tomato create this authentic side dish with ease.
| Ingredient | Amount | Notes |
|---|---|---|
| Long-Grain White Rice 🍚 | 2 cups | Rinsed until water runs clear |
| Olive Oil 🫒 | 3 tbsp | Divided for toasting and cooking |
| Garlic Cloves 🧄 | 4 cloves | Minced finely for even distribution |
| Yellow Onion 🧅 | 1 whole | Finely diced for base flavor |
| Tomato Sauce 🍅 | 1 cup | Plain, unsweetened variety preferred |
| Chicken Broth 🥣 | 3 cups | Use vegetable broth for vegetarian |
| Ground Cumin 🌿 | 1 tsp | Freshly ground for optimal flavor |
| Smoked Paprika 🌶️ | 1 tsp | Adds authentic depth of flavor |
| Dried Oregano 🍃 | ½ tsp | Mexican oregano if available |
| Bay Leaf 🌿 | 1 whole | Removed before serving |
| Salt 🧂 | 1 ½ tsp | Adjust to taste at the end |
| Fresh Cilantro 🌿 | ¼ cup | Chopped, for garnish (optional) |
| Lime 🍋 | 1 whole | Juiced for finishing touch |
| Green Peas 🌱 | ¾ cup | Frozen, thawed (optional) |
The rice quality is paramount for achieving the promised fluffy texture. Basmatis or jasmine rice works best here, though any long-grain variety will do. For the tomato element, plain tomato sauce provides consistent flavor without added sugars. The broth should be low-sodium to allow precise seasoning control. Whole Foods and Trader Joe’s carry excellent organic options for both the rice and spices.
Need to make this strictly vegetarian? Swap the chicken broth for vegetable broth—better yet, use a homemade version for maximum flavor. No fresh cilantro? Flat-leaf parsley offers a similar fresh note. Missing smoked paprika? Regular paprika plus a pinch of cayenne gets you close. The green peas are entirely optional but add a nice pop of color and texture (frozen works perfectly here).
This keeps beautifully for 4-5 days in the fridge, and the flavors actually deepen over time. Freeze portions for up to 3 months in airtight containers. The rice might clump slightly when thawed, but a quick stir over low heat restores its fluffy texture. Always store with the bay leaf removed to prevent bitterness.
Why You’ll Love This Recipe
- One Pot Wonder: I love that everything cooks together—just sauté the onion and garlic in olive oil, add rice and tomato sauce, then let it simmer.
- Rich Tomato Depth: The tomato sauce gives it that classic Mexican rice flavor, warm and slightly sweet with the garlic kicking it up.
- Feeds a Crowd: Between us, this recipe stretches easily for tacos, burritos, or as a side—doubling it still takes the same effort.
- Budget Stretch: Honestly, a bag of rice, a can of tomato sauce, and pantry staples make this dish for pennies per serving.
Step-by-Step Instructions for Mexican Rice
Master the technique for consistently fluffy grains with vibrant, well-balanced flavors every time.
Step 1: Toast the Rice for Maximum Flavor
Rinse the 2 cups Long-Grain White Rice until the water runs clear to remove excess starch, which prevents gummy texture. Heat 2 tbsp Olive Oil in a large skillet over medium-high heat until shimmering.
Add the drained rice and cook for 5-7 minutes, stirring frequently, until the grains turn golden brown and emit a nutty aroma. This toasting step is critical—it deepens the flavor and creates a barrier that prevents the rice from becoming mushy during cooking.
Step 2: Sauté Aromatics to Build the Base
Reduce heat to medium and add the remaining 1 tbsp Olive Oil. Stir in the finely diced Yellow Onion and cook for 3-4 minutes until translucent. Add the minced Garlic Cloves and sauté for 30 seconds until fragrant—don’t let it brown.
Immediately add the 1 cup Tomato Sauce, 1 tsp Ground Cumin, 1 tsp Smoked Paprika, 0.5 tsp Dried Oregano, and 1.5 tsp Salt. Cook for 2 minutes, stirring constantly, until the mixture darkens slightly and the raw tomato scent dissipates.
Step 3: Simmer Rice to Fluffy Perfection
Pour in the 3 cups Chicken Broth and add the Bay Leaf. Stir to combine, then bring to a boil. Once boiling, reduce heat to low, cover the skillet tightly, and simmer for 20-25 minutes.
Resist the urge to lift the lid during cooking—steam is essential for even cooking. The rice is done when all liquid is absorbed and the grains are tender with no chalky center. If using 0.75 cup Green Peas, sprinkle them over the rice during the last 5 minutes of cooking.
Step 4: Rest and Finish for Optimal Texture
Remove the skillet from heat and let the rice rest, covered, for 10 minutes. This allows the grains to steam and separate fully. Fluff gently with a fork to release any compacted sections.
Discard the Bay Leaf and transfer the rice to a serving dish. Finish with a squeeze of Lime juice and a sprinkle of chopped Fresh Cilantro for brightness and freshness. The rice should be light, separate, and infused with rich, spiced tomato flavor in every bite.
Pro Tips For Making Homemade Mexican Rice
- Toast the Rice First: I learned this the hard way—cook the rice in olive oil for 3-4 minutes until golden before adding liquids. It removes the raw starch and gives the rice that nutty depth Mexican rice is known for.
- Bloom the Garlic: After the onion softens, add minced garlic and cook just until fragrant, about 30 seconds. Any longer and it turns bitter, ruining the dish.
- Use Warm Tomato Sauce: Sounds weird, but it works: warm the tomato sauce slightly before mixing it in. Cold sauce can make the rice clump together instead of cooking evenly.
- Skip the Stirring: Once the liquid is added, resist the urge to stir. Stirring breaks the grains and turns your rice mushy—I skip this when I’m lazy, but the texture suffers every time.
Essential Equipment for Great homemade mexican rice
Skillet Selection
I always use a heavy-bottomed skillet with a tight-fitting lid for even heat distribution. A 12-inch cast iron works perfectly, but stainless steel with an aluminum core is also excellent. Avoid nonstick for the toasting step—it won’t get hot enough. 🔥
Wooden Spoon
A wooden spoon is essential for stirring the rice while toasting. It won’t scratch your skillet and handles the high heat beautifully. I keep mine right next to the stove for this recipe.
Fine-Mesh Strainer
Rinsing the rice properly is key, and a fine-mesh strainer ensures no grains escape down the drain. I use a OXO Good Grips strainer—it’s durable and easy to clean.
Chef’s Knife
For dicing the onion and mincing garlic, a sharp 8-inch chef’s knife makes quick work. I love my Wüsthof for precision cuts. Dull knives slip and make prep dangerous.
Liquid Measuring Cup
A 4-cup glass measuring cup with clear markings helps measure the broth accurately. I prefer Pyrex because it’s heat-resistant and easy to read. Never guess on liquid ratios.
Citrus Juicer
A simple handheld citrus juicer extracts every drop of lime juice efficiently. I use a OXO reamer—it’s comfortable and catches seeds. Fresh juice makes all the difference. 💛
Nutrition Facts
Frequently Asked Questions
Why do I need to toast the rice first?
Toasting enhances the nutty flavor and creates a barrier to prevent mushiness. Cook for 5-7 minutes over medium-high heat until golden brown for best results.
Can I substitute brown rice?
Yes, but adjust the liquid to 4 cups broth and increase simmer time to 40-45 minutes. The texture will be chewier and less fluffy.
How do I fix mushy rice?
Prevent it by rinsing rice thoroughly and avoiding lid-lifting. If it happens, spread on a tray to dry slightly or repurpose as a rice pudding base.
Can I make this ahead?
It keeps 4-5 days refrigerated. Reheat with a splash of water and cover to restore moisture.

- Ground Beef Rice and Beans Recipe: Slow-Simmered Savory Harmony - October 17, 2026
- Guyanese Fried Rice Recipe: Caribbean Spice With Wok-Charred Aromatics - October 17, 2026
- Hakka Thunder Tea Rice Recipe: Wok-Charred Herbal Infusion - October 17, 2026