
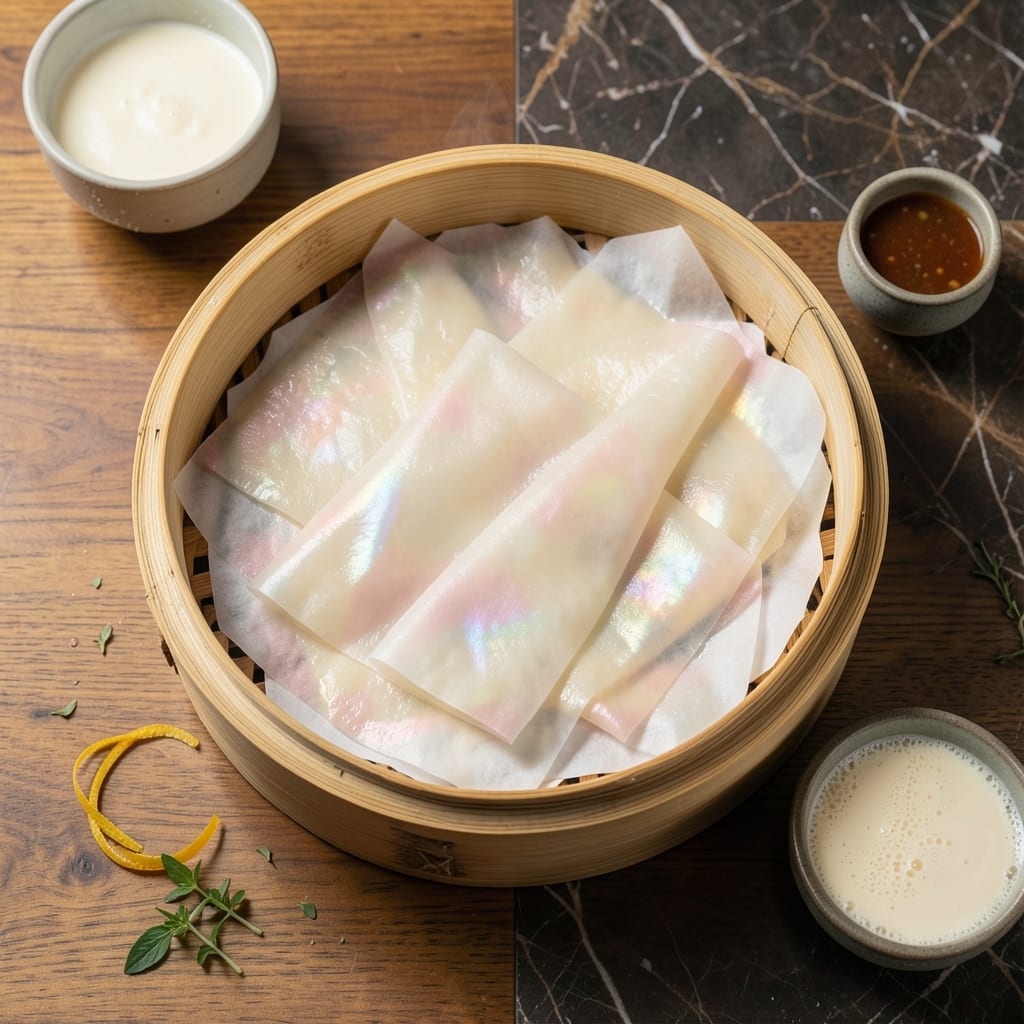
Creating rice paper from scratch transforms your kitchen into a Vietnamese street food stall. The process demands patience, but the delicate, translucent results are worth every minute.
This method uses simple ingredients—rice flour, water, and a touch of salt—to produce wrappers that are light and airy. The batter must be thin enough to spread evenly but thick enough to hold shape.
Cooking requires a non-stick surface and precise heat control. Too hot, and the paper burns; too cool, and it stays gummy. The key is a steady hand and quick movements.
Once dry, these wrappers will be ready for fresh spring rolls, crispy snacks, or elegant appetizers. The texture is the reward for your effort.
Ingredients for Homemade Rice Paper
Simple pantry staples create delicate, translucent wrappers perfect for spring rolls.
| Ingredient | Amount | Notes |
|---|---|---|
| Rice Flour 🌾 | 2 cups | White rice flour preferred |
| Water 💧 | 3 cups | Room temperature for best results |
| Salt 🧂 | ½ tsp | Fine sea salt works best |
| Tapioca Starch 🌾 | 2 tbsp | Adds flexibility to wrappers |
| Vegetable Oil 🫒 | 1 tsp | For greasing the pan |
| Cornstarch 🌽 | 1 tbsp | Prevents sticking when drying |
The rice flour is non-negotiable here. Bob’s Red Mill or Anthony’s Goods are reliable brands with consistent quality. Look for finely milled white rice flour—avoid brown rice flour, which gives a grittier texture. Tapioca starch (also called tapioca flour) adds just the right elasticity. Most Asian markets or well-stocked grocery stores carry both. If you’re making a big batch, bulk bins can be more economical.
No tapioca starch? Arrowroot powder at the same amount works as a substitute. In a pinch, cornstarch at half the quantity can help, though the texture won’t be as stretchy. The water temperature matters more than you’d think—room temp prevents clumping. For extra authenticity, some recipes call for a splash of coconut milk, but it’s not essential for this basic version.
The batter keeps in the fridge for 24 hours if you need to pause your process. Once cooked, the rice paper sheets will stay fresh at room temperature for 3-4 days in an airtight container, or freeze them for up to 3 months with parchment between layers. Drying them completely is key for storage.
Why You’ll Love This Recipe
- No Fuss Mixing: I just whisk rice flour, tapioca starch, water, and a pinch of salt—no fancy techniques, no resting time.
- Crisp & Light: The tapioca starch gives them that perfect chewy edge I can’t get from store-bought.
- Endless Fillings: I use these for fresh spring rolls, quick wraps, or even a crispy snack when fried.
- Pantry Staples: Rice flour and tapioca starch are cheap, last forever, and I always have them on hand.
Step-by-Step Instructions for Vietnamese-Style Rice Paper
This method delivers thin, pliable wrappers with a delicate texture for fresh spring rolls.
Step 1: Combine Dry Ingredients for the Batter
In a large mixing bowl, whisk together the 2 cups Rice Flour, 2 tbsp Tapioca Starch, 1 tbsp Cornstarch, and 0.5 tsp Salt until thoroughly combined. The tapioca starch adds flexibility, while the cornstarch prevents sticking during the drying process.
I use white rice flour for the most authentic texture, as it creates a smoother batter. The mixture should look uniform with no visible lumps. This dry blend forms the foundation of your rice paper, so take your time to ensure even distribution of all ingredients.
Step 2: Create a Smooth, Thin Batter
Gradually add the 3 cups Water to the dry ingredients while whisking continuously. Start with about 1 cup of the room temperature water and incorporate it fully before adding more. This prevents clumping and ensures a smooth consistency.
The batter should be thin, similar to heavy cream. If it appears too thick after adding all the water, whisk in an additional 1-2 tablespoons of water. The room temperature water helps achieve the right viscosity without creating air bubbles that could affect the final texture.
Step 3: Heat the Pan and Pour the Batter
Heat a non-stick skillet over medium heat and lightly grease it with 1 tsp Vegetable Oil using a paper towel. The pan is ready when a drop of water sizzles and evaporates immediately upon contact. Wipe away any excess oil to prevent the rice paper from becoming greasy.
Pour a thin layer of batter into the pan, starting from the outer edge and swirling inward to create an even, circular shape. Use about ¼ cup of batter per wrapper, adjusting the amount based on your pan’s size. The batter should spread easily—if it doesn’t, your batter may be too thick.
Step 4: Cook Until Set and Translucent
Cook the wrapper for 30-45 seconds until the edges start to lift and the surface looks set but still slightly moist. You’ll notice the color change from opaque to translucent as it cooks. Avoid flipping the wrapper—rice paper only cooks on one side.
Use a thin spatula to gently lift the cooked wrapper from the pan. If it tears, your batter may need a bit more water, or the pan might not be hot enough. The ideal wrapper should peel away cleanly and hold its shape when lifted.
Step 5: Dry and Store the Rice Paper
Lay the cooked wrapper on a clean kitchen towel or parchment paper. The cornstarch in the batter helps prevent sticking as the sheets dry. Allow each wrapper to cool completely at room temperature, which takes about 10-15 minutes per batch.
Once cooled, stack the wrappers with parchment paper between each layer to prevent them from sticking together. Store in an airtight container at room temperature for up to 1 week, or freeze for longer storage. To use, simply dip in warm water for 5-10 seconds to soften before filling.
Pro Tips For Making Homemade Rice Paper
- Thin the Batter: Use a 1:1.5 ratio of rice flour to water—any thicker and your rice paper will be gummy instead of delicate. I learned this the hard way after my first three batches came out like chewy pancakes.
- Rest the Mixture: Let the batter sit for 15-20 minutes before cooking. This gives the tapioca starch time to hydrate fully, and the difference in texture is noticeable.
- Skip the Boil: Keep the heat at a steady medium-low when cooking the sheets—boiling water or too-high heat will make them brittle and impossible to roll later.
- Oil the Surface: Lightly brush your steaming cloth or non-stick pan with vegetable oil before pouring the batter. Sounds minor, but it prevents sticking and makes peeling off the finished sheets a breeze.
Troubleshooting Perfect Results
Batter Too Thick
If your batter looks like pancake mix, whisk in 1-2 tbsp room temperature water until it reaches heavy cream consistency. I often find that Bob’s Red Mill rice flour absorbs more liquid, so adjust gradually. The batter should pour like melted ice cream. 💡
Sticking to Pan
Prevent sticking by using a non-stick skillet and ensuring it’s properly heated to medium heat. Lightly grease with vegetable oil on a paper towel, then wipe away excess. If wrappers still stick, your batter may need more tapioca starch for elasticity.
Tearing When Lifting
This usually means your wrapper isn’t fully cooked. Wait until edges lift completely and the surface looks translucent before attempting to remove. Use a thin, flexible spatula and lift from one edge, not the center. If it still tears, your batter might need 1 more tbsp water.
Uneven Cooking
Swirl your pan immediately after pouring to create an even layer. If you’re getting thick and thin spots, try using slightly less batter—3 tbsp instead of ¼ cup. Also ensure your pan is perfectly level on the burner.
Cloudy Appearance
Cloudiness often comes from water that’s too cold or overmixing. Use room temperature water and whisk just until combined. If your first few wrappers look cloudy, the batter may need 5-10 minutes to rest and settle before cooking.
Storage Issues
Prevent sticking during storage by dusting each wrapper with a pinch of cornstarch before stacking. Store in an airtight container with parchment between layers. If they dry out too much, place a damp paper towel in the container overnight. ✨
Nutrition Facts
Frequently Asked Questions
Can I use a different type of flour?
White rice flour is essential for authentic texture. Substituting with all-purpose or wheat flour will result in chewy, dense wrappers instead of the delicate, translucent sheets. Stick to rice flour for best results.
Why do my wrappers turn out cloudy?
Cloudiness usually comes from using cold water or overmixing the batter. Always use room temperature water and whisk just until smooth. Let the batter rest for 5-10 minutes before cooking.
How do I know when they’re done cooking?
The edges will lift and the surface will turn translucent after about 30-45 seconds. Avoid flipping—cook only one side. The wrapper should peel away cleanly when ready.
Can I make these ahead of time?
Yes! Store cooled wrappers in an airtight container with parchment between layers for up to 1 week. For longer storage, freeze for up to 3 months.

- Jollof Rice Sauce Recipe: West African Tomato and Spice Infusion - September 25, 2026
- Japanese Rice Soup Recipe: Umami-Rich Comfort in a Bowl - September 25, 2026
- Homemade Cream Of Rice Recipe: Silk-Smooth Breakfast in Minutes - September 25, 2026