
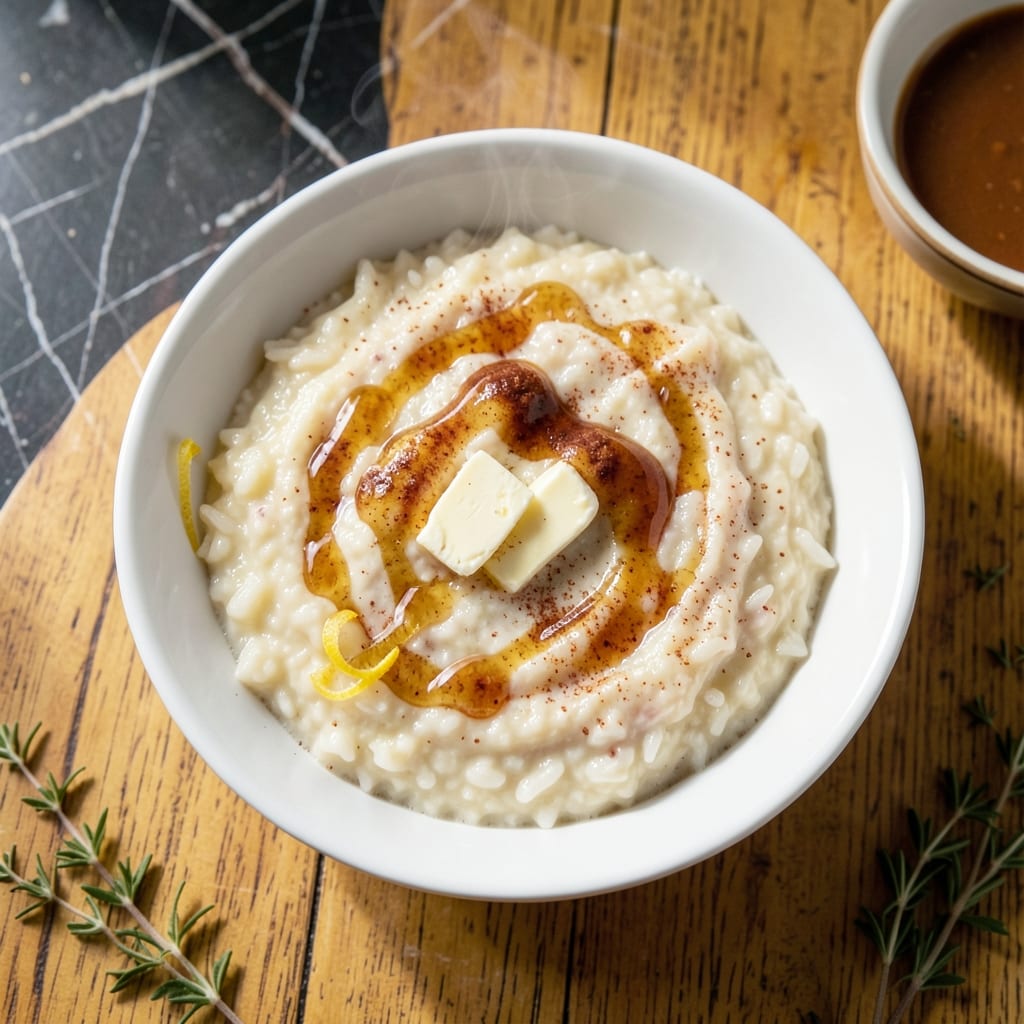
There’s something deeply comforting about a warm bowl of rice pudding straight from the oven. This baked version delivers a creamy custard texture with minimal hands-on time, letting the oven do most of the work.
I developed this method after testing countless stovetop versions that required constant stirring. The oven’s gentle heat coaxes the rice into plump, tender perfection while the custard sets around it, creating that signature homemade richness.
The vanilla-infused aroma fills the kitchen as it bakes, signaling that dessert—or breakfast—is nearly ready. A golden skin forms on top, hiding the velvety pudding beneath.
This recipe honors traditional flavors while simplifying the process. The result is a dessert that feels both nostalgic and effortless.
Ingredients for Homemade Rice Pudding Recipe in Oven
Simple pantry staples transform into a creamy, oven-baked custard with minimal effort.
| Ingredient | Amount | Notes |
|---|---|---|
| Long-Grain White Rice 🍚 | ¾ cup | Uncooked, Arborio works too |
| Whole Milk 🥛 | 4 cups | Full-fat for creaminess |
| Heavy Cream 🥛 | 1 cup | Cold, for richness |
| Granulated Sugar 🍬 | ¾ cup | Adjust to taste preference |
| Large Eggs 🥚 | 3 whole | Room temperature, lightly beaten |
| Unsalted Butter 🧈 | 2 tbsp | Melted, for greasing dish |
| Pure Vanilla Extract 🌿 | 2 tsp | High-quality for best flavor |
| Ground Cinnamon 🌶️ | 1 tsp | Freshly ground preferred |
| Ground Nutmeg 🌰 | ¼ tsp | Freshly grated if possible |
| Salt 🧂 | ½ tsp | Fine sea salt |
| Raisins 🍇 | ½ cup | Optional, for texture |
| Whole Vanilla Bean 🌿 | 1 whole | Split and scraped, optional |
The milk quality directly impacts the final texture. Whole milk from a local dairy yields the richest result, though any full-fat milk works. For the rice, Arborio or jasmine creates a creamier pudding than standard long-grain. If using raisins, plump them in warm water first to prevent dryness. Unsalted butter allows precise control over the dish’s salinity (trust me on this one).
Need a dairy-free version? Coconut milk at full-fat concentration substitutes beautifully for both milk and cream. No eggs? Cornstarch slurry (2 tbsp starch + 2 tbsp water) can replace the binding power. Brown sugar adds a caramel note, or maple syrup at three-quarters the amount. Skip the raisins? Diced apples or pears work well (add them halfway through baking).
Baked rice pudding keeps 4-5 days in the fridge. The custard thickens as it cools—stir in a splash of milk when reheating. Freezes well for 3 months (portion into containers first). The vanilla bean can be rinsed, dried, and reused for sugar infusions.
Why You’ll Love This Recipe
- I’ll be real: this recipe doubles perfectly for potlucks or Sunday suppers.
- Hands-Off Cooking: I just mix everything in a dish and let the oven do the work—no stirring, no fuss.
- Rich & Creamy: The whole milk and heavy cream make it so velvety, it’s like dessert hugging a spoon.
- Feeds a Crowd: I’ll be real: this recipe doubles perfectly for potlucks or Sunday suppers.
Step-by-Step Instructions for Baked Creamy Rice Pudding
Master the technique for a custard-like texture that forms beautifully in the oven.
Step 1: Prepare the Rice Base
Preheat your oven to 325°F. In a large saucepan, combine the 0.75 cup long-grain white rice with the 4 cups whole milk and 1 cup heavy cream. Bring to a gentle simmer over medium heat, stirring frequently to prevent scorching.
Cook for 15-18 minutes until the rice is tender but still has a slight bite. The mixture should thicken noticeably but remain pourable. This partial cooking ensures the rice absorbs liquid evenly during baking while preventing a dry final product.
Step 2: Sweeten and Temper the Eggs
In a separate bowl, whisk together the 0.75 cup granulated sugar, 3 whole large eggs, 1 tsp ground cinnamon, 0.25 tsp ground nutmeg, and 0.5 tsp salt until smooth and slightly pale. The eggs should be at room temperature to prevent curdling when combined with the hot rice mixture.
Slowly pour about 1 cup of the hot rice mixture into the egg mixture while whisking constantly. This tempering process gently raises the egg temperature without cooking it prematurely. Then pour the tempered egg mixture back into the saucepan with the remaining rice.
Step 3: Add Final Flavorings and Raisins
Remove the saucepan from heat. Stir in the 2 tsp pure vanilla extract and 0.5 cup raisins if using. For enhanced vanilla flavor, scrape the seeds from the 1 whole vanilla bean and add both seeds and pod to the mixture.
The vanilla bean pod will infuse additional flavor during baking. If you notice the mixture has thickened too much during this process, add a splash of warm milk to maintain a pourable consistency. The raisins should be evenly distributed throughout the pudding.
Step 4: Bake to Custard Perfection
Pour the mixture into a 2-quart baking dish that’s been greased with the 2 tbsp unsalted butter. Smooth the top with a spatula and bake at 325°F for 45-50 minutes.
You’ll know it’s done when the edges are golden brown and the center is set but still has a slight jiggle when gently shaken. The top should develop a thin, golden skin while the interior remains creamy. Avoid overbaking, as the custard will continue to set as it cools.
Step 5: Cool and Serve
Remove the pudding from the oven and let it cool at room temperature for 20-30 minutes. This resting period allows the custard to fully set and develop its characteristic creamy texture.
Serve warm or chilled, with a dusting of additional ground cinnamon if desired. The pudding should have a smooth, velvety texture with visible rice grains and bursts of raisin throughout. Store any leftovers covered in the refrigerator for up to 4 days.
Pro Tips For Making Homemade Rice Pudding Recipe In Oven
- Precook the Rice: Parboil the long-grain rice for 5-7 minutes before baking—this jumpstarts the softening process so it absorbs the milk and cream evenly without turning chalky.
- Warm Your Dairy: Take the whole milk and heavy cream out of the fridge 30 minutes before mixing, or gently warm them on the stove. Cold dairy can make the eggs curdle when combined.
- Skip the Rinse: Don’t rinse the rice before cooking—you want the starch to thicken the pudding as it bakes. I learned this the hard way after making three watery batches.
- Stir Mid-Bake: Pull the dish out at the 30-minute mark to give it a quick stir, then return it to the oven. This prevents a skin from forming on top and helps the custard set uniformly.
Make-Ahead Tips for Leftovers
Overnight Prep
Mix all ingredients the night before and refrigerate in your baking dish. In the morning, let it sit at room temperature for 30 minutes while preheating the oven. This head start cuts baking time to 35-40 minutes. 💡
Portion Control
Divide the mixture into 8 ramekins instead of one large dish for individual servings. These bake faster at 25-30 minutes and are perfect for grab-and-go breakfasts. I use 6-ounce ramekins from my neighborhood Boston market.
Slow Cooker Adaptation
Transfer the prepared mixture to a greased slow cooker insert. Cook on low for 3-4 hours, stirring once halfway through. The texture is slightly less custardy but still delicious.
Freeze for Later
Portion cooled pudding into airtight containers with ½ inch headspace. Freeze for up to 3 months. Thaw overnight in the fridge, then reheat with 2 tbsp milk per cup to restore creaminess. ❄️
Reheating Tips
For the best texture, reheat in the oven at 300°F covered with foil for 15-20 minutes. Microwave works in 1-minute bursts at 50% power, stirring between each.
Flavor Boost
Add a splash of vanilla almond milk when reheating for extra depth. I discovered this trick after testing multiple variations in my tiny triple-decker kitchen.
Nutrition Facts
Frequently Asked Questions
Can I use a different type of rice?
Arborio or jasmine rice creates a creamier result than long-grain. Avoid instant rice as it can turn mushy.
Why does my pudding have a skin on top?
This is normal for baked custards! Stir it in before serving or prevent it by placing a piece of buttered parchment directly on the surface before baking.
How do I prevent curdling?
Temper the eggs properly by slowly adding hot liquid while whisking. Use room temperature eggs to avoid shocking them.
Can I bake this in individual portions?
Yes! Use 6-ounce ramekins and reduce baking time to 25-30 minutes. Perfect for meal prep.

- Ground Beef Rice and Beans Recipe: Slow-Simmered Savory Harmony - October 17, 2026
- Guyanese Fried Rice Recipe: Caribbean Spice With Wok-Charred Aromatics - October 17, 2026
- Hakka Thunder Tea Rice Recipe: Wok-Charred Herbal Infusion - October 17, 2026