
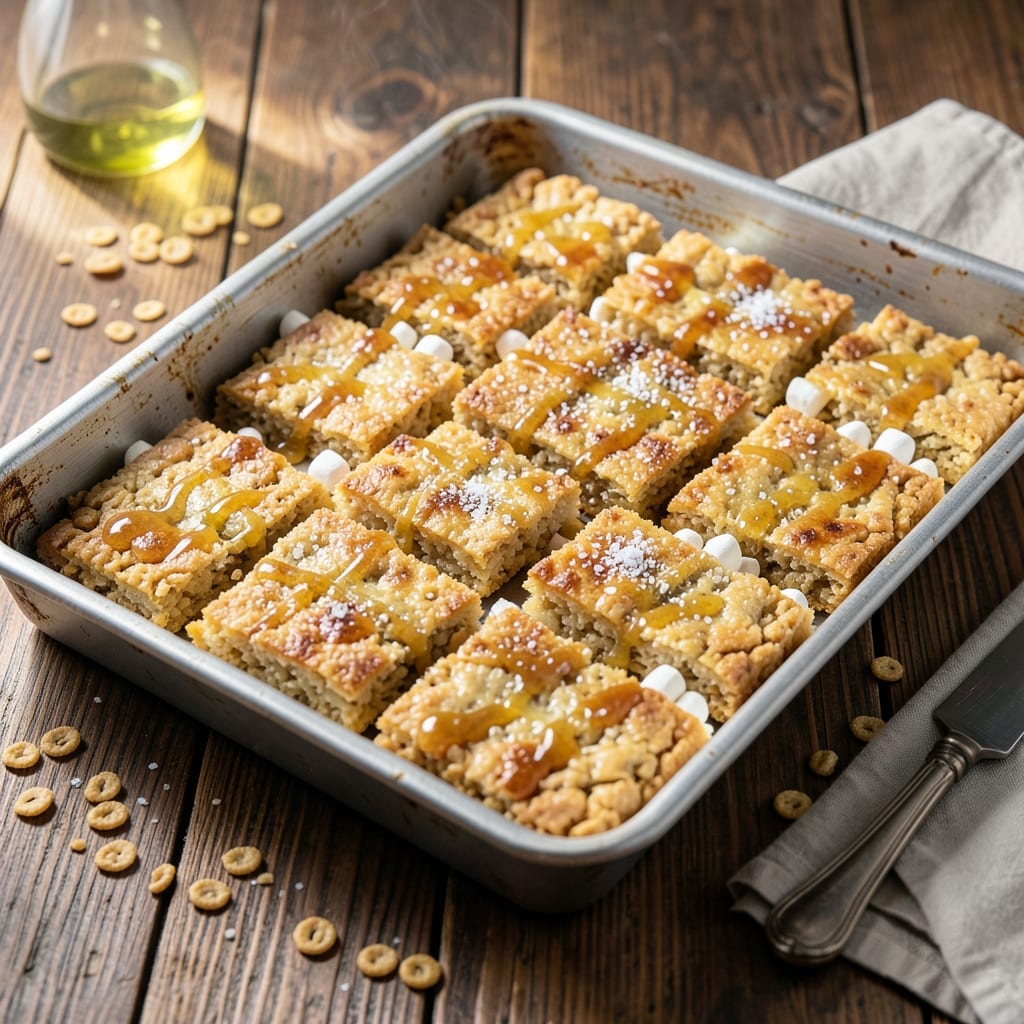
There’s a reason this classic treat has stood the test of time—it delivers perfectly crispy texture with minimal effort. I’ve tested countless variations in my small kitchen, and this version proves that simplicity often wins.
With just a few pantry staples and 10 minutes of active time, you can create a batch that’s golden, buttery, and impossible to resist. The key is melting the marshmallows just until smooth, then folding in the cereal quickly before the mixture sets.
What you get is a pan of squares with that signature snap when you break them apart, each bite offering a balance of sweet and salty. They’re ideal for bake sales, lunchboxes, or an after-dinner treat.
No special equipment required—just a pot, a spoon, and a little patience while they cool.
Ingredients for Homestyle Rice Krispie
Six ingredients. One pot. Endless crispy, buttery goodness in every square.
| Ingredient | Amount | Notes |
|---|---|---|
| Rice Krispies Cereal 🥣 | 6 cups | Fresh for maximum crispiness |
| Mini Marshmallows 🍬 | 10 oz | Or use 40 regular marshmallows |
| Unsalted Butter 🧈 | ½ cup | 1 stick, for rich flavor |
| Vanilla Extract 🌿 | 1 tsp | Pure for best flavor |
| Sea Salt 🧂 | ¼ tsp | Fine grain for even distribution |
| Light Corn Syrup 🫙 | 2 tbsp | Optional for extra chewiness |
The marshmallows are doing the heavy lifting here. Kraft Jet-Puffed mini marshmallows melt fastest, but any brand works—just avoid stale ones (they won’t melt smoothly). For the cereal, Kellogg’s Rice Krispies have that signature snap, but store brands are fine too. The butter needs to be unsalted so you control the salt level. I always use Land O’Lakes for consistent quality.
No mini marshmallows? Regular marshmallows at 40 pieces (about 10 oz) work perfectly. Out of vanilla? Skip it—the butter flavor shines through. For a gooier texture, add light corn syrup (Karo brand is reliable). Want to make it fancy? Swap half the butter for brown butter (worth the extra 5 minutes). No Rice Krispies? Any crispy rice cereal will do.
These keep at room temperature for 2-3 days in an airtight container. For longer storage, freeze for up to 6 weeks—just thaw at room temp before serving. Cut into squares only after fully cooled (don’t rush it, they’ll crumble).
Why You’ll Love This Recipe
- I’ll be real: they’re still soft and chewy two days later in an airtight container.
- One-Bowl Wonder: I melt the butter, toss in marshmallows, and stir in cereal—no extra bowls, no fuss.
- Vanilla Cloud: The vanilla and sea salt turn those mini marshmallows into something ridiculously good.
- Crowd Pleaser: Honestly, it’s my go-to for birthday parties, bake sales, and last-minute school treats.
Step-by-Step Instructions for Homestyle Rice Krispie Treats
Here’s the method I’ve perfected for that nostalgic crunch and gooey sweetness everyone loves.
Step 1: Melt the Butter and Prepare the Marshmallow Base
In a large, heavy-bottomed pot, melt the 0.5 cup Unsalted Butter over low heat. I use a light-colored pot so I can monitor the melting process and prevent browning. Once fully melted, add the 10 oz Mini Marshmallows all at once.
Stir constantly with a silicone spatula, breaking up any clumps, until the marshmallows are completely melted and smooth. This should take about 5-7 minutes. Watch for the mixture to become glossy and pull away slightly from the sides of the pot—this is your visual cue that it’s ready for the next step.
Immediately stir in the 1 tsp Vanilla Extract, 0.25 tsp Sea Salt, and 2 tbsp Light Corn Syrup. The corn syrup adds that extra chewiness that takes these from good to exceptional. Mix for another 30 seconds until fully incorporated.
Step 2: Fold in the Rice Krispies Cereal
Remove the pot from heat and add all 6 cups Rice Krispies Cereal at once. Here’s the thing—I’ve found that adding them all at once, rather than in batches, prevents the cereal at the bottom from getting soggy while you’re still mixing in the rest.
Using the same spatula, fold the cereal into the marshmallow mixture with a gentle but firm motion. You want to coat every piece evenly without crushing the cereal. The mixture will look thick and sticky. Stop folding as soon as the cereal is fully coated—overmixing will make the treats dense instead of light and airy.
Step 3: Press into the Pan for Even Thickness
Transfer the mixture to a greased 9×13-inch baking dish (I use a light coating of butter on the bottom and sides). Press the mixture evenly into the pan using the spatula or slightly damp hands to prevent sticking. Don’t press too hard—just enough to create an even layer about 1-inch thick.
I like to use an offset spatula to smooth the top for a bakery-style finish. For extra crispiness, you can lightly press a few additional Rice Krispies into the top. Let the treats cool at room temperature for 30 minutes until firm enough to cut.
Step 4: Cut and Serve at the Perfect Moment
Once cooled and set, use a sharp knife to cut into 16 equal squares. For clean cuts, dip the knife in hot water and wipe it dry between each cut. This prevents the marshmallow from sticking and dragging the cereal with it.
Serve immediately for that ideal combination of crispy edges and gooey centers. If you’re making these ahead, store them in an airtight container at room temperature for up to 2 days. Real talk: they’re best the day they’re made, when the cereal still has that perfect snap.
Pro Tips For Making Homestyle Rice Krispie
- Melt Butter Low: Use medium-low heat when melting the butter—high heat will brown it too fast and give your treats a burnt taste. I learned this the hard way after ruining a batch with overzealous flames.
- Fresh Marshmallows Only: Skip the stale mini marshmallows; they won’t melt smoothly. Fresh ones blend seamlessly with the butter and vanilla for that perfect gooey texture.
- Press Lightly: Resist the urge to pack the mixture too tightly into the pan. A gentle press keeps the treats airy and crispy instead of dense and hard.
- Salt the Mix: Add a pinch of sea salt to the melted butter and marshmallow mixture—about ¼ teaspoon. It balances the sweetness and makes the flavors pop without overpowering.
Common Mistakes When Making Great homestyle rice krispie
Overheating the Butter
Melting your 0.5 cup Unsalted Butter too hot can cause it to brown, which adds an unwanted nutty flavor. Keep the heat on low and use a light-colored pot to monitor the color. I learned this the hard way in my tiny Boston kitchen. 🔥
Rushing the Marshmallow Melt
Adding the 6 cups Rice Krispies Cereal before marshmallows are fully melted creates uneven coating. Stir constantly until the mixture is completely smooth and glossy, about 5-7 minutes. Patience here ensures every bite is perfectly coated.
Overmixing the Cereal
Once you fold in the cereal, stop as soon as it’s evenly coated. Overmixing crushes the Rice Krispies and makes the treats dense. Use a gentle but firm motion with your spatula to preserve that signature crispiness.
Pressing Too Hard
When transferring to your 9×13-inch baking dish, press just enough to create an even 1-inch layer. Pressing too firmly compacts the mixture, resulting in hard, chewy treats instead of light, airy ones.
Cutting Too Soon
Resist the urge to slice before the mixture is fully cooled. Cutting warm treats causes crumbling. Wait the full 30 minutes for clean squares. I use a hot water-dipped knife for perfect edges.
Skipping the Corn Syrup
The 2 tbsp Light Corn Syrup might seem optional, but it adds that extra chewiness. Without it, your treats may turn out slightly drier. It’s a small addition that makes a noticeable difference. ✨
Nutrition Facts
Frequently Asked Questions
Can I use regular marshmallows instead of mini?
Use 40 regular marshmallows (about 10 oz) as a substitute. They melt just as smoothly, though they may take a minute longer to fully dissolve.
How do I make them extra crispy?
Press a few extra Rice Krispies on top before cooling. Also, avoid overmixing the cereal to maintain that signature snap. Let them cool completely before cutting.
Can I make these without butter?
Yes, substitute with 1/2 cup coconut oil for a dairy-free version. The flavor will be slightly different, but they’ll still hold together nicely.
How long do they stay fresh?
Store in an airtight container at room temperature for up to 2-3 days. For longer storage, freeze for up to 6 weeks.

- Jamaican Jollof Rice Recipe: Island Spice in Every Bite - October 18, 2026
- Hamburger Rice Hot Dish Recipe: Midwest Comfort in One Pan - October 18, 2026
- Iranian Cabbage Rice Recipe: Aromatic Herbs and Spiced Layers - October 18, 2026