
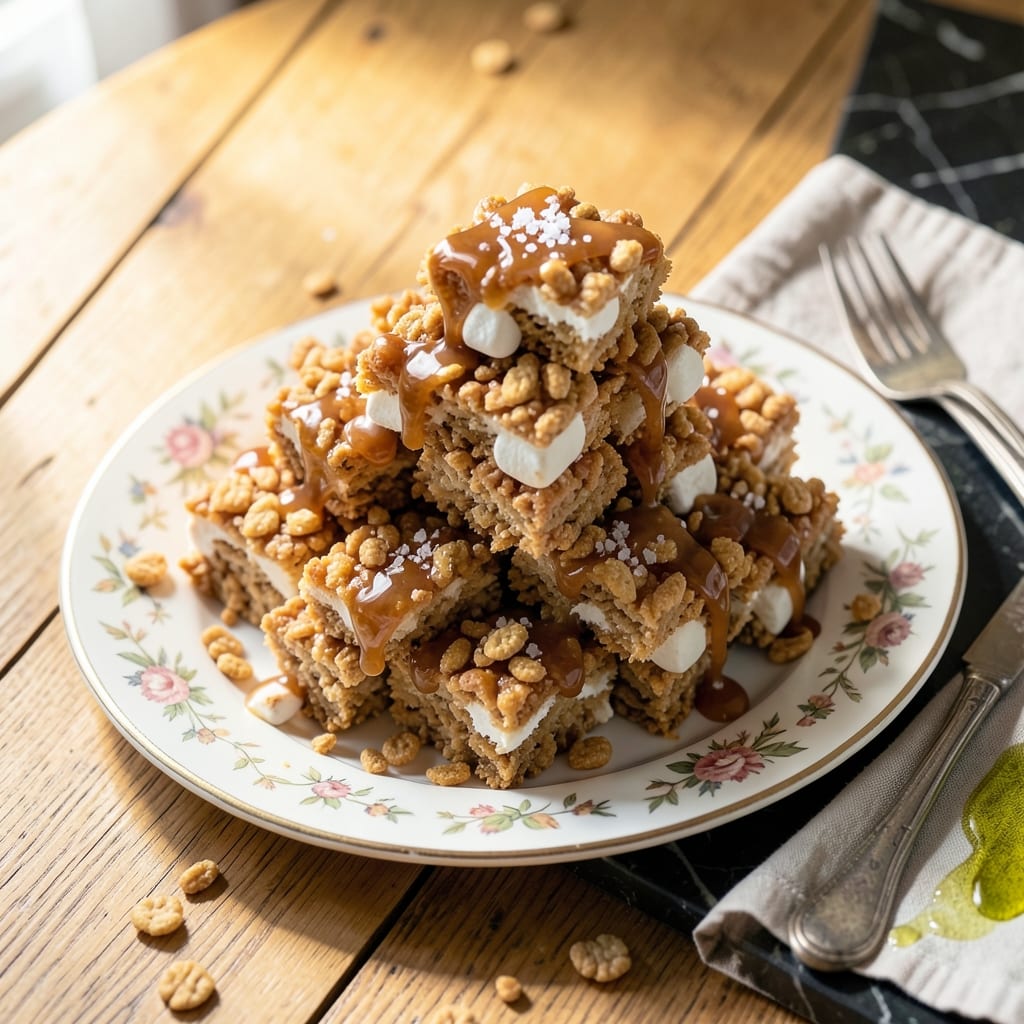
There’s something deeply comforting about the first bite of a perfectly made Rice Krispie treat. This recipe brings back childhood memories with its buttery richness and signature crunch. I’ve tested countless variations to nail the ideal texture.
The secret lies in melting the butter and marshmallows together until just smooth, then quickly folding in the cereal. This prevents the mixture from becoming dense or gummy. Timing is everything with this simple process.
What you get are squares with a golden top layer, a gooey center, and that unmistakable snap when you break into them. Each piece delivers the perfect balance of sweetness and crispness we all remember.
These treats keep well for days and travel beautifully for bake sales or care packages. The recipe scales easily for larger batches when needed.
Ingredients for Homestyle Rice Krispie Treats
Butter, marshmallows, cereal—classic trio for that nostalgic crunch you remember.
| Ingredient | Amount | Notes |
|---|---|---|
| Unsalted Butter 🧈 | ½ cup | Melted for binding |
| Miniature Marshmallows ⚪ | 10 cups | Standard 10-oz bag |
| Rice Krispies Cereal 🥣 | 6 cups | Fresh for maximum crunch |
| Vanilla Extract 🌿 | 1 tsp | Pure for best flavor |
| Kosher Salt 🧂 | ¼ tsp | Enhances sweetness balance |
| Light Corn Syrup 💧 | ¼ cup | Optional for extra chew |
| Sea Salt Flakes 🧂 | ½ tsp | For golden top sprinkle |
The butter is the foundation here. Use unsalted so you control the salt—Land O’Lakes or a good store brand works. Marshmallows should be fresh and puffy (the mini kind melts faster and more evenly). I grab mine at Target or Walmart—any generic brand is fine. The cereal? Kellogg’s Rice Krispies is the gold standard, but store brands work in a pinch (just check for that signature snap).
No mini marshmallows? 10 oz of regular marshmallows works—just cut them into quarters first. Want a deeper flavor? Swap half the butter for browned butter. The vanilla extract is optional but worth it (I use McCormick). For a saltier contrast, Maldon sea salt flakes on top add that bakery-style finish. Skip the corn syrup if you prefer a firmer treat.
Store in an airtight container at room temp for up to 3 days, or freeze for 6 weeks. Press plastic wrap directly on the surface to prevent drying out. They travel well for bake sales—pack between layers of parchment paper.
Why You’ll Love This Recipe
- One-Pot Magic: I melt the butter, stir in marshmallows, and fold in cereal—cleanup is just a single pot and spatula.
- Vanilla Kiss: That splash of vanilla extract turns sweet marshmallow and crispy cereal into something crave-worthy.
- Bake Sale MVP: Honestly, they’re my go-to for potlucks, lunchboxes, or when the kids demand a snack.
- Pocketbook Pleaser: A box of cereal and a bag of marshmallows feed a crowd for pennies, and leftovers keep for days.
Step-by-Step Instructions for Homestyle Rice Krispie Treats
Here’s the method I swear by for that perfect chewy, crispy texture we all remember.
Step 1: Melt Butter and Prepare Marshmallow Base
In a large saucepan, melt the 0.5 cup unsalted butter over low heat. I always use a light-colored pan so I can see the butter melt without browning. Once completely liquid, add the 10 cups miniature marshmallows and the 0.25 tsp kosher salt.
Stir constantly with a silicone spatula until the marshmallows are about 75% melted—you’ll see just a few lumps remaining. This gradual melting prevents scorching at the bottom. Remove from heat and immediately stir in the 1 tsp vanilla extract and 0.25 cup light corn syrup until smooth.
Step 2: Incorporate the Light Corn Syrup
The light corn syrup is my secret for that extra-chewy texture that makes these treats so addictive. As you stir it into the melted marshmallow mixture, you’ll notice the blend becomes glossier and more elastic. This is the syrup’s hygrooscopic property at work, helping retain moisture.
Make sure it’s fully incorporated before moving to the next step. The mixture should be uniform with no streaks of syrup visible. If it seems too thick, return the pan to low heat for 10-15 seconds, but don’t let it boil.
Step 3: Fold in Rice Krispies Cereal
Working quickly while the mixture is still hot, add all 6 cups Rice Krispies cereal at once. Use your spatula to fold gently from the bottom up, coating every piece evenly. I count to 30 with each fold to ensure thorough distribution without crushing the cereal.
You’ll know it’s ready when the cereal is completely coated and the mixture pulls away from the sides of the pan. The cereal should still have some snap to it—if it’s getting soggy, you’ve overmixed. The marshmallow mixture will be thick and slightly sticky, which is exactly what you want.
Step 4: Press and Shape the Treats
Transfer the mixture to a 9×13-inch pan lined with parchment paper. Use your spatula to spread it evenly, then lightly grease your hands with butter and press down gently. Don’t compact it too firmly—that’s the key to keeping them tender rather than dense.
While the mixture is still warm, sprinkle the 0.5 tsp sea salt flakes evenly over the top. This final touch adds a sophisticated contrast to the sweetness and makes them look as good as they taste. Let them cool at room temperature for 30 minutes before cutting.
Step 5: Cut and Serve
Once completely cool and set, lift the treats from the pan using the parchment paper and transfer to a cutting board. Use a sharp knife dipped in hot water to cut into squares—this prevents sticking and gives you clean edges.
For that classic homestyle look, I like to cut them into 2-inch squares. They should hold their shape perfectly but still be soft enough to yield slightly when pressed. Serve immediately or store in an airtight container at room temperature for up to 3 days.
Pro Tips For Making Homestyle Rice Krispie Treats
- Melt Butter Slowly: Use low heat when melting the butter to prevent browning—burnt butter will make your treats taste bitter. I learned this the hard way after ruining a batch with overzealous heat.
- Use Fresh Marshmallows: Skip the stale ones; miniature marshmallows melt faster and more evenly, but they need to be soft and fresh to bind properly with the cereal.
- Press While Warm: Spread the mixture into the pan immediately after combining—waiting even 2-3 minutes makes it harder to shape, and the marshmallows start to set.
- Add Salt Last: Sprinkle the kosher salt over the top after pressing into the pan, not while melting. This keeps the flavor balanced without over-salting the butter-marshmallow mix.
Common Mistakes When Making Great homestyle rice krispie treats
Overheating the Butter
Never melt your butter over medium-high heat—it can brown or burn before the marshmallows melt. I always use low heat in a light-colored pan to monitor the color. Burnt butter gives your treats a bitter, caramelized taste that ruins the nostalgic flavor. 🔥
Skipping the Corn Syrup
While optional, omitting the 0.25 cup light corn syrup results in a firmer, less chewy texture. The syrup adds elasticity and moisture retention. If you skip it, your treats may turn rock-hard after cooling.
Overmixing the Cereal
Fold the cereal just until coated—about 30 seconds of gentle mixing. Overworking crushes the Rice Krispies and releases too much air, leaving you with dense, flat squares instead of light, crispy ones.
Pressing Too Hard
Use a light touch when pressing the mixture into the pan. Compact too firmly and you’ll squeeze out all the air, creating hard, tough treats. A gentle press keeps them tender and easy to bite into.
Cutting Too Soon
Wait the full 30 minutes for cooling and setting. Slicing prematurely causes the squares to lose their shape and stick to the knife. Patience ensures clean edges and that perfect chewy-crispy texture. ✨
Using Stale Cereal
Fresh Rice Krispies are essential for maximum crunch. Stale cereal absorbs moisture differently, resulting in soggy treats. Always check the expiration date and store cereal in an airtight container before using.
Nutrition Facts
Frequently Asked Questions
Can I use regular marshmallows instead of mini?
Yes! Use 10 oz of regular marshmallows, cut into quarters for even melting. The texture will be the same as with mini marshmallows.
How do I make them extra chewy?
Add 0.25 cup light corn syrup to the marshmallow mixture. This keeps them soft and stretchy for days.
Why did my treats turn out hard?
Overmixing or pressing too firmly removes air. Fold gently and press lightly for tender results.
How long can I store them?
Keep in an airtight container at room temperature for up to 3 days. For longer storage, freeze for up to 6 weeks.

- Jamaican Jollof Rice Recipe: Island Spice in Every Bite - October 18, 2026
- Hamburger Rice Hot Dish Recipe: Midwest Comfort in One Pan - October 18, 2026
- Iranian Cabbage Rice Recipe: Aromatic Herbs and Spiced Layers - October 18, 2026