
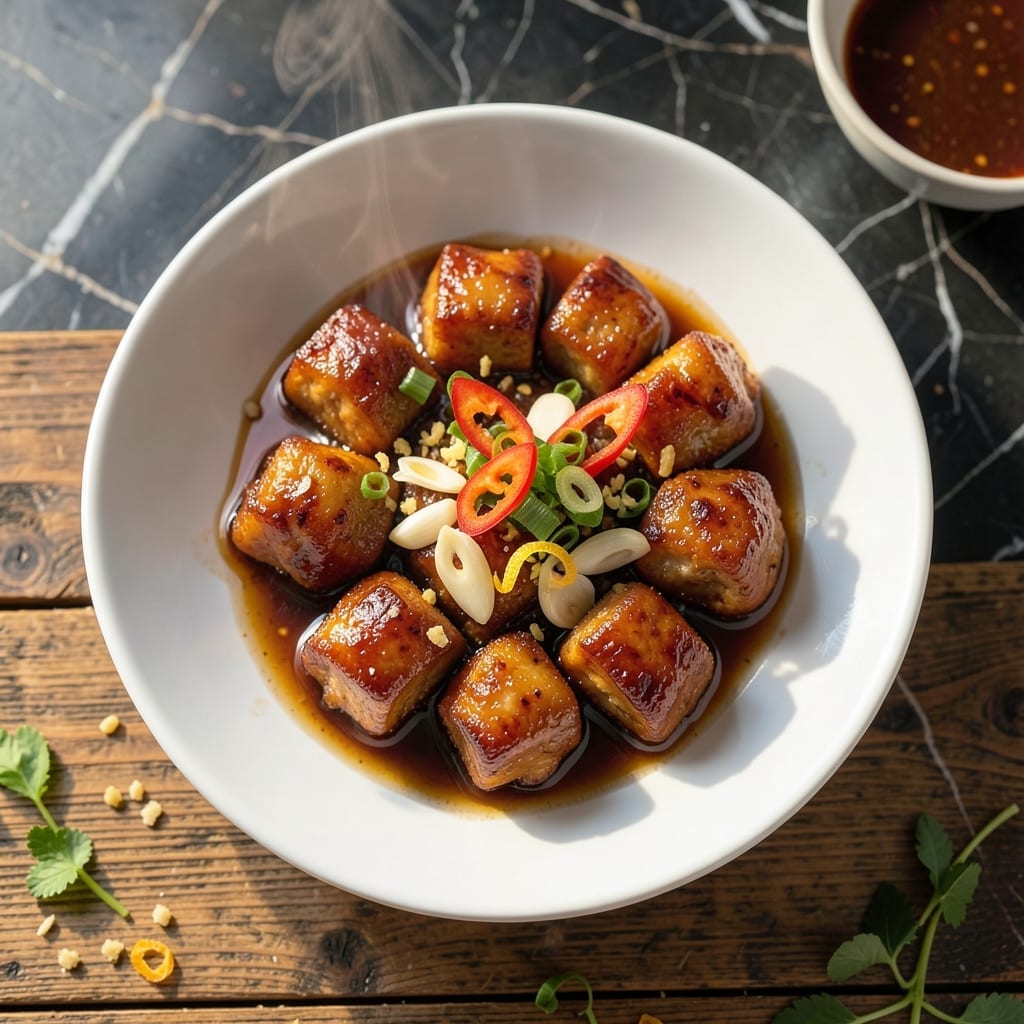
I’ve perfected these honey chicken bites after countless tests to achieve that ideal balance of sweet and savory with a glossy finish. The secret lies in a quick marinade and high-heat cooking to lock in moisture while creating a caramelized exterior.
Each bite delivers tender chicken coated in a sticky, golden sauce that clings perfectly. The recipe uses simple ingredients but relies on precise timing—just 15 minutes of active cooking—to ensure crisp edges and juicy centers.
What sets this dish apart is the contrast: the exterior has a slight crunch, while the inside stays succulent. It’s a crowd-pleaser that works as an appetizer or main course.
Serve immediately for the best texture, garnished with sesame seeds for visual appeal. The sauce thickens slightly as it cools, making every bite irresistible.
Ingredients for Honey Chicken Bites
Simple ingredients deliver complex flavor with glossy, caramelized perfection in every bite.
| Ingredient | Amount | Notes |
|---|---|---|
| Boneless Skinless Chicken Breasts 🍗 | 1 ½ lb | Cut into 1-inch bite-sized pieces |
| Honey 🍯 | ½ cup | Pure, not artificial |
| Soy Sauce 🫒 | ¼ cup | Low-sodium preferred |
| Rice Vinegar 🍚 | 2 tbsp | Unseasoned variety |
| Garlic Cloves 🧄 | 3 cloves | Minced finely |
| Fresh Ginger 🌿 | 1 tbsp | Grated or minced |
| Cornstarch 🌾 | 2 tbsp | For thickening sauce |
| Vegetable Oil 🫒 | ½ cup | High smoke point for frying |
| Sesame Oil 🫒 | 1 tsp | Toasted variety for depth |
| Salt 🧂 | ½ tsp | Kosher or sea salt |
| Black Pepper 🌶️ | ¼ tsp | Freshly ground |
| Sesame Seeds 🌰 | 2 tbsp | Toasted for garnish |
| Green Onions 🧅 | 3 whole | Thinly sliced for garnish |
The chicken quality is non-negotiable for optimal texture. Boneless, skinless chicken breasts from Whole Foods or Costco yield the most consistent results due to uniform thickness. Ensure pieces are uniformly cut to 1-inch cubes for even cooking. For the honey, local, raw varieties add depth, but any pure honey works. Soy sauce should be low-sodium to control seasoning levels precisely.
No honey on hand? Maple syrup or agave nectar substitute at a 1:1 ratio though flavor will differ subtly. Tamari replaces soy sauce for gluten-free needs. Fresh ginger is preferred but ground ginger at one-fourth the amount works in a pinch. For oil, peanut or canola can replace vegetable oil with identical high-heat performance. Cornstarch is essential for the signature gloss—do not substitute.
Marinated chicken keeps 24 hours in the fridge before cooking. Cooked bites hold 3-4 days refrigerated but lose crispness over time. For best results, reheat in a skillet rather than microwave. Sesame seeds and green onions should be added fresh—toast seeds just before serving for maximum aroma.
Why You’ll Love This Recipe
- 20-Minute Meal: Honestly, I can prep and cook these bites faster than it takes to decide on takeout.
- Sweet & Savory Magic: That sticky honey glaze with the punch of garlic and soy? I catch myself sneaking bites straight from the pan.
- Meal Prep MVP: They reheat beautifully, so I pack them for lunches all week—no sad desk salad here.
- Budget Stretcher: A pound of chicken turns into a dish that feels fancy but costs less than a single delivery fee.
Step-by-Step Instructions for Honey Chicken Bites
Master the technique for achieving that perfect balance of crispy exterior and glossy, sweet-savory coating.
Step 1: Prepare and Marinate the Chicken
Begin by cutting the 1.5 lb Boneless Skinless Chicken Breasts into uniform 1-inch pieces. Uniformity ensures even cooking and consistent texture. Place the pieces in a large bowl and season with 0.5 tsp Salt and 0.25 tsp Black Pepper.
In a separate bowl, whisk together the 0.5 cup Honey, 0.25 cup Soy Sauce, 2 tbsp Rice Vinegar, 3 cloves Garlic Cloves (minced), and 1 tbsp Fresh Ginger. Pour this marinade over the chicken, tossing to coat evenly. Let it sit for 15-20 minutes to absorb the flavors.
Step 2: Coat and Fry to Crispy Perfection
Drain the chicken from the marinade, reserving the liquid for the sauce. Toss the chicken pieces in 2 tbsp Cornstarch until each piece is fully coated. The cornstarch creates a light, crispy layer that will hold the sauce beautifully once cooked.
Heat 0.5 cup Vegetable Oil in a large skillet over medium-high heat until shimmering. Working in batches to avoid crowding the pan, add the chicken pieces and fry for 3-4 minutes per side, or until they turn golden brown and crispy. Transfer to a paper towel-lined plate to drain excess oil.
Step 3: Craft the Glossy Honey Sauce
Pour the reserved marinade into the same skillet and bring to a gentle boil over medium heat. Let it simmer for 2-3 minutes until it thickens slightly. This step reduces the raw edge of the garlic and ginger while concentrating the flavors.
Add the 1 tsp Sesame Oil to the sauce and stir to combine. The sesame oil adds a nutty depth that complements the sweetness of the honey. Taste and adjust seasoning if needed, though the soy sauce should provide enough saltiness.
Step 4: Toss and Garnish for Maximum Appeal
Return the crispy chicken to the skillet with the sauce. Toss gently to coat each piece evenly, ensuring every bite is infused with the glossy, sweet-savory glaze. The sauce should cling to the chicken, creating a beautiful sheen that’s irresistible.
Transfer to a serving dish and immediately sprinkle with 2 tbsp Sesame Seeds and thinly sliced 3 whole Green Onions. The sesame seeds add a toasty crunch, while the green onions provide a fresh, vibrant contrast. Serve warm for the best texture and flavor experience.
Pro Tips For Making Honey Chicken Bites
- Velvet the Chicken: Pound the chicken breasts to an even 1/2-inch thickness before cutting—this guarantees even cooking and prevents chewy bits.
- Bloom the Garlic: Cook the minced garlic in a little oil for 30 seconds before adding other sauce ingredients; raw garlic can overpower the honey glaze.
- Skip the Overcrowding: Fry the chicken in batches with space between pieces, or it’ll steam instead of brown—yes, it takes longer, but it’s worth the crispy edges.
- Thin the Honey: Warm the honey slightly before mixing it with soy sauce; it blends smoother and coats the chicken evenly without clumping.
Common Mistakes When Making This Recipe
Overcrowding the Pan
Frying too many chicken pieces at once lowers the oil temperature, creating steamed instead of crispy bites. I cook in batches with 1 inch of space between pieces to maintain medium-high heat. Use a 12-inch skillet for best results. 🔥
Skipping the Cornstarch
The 2 tbsp cornstarch coating is non-negotiable—it creates that light, crispy layer that holds the sauce. Without it, your sauce will slide right off. Toss pieces until they’re fully dusted before frying.
Undercooking the Sauce
Raw garlic and ginger in the sauce taste harsh. Always simmer the reserved marinade for 2-3 minutes to cook these aromatics and thicken the glaze. The sauce should coat the back of a spoon before adding chicken.
Premature Sauce Addition
Adding chicken to the sauce too early makes it soggy. First fry until golden brown and crispy, then toss with the cooked sauce. This preserves the texture contrast you worked so hard to achieve.
Inconsistent Chicken Sizes
Uniform 1-inch pieces ensure even cooking. Larger pieces stay raw inside while smaller ones overcook. I use kitchen shears for quick, precise cutting. This step prevents half the common texture issues. 💡
Ignoring Oil Temperature
Test your 0.5 cup vegetable oil is ready by dropping in a cornstarch-coated chicken piece—it should sizzle immediately. If it doesn’t, wait until it reaches 350-375°F for that perfect crisp.
Nutrition Facts
Frequently Asked Questions
Can I use chicken thighs instead of breasts?
Boneless thighs stay juicier and handle the high heat well. Just trim excess fat and cut into 1-inch pieces like breasts. The cooking time remains the same.
How do I make the sauce thicker?
Simmer the reserved marinade for 3-4 minutes instead of 2-3. For extra thickness, mix 1 tsp cornstarch with 1 tbsp water and stir into the sauce.
Can I bake instead of frying?
Yes, but texture differs. Toss cornstarch-coated pieces with 1 tbsp oil and bake at 400°F for 15-18 minutes, flipping halfway. The exterior won’t be as crispy.
How long can I store leftovers?
Keep in an airtight container in the fridge for up to 3 days. Reheat in a skillet over medium heat to restore some crispness.

- Jollof Rice Sauce Recipe: West African Tomato and Spice Infusion - September 25, 2026
- Japanese Rice Soup Recipe: Umami-Rich Comfort in a Bowl - September 25, 2026
- Homemade Cream Of Rice Recipe: Silk-Smooth Breakfast in Minutes - September 25, 2026