
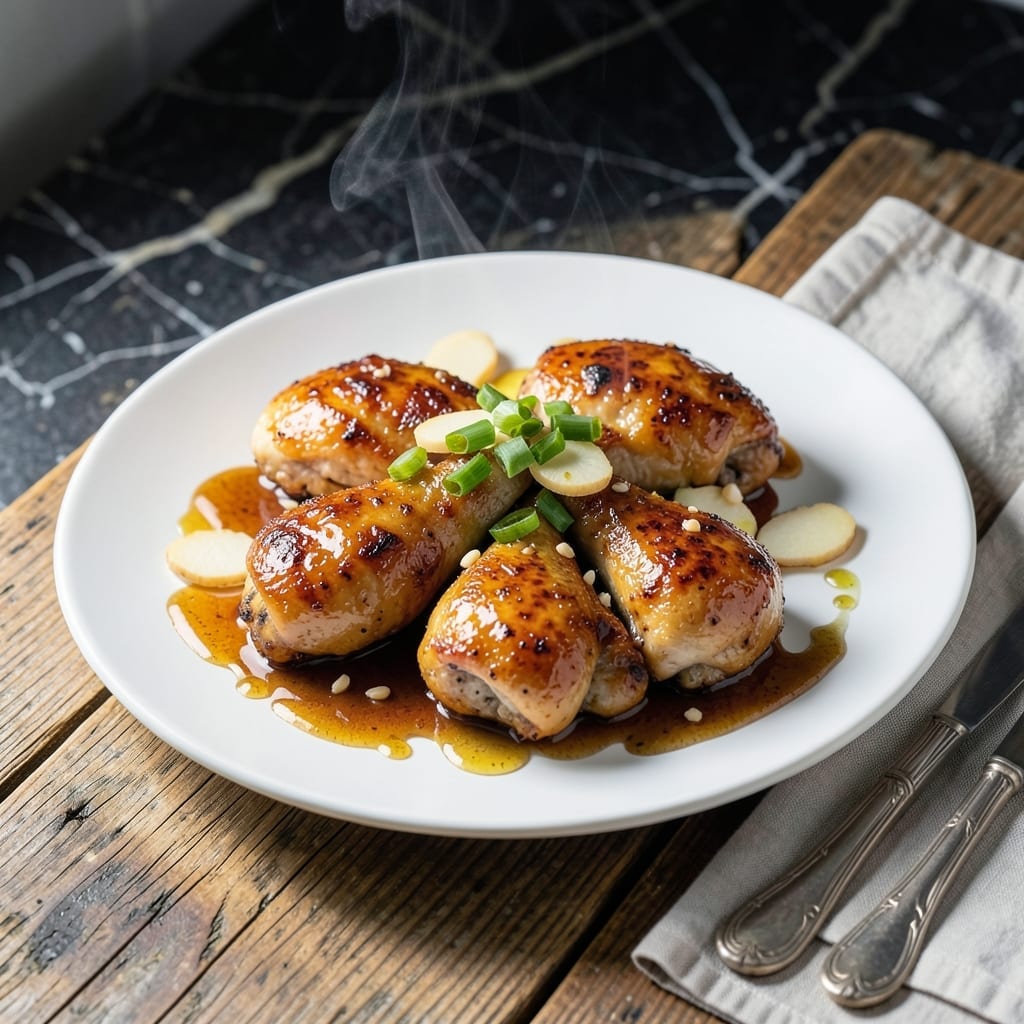
This honey ginger chicken delivers perfectly balanced sweet and spicy flavors in every bite. The secret lies in the glaze, which caramelizes beautifully during cooking to create a sticky, finger-licking coating.
I developed this recipe after years of testing different ratios of honey to ginger, settling on a blend that’s bold without being overpowering. The chicken stays juicy while the sauce reduces to a glossy, restaurant-worthy finish.
You’ll achieve tender meat with a glossy, slightly charred exterior that’s as impressive as it is delicious. The glaze clings to each piece, ensuring every mouthful bursts with that signature honey-ginger harmony.
Serve with steamed rice or roasted vegetables to complete the meal.
Ingredients for Honey Ginger Chicken
Pantry staples and fresh ginger come together for that perfect sweet-spicy balance you crave.
| Ingredient | Amount | Notes |
|---|---|---|
| Boneless Skinless Chicken Thighs 🍗 | 1 ½ lb | Trimmed of excess fat |
| Honey 🍯 | ½ cup | Raw or pure for best flavor |
| Fresh Ginger Root 🌿 | 3 tbsp | Peeled and finely grated |
| Soy Sauce 🫒 | ¼ cup | Low-sodium preferred |
| Garlic Cloves 🧄 | 4 cloves | Minced finely |
| Rice Vinegar 🍶 | 2 tbsp | Or apple cider vinegar |
| Olive Oil 🫒 | 2 tbsp | Divided for cooking |
| Cornstarch 🌾 | 1 tbsp | For thickening glaze |
| Red Pepper Flakes 🌶️ | ½ tsp | Adjust for heat preference |
| Sesame Oil 🫒 | 1 tsp | Toasted for finishing |
| Green Onions 🧅 | 3 whole | Thinly sliced for garnish |
| Sesame Seeds 🌾 | 1 tbsp | Toasted for garnish |
| Salt 🧂 | ½ tsp | Kosher or sea salt |
| Black Pepper 🌶️ | ¼ tsp | Freshly ground preferred |
The chicken thighs are non-negotiable here—they stay juicy even with the high-heat caramelization (trust me, breasts dry out). Costco or Whole Foods have great quality, but any supermarket brand works. For the ginger, look for firm, smooth roots—wrinkled or soft spots mean it’s past its prime. The honey is doing heavy lifting, so splurge on raw or local if you can. I always keep a jar in the pantry for this exact reason.
Out of honey? Maple syrup or agave at a 1:1 ratio works in a pinch. No fresh ginger? Ground ginger at one-third the amount (but fresh is worth it). Soy sauce haters can swap in coconut aminos—similar saltiness, slightly sweeter. The rice vinegar can be white wine vinegar if that’s what you’ve got. For extra depth, a dash of fish sauce (yes, really) adds umami without tasting fishy.
The cooked chicken keeps 4-5 days in the fridge, reheats well for lunches. Glaze thickens as it cools—loosen with a splash of water before storing. Freezes beautifully for up to 3 months. I double the glaze recipe and keep extra in the freezer (worth the extra minute).
Why You’ll Love This Recipe
- One Pan Meal: I just toss everything in a skillet—chicken, honey, ginger, soy sauce—and let it work its magic.
- Sweet and Spicy: The honey and fresh ginger create this sticky, tangy glaze that’s honestly hard to resist.
- Weeknight Hero: Between us, this is my go-to for busy evenings when I need dinner fast but still flavorful.
- Budget Stretcher: Chicken thighs stay juicy and cheap, and the sauce makes every bite taste like a million bucks.
Step-by-Step Instructions for Honey Ginger Chicken
Here’s the method I use to achieve tender chicken with a glossy, flavorful glaze every time.
Step 1: Season and Sear the Chicken Thighs
Pat the 1.5 lb Boneless Skinless Chicken Thighs dry with paper towels, then season both sides with 0.5 tsp Salt and 0.25 tsp Black Pepper. I can’t stress this enough—dry meat sears better and prevents splattering.
Heat 1 tbsp Olive Oil in a large skillet over medium-high heat until shimmering. Add the chicken in a single layer and sear for 4-5 minutes per side until deeply golden. You’ll know it’s ready to flip when it releases easily from the pan. Transfer to a plate and set aside.
Step 2: Create the Aromatic Glaze Base
In the same skillet, add the remaining 1 tbsp Olive Oil and reduce heat to medium. Add the 3 tbsp Fresh Ginger Root and 4 cloves Garlic Cloves, stirring constantly for 1 minute until fragrant. Here’s the thing—ginger burns quickly, so don’t walk away.
Pour in the 0.5 cup Honey, 0.25 cup Soy Sauce, 2 tbsp Rice Vinegar, and 0.5 tsp Red Pepper Flakes. Stir to combine and let it simmer for 2 minutes until slightly thickened. The mixture should coat the back of a spoon.
Step 3: Thicken and Finish the Glaze
In a small bowl, whisk the 1 tbsp Cornstarch with 1 tbsp water until smooth. Slowly pour this slurry into the simmering glaze while whisking constantly. The glaze will transform from thin to thick in about 1-2 minutes—you’re looking for a syrup-like consistency.
Return the chicken to the skillet and spoon the glaze over each piece. Reduce heat to low and simmer for 3-4 minutes until the chicken is cooked through and the glaze clings beautifully. The chicken should reach an internal temperature of 165°F.
Step 4: Add Final Touches and Serve
Remove from heat and drizzle the 1 tsp Sesame Oil over the chicken. This adds a nutty depth that complements the sweet and spicy flavors perfectly. Garnish with the 3 whole Green Onions and 1 tbsp Sesame Seeds for a pop of color and texture.
Let it rest for 5 minutes before serving. This allows the glaze to set slightly and the flavors to meld. Each bite should deliver tender chicken with a glossy, sticky glaze that balances sweet, tangy, and spicy notes. Serve over rice to soak up every last drop.
Pro Tips For Making Honey Ginger Chicken
- Sear First, Sauce Later: I learned this the hard way—browning the chicken thighs in a hot pan before adding the honey-ginger mixture prevents a sticky, burnt mess and locks in flavor.
- Grate the Ginger: Sounds tedious, but freshly grated ginger releases way more flavor than minced or powdered, and it blends smoothly into the sauce.
- Thin the Honey: After burning two batches, I started warming the honey slightly with a splash of soy sauce before adding it to the pan—it coats the chicken evenly without caramelizing too fast.
- Rest Before Serving: Give the chicken a solid 5 minutes off the heat before slicing, or all those juices you worked so hard for will end up on the cutting board.
Dietary Considerations for This Dish
Gluten-Free Option
This dish is naturally gluten-free if you use tamari instead of regular soy sauce. I recommend San-J Tamari for its rich, well-balanced flavor. Always double-check your soy sauce label, as many brands contain wheat.
Low-Carb Adaptation
To reduce carbs, cut the honey in half and replace it with 2 tbsp monk fruit sweetener. The glaze will be less sticky but still packed with flavor. Serve with cauliflower rice instead of regular rice to keep it low-carb.
Dairy-Free Friendly
This recipe contains no dairy ingredients, making it perfect for those avoiding milk products. The glaze relies on honey, ginger, and soy for its rich flavor, so there’s no need for substitutions.
Lower Sodium Version
Use low-sodium soy sauce and reduce the added salt by half. You can boost flavor with extra garlic and ginger, which add depth without increasing sodium. I often use Kikkoman Low-Sodium Soy Sauce for this. 💡
Paleo Modifications
Replace honey with ¼ cup pure maple syrup and soy sauce with coconut aminos. These swaps maintain the sweet-savory balance while staying paleo-compliant. The texture and flavor remain nearly identical.
Allergen Note
Be aware this contains soy (from soy sauce) and sesame (from sesame oil). For soy allergies, use coconut aminos. For sesame allergies, substitute with avocado oil. Always verify ingredient sources. 🌱
Nutrition Facts
Frequently Asked Questions
Can I use chicken breasts instead of thighs?
You can, but thighs stay juicier with the high-heat cooking. If using breasts, reduce searing time to 3-4 minutes per side and monitor internal temp closely to prevent drying out.
How do I make the glaze thicker?
Simmer the glaze for an extra 1-2 minutes after adding the cornstarch slurry. For even thicker results, mix an additional ½ tbsp cornstarch with water before stirring in.
What if I don’t have fresh ginger?
Use 1 tbsp ground ginger as a substitute. The flavor will be slightly different but still delicious. Fresh is preferred for its bright, zesty kick.
How long can I store leftovers?
Leftovers keep for 4-5 days in the fridge. Reheat gently in a skillet with a splash of water to loosen the glaze. Freeze for up to 3 months for best quality.

- Jollof Rice Sauce Recipe: West African Tomato and Spice Infusion - September 25, 2026
- Japanese Rice Soup Recipe: Umami-Rich Comfort in a Bowl - September 25, 2026
- Homemade Cream Of Rice Recipe: Silk-Smooth Breakfast in Minutes - September 25, 2026