
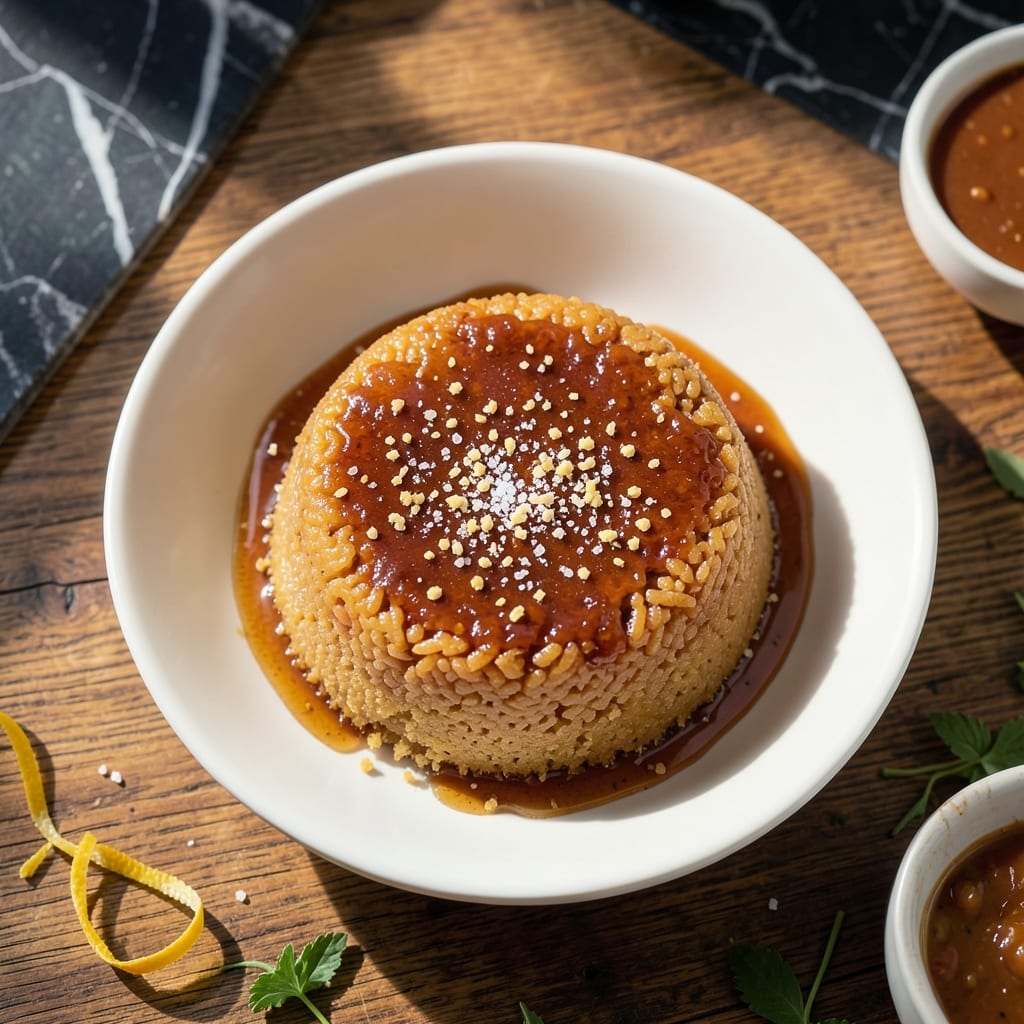
This honey rice cake delivers a perfect balance of crispy edges and tender, sticky centers that make it irresistible.
I developed this recipe to capture the traditional texture of Korean honey rice cakes, where the exterior forms a delicate crunch while the inside stays soft and moist.
The secret lies in the precise baking time and temperature, which creates that signature contrast between the golden crust and the chewy interior.
Each bite offers layers of sweetness and texture, making this dish a standout for any occasion.
Ingredients for Honey Rice Cake
These simple ingredients transform into a cake with golden edges and chewy centers.
| Ingredient | Amount | Notes |
|---|---|---|
| Glutinous Rice Flour 🌾 | 2 cups | Also called sweet rice flour |
| Honey 🍯 | ¾ cup | Use pure, high-quality variety |
| Granulated Sugar 🥣 | ½ cup | Fine white sugar preferred |
| Baking Powder 🧂 | 1 tsp | Ensures proper rise |
| Salt 🧂 | ¼ tsp | Balances sweetness |
| Large Eggs 🥚 | 2 whole | Room temperature preferred |
| Whole Milk 🥛 | ½ cup | Full-fat for richness |
| Unsalted Butter 🧈 | ¼ cup | Melted and cooled slightly |
| Vanilla Extract 🌿 | 1 tsp | Pure extract for best flavor |
| Vegetable Oil 🫒 | 1 tbsp | For greasing the pan |
| Sesame Seeds 🌰 | 1 tbsp | For topping, optional |
The rice flour is non-negotiable here—sweet rice flour (Mochiko brand) gives that authentic chewy texture. Look for it in the Asian aisle at Walmart or H Mart. The honey should be thick and fragrant; local farmers market stuff is ideal. Don’t substitute with agave—it lacks the depth. The eggs and milk add structure, so don’t skip them (this is a vegetarian recipe, after all).
No glutinous rice flour? Regular rice flour won’t work—it’s a different grind. Out of honey? Maple syrup at a 1:1 ratio is your backup, though the flavor shifts slightly. Want to make it dairy-free? Swap the milk for oat milk and the butter for coconut oil. The sesame seeds are optional but add that traditional Korean touch (toast them lightly first).
Store the flour in an airtight container in a cool, dark place for up to 6 months. Once baked, the cake keeps well at room temperature for 2 days or in the fridge for 5 days. Reheat slices briefly in a toaster oven to revive the crisp edges.
Why You’ll Love This Recipe
- I’ll be real: leftovers stay moist for days, so I can grab one whenever the craving hits.
- One Bowl Wonder: I just dump the glutinous rice flour, honey, and sugar in a single bowl, mix, and pour—no fancy steps.
- Sweet Simplicity: That natural honey taste shines through with every bite, balanced just right by a touch of salt.
- Snack or Dessert: Honestly, it’s as good with morning coffee as it is after dinner.
Step-by-Step Instructions for Honey Rice Cake
This method ensures a moist center with perfectly crisp edges every time.
Step 1: Prepare the Batter Base
In a large mixing bowl, whisk together the 2 cups Glutinous Rice Flour, 0.5 cup Granulated Sugar, 1 tsp Baking Powder, and 0.25 tsp Salt until evenly combined. This dry mixture creates the structural foundation for your cake.
I always sift the glutinous rice flour first to prevent lumps in the final batter. The sugar and baking powder ensure proper rise and sweetness, while the salt balances the flavors beautifully.
Step 2: Combine Wet Ingredients
In a separate bowl, beat the 2 whole Large Eggs lightly, then whisk in the 0.75 cup Honey, 0.5 cup Whole Milk, 0.25 cup Unsalted Butter, and 1 tsp Vanilla Extract until smooth. The honey should blend completely with the other liquids.
Ensure the melted butter has cooled slightly before adding it to prevent cooking the eggs. The milk and vanilla add richness and depth to the flavor profile. This wet mixture will create the sticky, moist texture characteristic of this cake.
Step 3: Fold Together and Prepare Pan
Gradually pour the wet ingredients into the dry mixture while folding gently with a spatula. Mix just until combined—overmixing will make the cake dense. The batter will be thick but pourable.
Preheat your oven to 350°F. Grease an 8-inch round cake pan with the 1 tbsp Vegetable Oil, making sure to coat the bottom and sides evenly. This preparation prevents sticking and helps achieve those desired crispy edges.
Step 4: Bake to Golden Perfection
Pour the batter into the prepared pan and smooth the top with your spatula. Sprinkle the 1 tbsp Sesame Seeds evenly over the surface for added texture and visual appeal.
Bake for 35-40 minutes or until the edges are golden brown and a toothpick inserted in the center comes out clean. The top should spring back when lightly pressed. The sesame seeds will toast slightly during baking, adding a nutty aroma.
Step 5: Cool and Serve
Remove the cake from the oven and let it cool in the pan for 10 minutes. This allows the structure to set while the edges maintain their crispness. The cake will pull away slightly from the sides of the pan as it cools.
Transfer to a wire rack to cool completely before slicing. Serve at room temperature for the best texture contrast between the moist interior and crispy edges. The honey flavor becomes more pronounced as the cake cools.
Pro Tips For Making Honey Rice Cake
- Steam Evenly: Cover the steamer with a lid and steam for 20-25 minutes—any less and the center stays gummy. I learned this the hard way after pulling out a gooey mess at 15 minutes.
- Warm the Honey: Gently heat the honey for 10-15 seconds in the microwave before mixing—it blends smoothly into the batter instead of clumping. Sounds fussy, but it saves a ton of stirring.
- Sift the Flour: Always sift the glutinous rice flour with the baking powder to avoid dense spots in your cake. After a few lumpy batches, I finally started doing this religiously.
- Rest Before Slicing: Let the cake cool for at least 10 minutes after steaming—cutting too soon makes it crumble. My grandmother swore by this, and she was right.
Regional Styles of honey rice cake
Korean Style
In Korea, this is called honey rice cake or gyeran-ppang when made with eggs. The version I grew up with uses mochiko flour for that signature chewy texture. It’s often served as a street food snack, warm and slightly crispy on the edges.
Japanese Adaptation
Japanese versions often use mochi rice flour and add matcha powder for a green tea twist. They bake it in a rectangular pan and cut into small squares. The texture is slightly denser but still maintains that satisfying chewiness.
Chinese Variation
The Chinese approach sometimes incorporates red bean paste as a filling, creating a sweet, soft center. They might also use brown sugar instead of honey for a deeper caramel flavor. It’s commonly steamed rather than baked.
Western Fusion
For a Western take, I’ve seen recipes that add cinnamon or nutmeg to the batter. Some even fold in diced apples or raisins for added texture. The baking technique remains similar, but the flavor profile becomes more dessert-like.
Southeast Asian Twist
In Thailand and Vietnam, coconut milk often replaces regular milk, and pandan extract adds a fragrant, tropical note. The cake might be baked in a bundt pan for a decorative shape. The honey is sometimes infused with lemongrass for extra aroma. 💛
Nutrition Facts
Frequently Asked Questions
Can I use regular rice flour instead of glutinous?
No, the texture will be completely different. Glutinous rice flour creates the signature chewy texture, while regular rice flour makes a crumbly cake. Stick with Mochiko brand for authentic results.
Why did my cake turn out dense?
Overmixing the batter is the most common reason. Fold just until combined to avoid developing gluten. Also ensure your baking powder is fresh and active.
How do I store leftovers?
Keep at room temperature in an airtight container for up to 2 days. For longer storage, refrigerate for up to 5 days and reheat briefly to restore crisp edges.

- Jollof Rice Sauce Recipe: West African Tomato and Spice Infusion - September 25, 2026
- Japanese Rice Soup Recipe: Umami-Rich Comfort in a Bowl - September 25, 2026
- Homemade Cream Of Rice Recipe: Silk-Smooth Breakfast in Minutes - September 25, 2026