
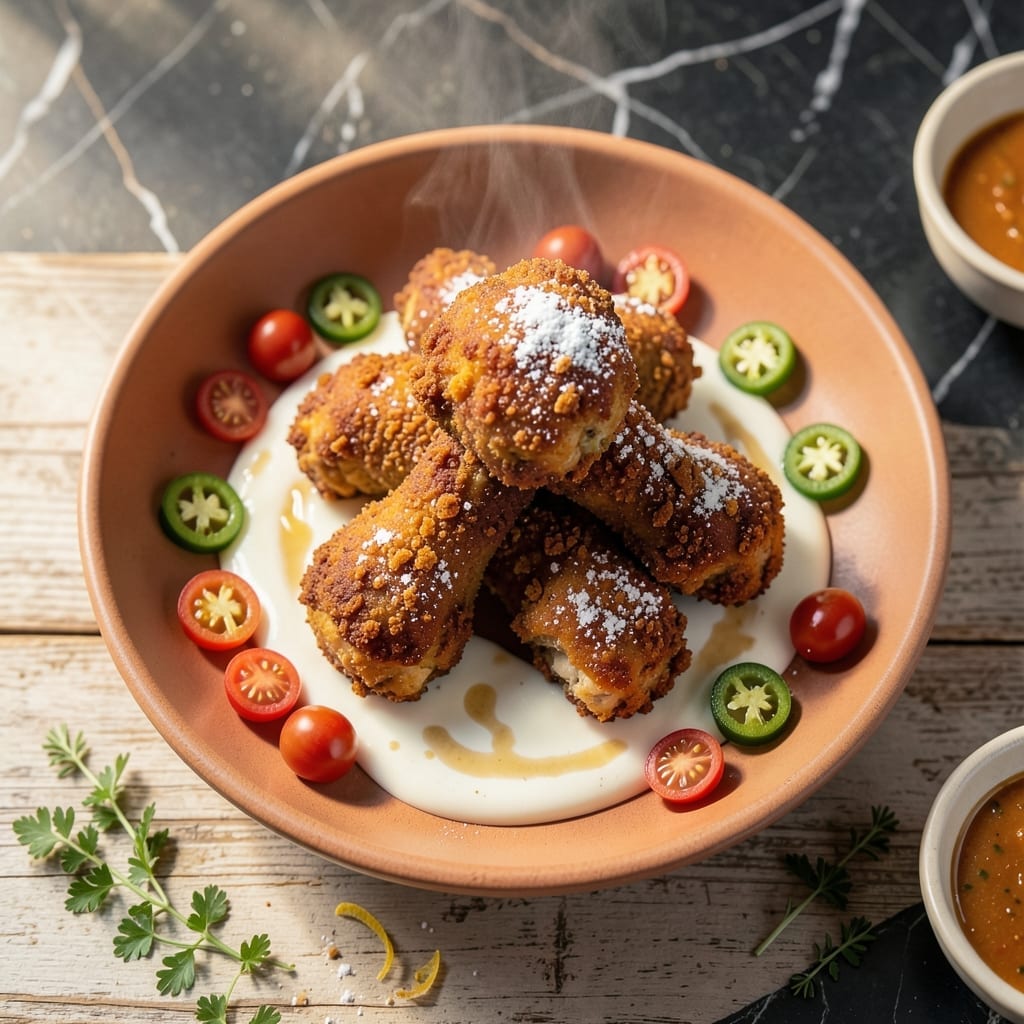
This platter delivers the bold flavors and signature presentation that made Houston’s famous. The combination of perfectly spiced chicken, tangy dipping sauces, and crispy sides creates a meal that’s both satisfying and impressive.
The secret lies in the balance of heat and sweetness in the seasoning, paired with house-made sauces that elevate every bite. Each element comes together to recreate that restaurant-quality experience at home with simple techniques.
You’ll achieve tender chicken with a crispy exterior, complemented by sauces that offer both creaminess and a hint of spice. The result is a dish that’s as enjoyable to make as it is to eat.
Perfect for game day, gatherings, or whenever you crave that Houston’s magic. Here’s how to bring it to your table.
Ingredients for Houston’s Flying Chicken Platter
Simple techniques and bold flavors make this platter shine with crispy chicken and tangy sauces.
| Ingredient | Amount | Notes |
|---|---|---|
| Chicken Thighs 🍗 | 2 lb | Boneless, skinless, cut into strips |
| Buttermilk 🥛 | 1 ½ cups | For marinating chicken |
| Hot Sauce 🔥 | 2 tbsp | Frank's RedHot recommended |
| All-Purpose Flour 🌾 | 1 ½ cups | For dredging chicken |
| Cornstarch 🌽 | ½ cup | For extra crispiness |
| Paprika 🌶️ | 1 tbsp | Sweet or smoked variety |
| Garlic Powder 🧄 | 1 tbsp | Fresh ground preferred |
| Onion Powder 🧅 | 1 tbsp | For depth of flavor |
| Salt 🧂 | 1 tsp | Diamond Crystal kosher preferred |
| Black Pepper 🌶️ | 1 tsp | Freshly ground preferred |
| Cayenne Pepper 🔥 | ½ tsp | Adjust for heat preference |
| Vegetable Oil 🫒 | 4 cups | For deep frying |
| Mayonnaise 🥚 | ¾ cup | Full-fat for creaminess |
| Sour Cream 🥛 | ½ cup | Full-fat for richness |
| Honey 🍯 | 2 tbsp | For balancing heat |
| Lemon Juice 🍋 | 1 tbsp | Freshly squeezed |
The chicken is the star here. Thighs stay juicier than breasts after frying—look for boneless, skinless at Costco or your butcher. The buttermilk marinade (even just 30 minutes) makes all the difference in tenderness. For the seasoning, Penzeys has the best paprika and cayenne, but grocery store brands work if they’re fresh.
No buttermilk? Whole milk plus 1 tbsp vinegar gets you close. Swap cornstarch for flour if you want extra crispiness. The hot sauce can be any brand—Frank’s or Crystal are classics. For the dipping sauce, Greek yogurt works instead of sour cream (same tang, less fat). Skip the honey? Maple syrup brings similar sweetness.
Fry the chicken in batches so it stays crispy—keeps warm in a 200°F oven while you finish. Sauces hold for 3-4 days in the fridge. Leftovers? Reheat in the oven, not microwave, to keep that crunch.
Why You’ll Love This Recipe
- I’ll be real: the extras never last past lunch the next day—everyone wants more.
- No Fuss Coating: I just toss the thighs in buttermilk and hot sauce, then dredge in flour and cornstarch—no fancy steps.
- That Saucy Crunch: The buttermilk-hot sauce soak keeps the chicken juicy while the cornstarch gives it that crispy bite.
- Weeknight Rescue: Honestly, it’s my go-to when I need dinner fast and the family’s starving.
Step-by-Step Instructions for Spiced and Sauced Chicken Platter
Here’s the method. Straightforward, tested, works every time.
Step 1: Marinate the Chicken Thighs
In a large bowl, whisk together the 1.5 cups buttermilk and 2 tbsp hot sauce until fully combined. The buttermilk tenderizes the meat while the hot sauce adds a subtle kick that will carry through to the finished dish.
Add the 2 lb chicken thighs to the mixture, ensuring each piece is fully coated. I like to press the chicken down gently so it’s fully submerged. Cover and refrigerate for at least 4 hours, but overnight is even better for maximum flavor penetration.
You’ll know the marinade is working when the chicken looks slightly opaque and the buttermilk mixture has thickened slightly from absorbing into the meat.
Step 2: Prepare the Dredging Mixture
In a shallow dish, combine the 1.5 cups all-purpose flour, 0.5 cup cornstarch, 1 tbsp paprika, 1 tbsp garlic powder, 1 tbsp onion powder, 1 tsp salt, 1 tsp black pepper, and 0.5 tsp cayenne pepper. The cornstarch is key here—it creates that extra-crispy coating that makes this dish special.
Whisk the mixture thoroughly until no lumps remain and the spices are evenly distributed. The color should be a uniform warm orange from the paprika. This isn’t just a coating—it’s where all the flavor lives, so don’t rush this step.
Real talk: The cayenne might seem like a lot, but it mellows during cooking and balances beautifully with the creamy sauce you’ll make later.
Step 3: Fry the Chicken to Golden Perfection
Heat the 4 cups vegetable oil in a deep, heavy-bottomed pot to 350°F. Use a thermometer for accuracy—oil that’s too cool will make greasy chicken, and oil that’s too hot will burn the outside before the inside cooks. This is the moment that matters:
Remove the chicken from the marinade, letting any excess drip off, then dredge each piece thoroughly in the flour mixture. Press the coating onto the chicken so it adheres well. Fry in batches to avoid crowding the pot, which would lower the oil temperature.
Cook for 8-10 minutes until the chicken is golden brown and the internal temperature reaches 165°F. The coating should be crispy and the oil should be bubbling steadily around each piece. Drain on a wire rack set over a baking sheet to keep it crispy.
Step 4: Prepare the Creamy Dipping Sauce
While the chicken fries, whisk together the 0.75 cup mayonnaise, 0.5 cup sour cream, 2 tbsp honey, and 1 tbsp lemon juice in a medium bowl. The honey balances the heat from the chicken, while the lemon juice adds a bright note that cuts through the richness.
Taste and adjust the seasoning if needed, though the chicken’s spice blend should provide enough flavor. The sauce should be thick but pourable—if it’s too stiff, you can thin it with a teaspoon of water.
This sauce is best made fresh and served immediately, as it will thicken slightly as it sits. The flavors meld beautifully while the chicken finishes frying.
Pro Tips For Making Houston’S Flying Chicken Platter
- Double Dredge: Dip the chicken in buttermilk-hot sauce mix, then flour, then back in the buttermilk, then flour again. Sounds tedious, but it creates that shatteringly crisp coating Houston’s is known for.
- Rest the Chicken: Let the dredged thighs sit on a wire rack for 10 minutes before frying. I learned this the hard way—skipping this step means the coating slides right off in the oil.
- Cornstarch Boost: Swap ¼ of the all-purpose flour for cornstarch in your dredge. It’s the lazy way to get that extra-crispy texture without deep-frying twice.
- Hot Oil Test: Drop a pinch of flour in the oil before adding chicken—if it sizzles aggressively, it’s ready. After burning two batches, I finally figured out that 350°F is the sweet spot for even cooking.
Pro Cooking Tips for houstons flying chicken platter
Oil Temperature Control
Maintaining 350°F oil temperature is non-negotiable for perfect crispiness. I use a Taylor digital thermometer with probe for accuracy. If the oil drops below 325°F when adding chicken, wait for it to recover before continuing. 🌡️
Batch Frying Strategy
Fry in small batches—about 6-8 pieces at a time—to prevent temperature drops. Overcrowding creates soggy chicken. Use a slotted metal spoon to carefully lower pieces in and avoid oil splatter.
Dredging Pro Tips
Let marinated chicken rest on a rack for 5 minutes before dredging so the coating sticks better. Press firmly to create ridges—this increases surface area for maximum crunch. The cornstarch in your mix is the secret to that restaurant-style crispiness.
Draining and Keeping Warm
Drain on a wire rack (not paper towels) to maintain crispiness. Keep finished batches warm in a 200°F oven on the rack. This prevents steam from making the coating soggy while you finish frying.
Sauce Timing
Make the creamy sauce while the first batch fries—it gives flavors time to meld. If it thickens too much, stir in 1 tsp cold water at a time. The sauce should coat the back of a spoon but still drip slowly.
Platter Presentation
Arrange chicken on a platter with sauces in small ramekins on the side. Garnish with thin lemon slices for color and freshness. Serve immediately while everything is at peak temperature and texture. 💛
Nutrition Facts
Frequently Asked Questions
What if I don’t have buttermilk?
Use 1.5 cups whole milk with 1 tbsp vinegar or lemon juice. Let it sit for 5 minutes to curdle before using. The acidity mimics buttermilk’s tenderizing effect.
Can I bake the chicken instead of frying?
Yes, but texture will differ. Bake at 400°F for 20-25 minutes on a wire rack for crispiness. Frying is still the best method for that signature crunch.
How do I keep the chicken crispy after frying?
Drain on a wire rack and keep warm in a 200°F oven. Avoid stacking pieces, which traps steam and makes them soggy.

- Jollof Rice Sauce Recipe: West African Tomato and Spice Infusion - September 25, 2026
- Japanese Rice Soup Recipe: Umami-Rich Comfort in a Bowl - September 25, 2026
- Homemade Cream Of Rice Recipe: Silk-Smooth Breakfast in Minutes - September 25, 2026