
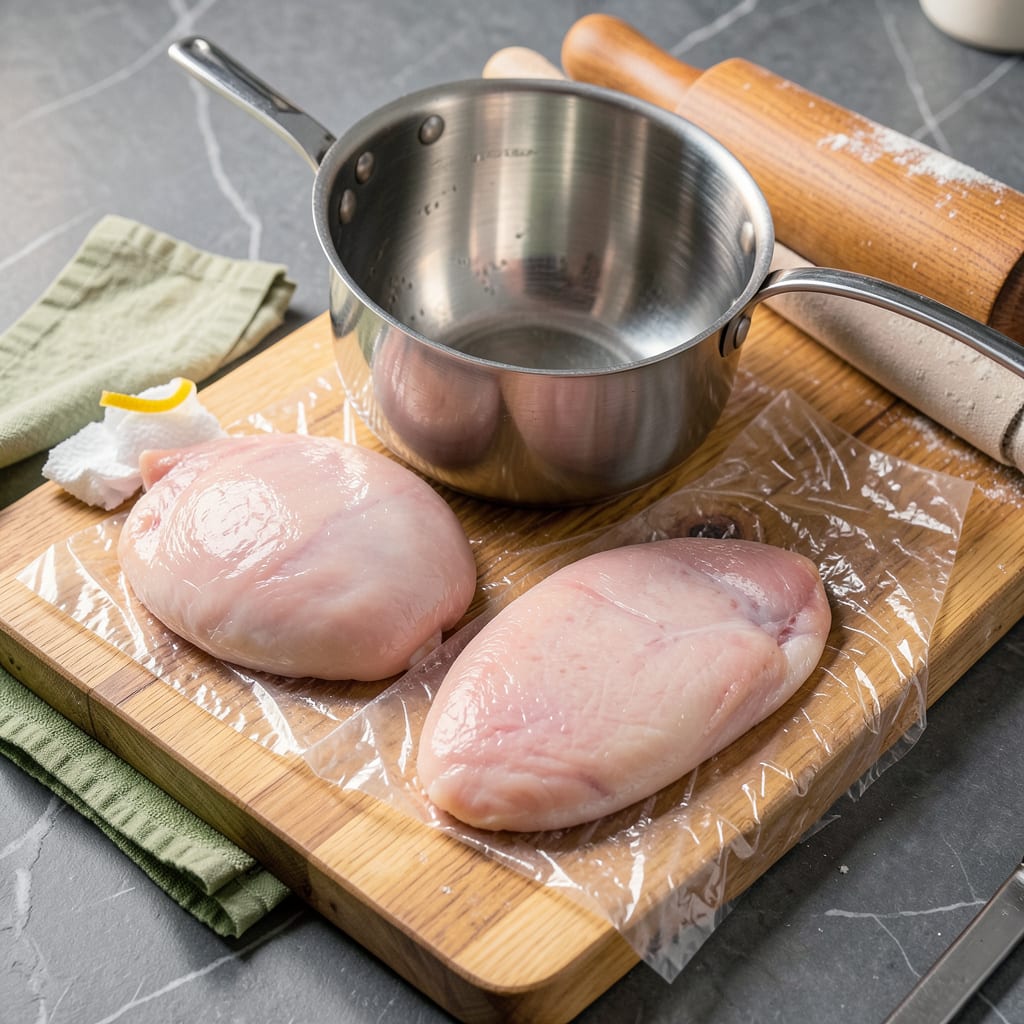
Ever been halfway through a chicken recipe only to realize you don’t have a meat mallet? Yeah, me too. Turns out you don’t need one to get perfectly even chicken breasts every time. This simple trick using everyday kitchen tools will save you money and still deliver restaurant-quality results.
The secret is using what you already have—a rolling pin, heavy skillet, or even a sturdy water glass. Just wrap your chicken in plastic wrap first to prevent splatter and keep things clean. Pounding creates uniform thickness so your chicken cooks evenly, stays juicy, and works perfectly for dishes like schnitzel or stuffed chicken breasts.
You’re aiming for about ¼-inch thickness throughout. Too thin and it’ll dry out, too thick and it won’t cook properly. I’ve found pressing down firmly with steady, even strokes works best—no need for aggressive pounding. The plastic wrap also helps the chicken stay intact while you work.
Once you master this technique, you’ll open up a world of recipes that require even-thickness chicken. Think crispy cutlets, quick stir-fries, or perfectly rolled chicken cordons. No special tools, no extra cost—just perfectly prepped chicken every time.
📚 In This Guide
- What You’ll Need
- Instructions
- Tips and Common Mistakes
What Youll Need
- ● 1–4 boneless, skinless chicken breasts (6–8 oz each, thawed if frozen)
- ● Plastic wrap or parchment paper (2 large sheets, ~12″x12″ each per breast)
- ● Heavy, flat alternative tools (pick one): Rolling pin (wooden or marble)
- ● Heavy skillet (cast iron works best)
- ● Thick cookbook or hardcover book
- ● Empty wine bottle (full bottles risk cracking!)
- ● Cutting board (sturdy, non-slip—wood or plastic)
- ● Sharp chef’s knife or kitchen shears (to trim excess fat if needed)
- ○ Optional but helpful: Meat tenderizer powder (for extra tenderness)
- ● Cooking spray or olive oil (to prevent sticking)
- ● Ruler or measuring tape (for even thickness checks)
Instructions
Here’s how to achieve perfectly even chicken breasts using simple kitchen tools you already own.
Prepare Your Chicken and Work Surface
Start by placing your chicken breasts on a sturdy cutting board. I always use a board that won’t slip—place a damp paper towel underneath to keep it steady. Pat the chicken completely dry with paper towels first; this prevents any moisture from making the process messy.
Choose your pounding tool: a rolling pin, heavy skillet, or even a sturdy water bottle works perfectly. The key is using something with a flat, broad surface that won’t tear the meat. I prefer a heavy-bottomed stainless steel skillet—it gives me excellent control and even pressure.
Protect the Chicken with Plastic Wrap
Tear off two sheets of plastic wrap, each about 12 inches long. Place one sheet on your cutting board, then position the chicken breast in the center. Cover with the second sheet, pressing it gently around the edges to create a seal. This barrier prevents the chicken from sticking to your tool and keeps everything clean.
For extra security, I sometimes use parchment paper instead of plastic wrap—it’s more eco-friendly and just as effective. Make sure the chicken is centered with plenty of overhang on all sides. This setup lets you pound aggressively without worrying about tearing the meat or making a mess.
Pound from Center to Edges
Begin pounding at the thickest part of the breast, working your way outward toward the edges. Use firm, even pressure—don’t just smash randomly. I start in the center and make concentric circles, gradually moving outward until the entire piece is an even ½-inch thickness.
Check your progress frequently by lifting the plastic wrap. You’re aiming for uniform thickness throughout. If some areas are still thick, focus your pressure there. The chicken should look evenly flat when you’re done, with no bulging sections. This evenness ensures consistent cooking later.
Finish and Inspect for Evenness
Once you’ve achieved uniform thickness, remove the plastic wrap and run your fingers over the surface. You shouldn’t feel any thick spots or uneven areas. If you do, simply replace the plastic and give those spots a few more gentle taps.
For best results, I always pound chicken breasts immediately before cooking. If you need to store them, place the pounded breasts on a plate, cover with plastic wrap, and refrigerate for up to 24 hours. They’re now ready for breading, grilling, or any recipe that calls for evenly cooked chicken.
Tips and Common Mistakes
Mastering this technique is all about precision and the right approach—here’s what I’ve learned from years of trial and error.
Tool Selection: In Step 1, your choice of pounding tool makes a huge difference. While a rolling pin works, I’ve found that a heavy skillet gives better control because its flat surface distributes pressure evenly. Avoid using anything with ridges or textures, as they can tear the chicken instead of flattening it. The weight of the tool matters too—something too light won’t do the job, while something too heavy can overwork the meat.
Plastic Wrap Technique: When following Step 2, don’t skimp on the plastic wrap length. Those 12-inch sheets are essential for full coverage and preventing tears. Press the wrap tightly around the edges to create a vacuum-like seal—this keeps the chicken from shifting as you pound. If you’re using parchment paper instead, dampen it slightly with water to help it cling better to the cutting board and chicken.
Even Pressure Matters: The key to Step 3 is working methodically from the center outward. Don’t just hammer away—use controlled, overlapping strokes to gradually thin the chicken. I like to rotate the breast 90 degrees halfway through to ensure I’m not missing any thick spots. Remember, you’re aiming for that ½-inch thickness throughout, so lift the plastic frequently to check your progress and adjust pressure as needed.
Storage Wisdom: While the instructions mention you can refrigerate pounded chicken for up to 24 hours, here’s what I’ve found works best: If you’re not cooking immediately, place the breasts on a plate lined with paper towels before covering with plastic wrap. This absorbs any moisture that might accumulate, keeping the surface dry for better browning when you cook later. For longer storage, you can freeze pounded chicken for up to 3 months—just separate layers with parchment paper to prevent sticking.
Pro Tips for Pound Chicken Breast Without Mallet
- Mastering this technique is all about precision and the right approach—here’s what I’ve learned from years of trial a…
- Tool Selection: In Step 1, your choice of pounding tool makes a huge difference. While a rolling pin works, I’ve foun…
- Plastic Wrap Technique: When following Step 2, don’t skimp on the plastic wrap length. Those 12-inch sheets are essen…
Frequently Asked Questions
Can I use a rolling pin instead of a mallet?
A rolling pin works great—just wrap the chicken in plastic wrap or parchment paper first. Use gentle, even pressure to avoid tearing. For extra control, opt for a heavy-duty rolling pin (like a French-style one) to mimic a mallet’s weight.
How thin should I pound the chicken breast?
Aim for ¼-inch to ½-inch thickness for most recipes (like cutlets or schnitzel). Go too thin, and it may dry out; too thick, and it won’t cook evenly. Use a ruler or eyeball it—your palm’s width is roughly 1 inch for reference!
What if I don’t have plastic wrap or parchment paper?
No problem! Try these hacks:
- A resealable plastic bag (cut open and lay flat).
- A damp paper towel (prevents sticking but may tear).
- The back of a baking sheet as a barrier (less ideal but works).
Why does my chicken keep sticking to the surface?
Sticking happens when the meat is too wet or the barrier (like plastic) isn’t secure. Pat the chicken dry with paper towels first, and ensure the wrap is taut. A light sprinkle of flour on the chicken can also help!
Can I pound frozen chicken breast?
Never pound frozen chicken—it’s risky (uneven texture, potential bone splinters). Thaw it first in the fridge or under cold water. For speed, use the microwave’s defrost setting, then pat dry before pounding.
No mallet? No problem! 🎯 With a few simple tools—like a rolling pin, skillet, or even a wine bottle—you can pound chicken breast to perfect, even thickness every time. The key is patience and gentle pressure to avoid tearing the meat.
Now that you’ve mastered the technique, put it to use in your next recipe! Try breaded cutlets, stuffed chicken, or quick stir-fries—your evenly pounded breasts will cook faster and more evenly. Happy cooking! 🍳

- Jollof Rice Sauce Recipe: West African Tomato and Spice Infusion - September 25, 2026
- Japanese Rice Soup Recipe: Umami-Rich Comfort in a Bowl - September 25, 2026
- Homemade Cream Of Rice Recipe: Silk-Smooth Breakfast in Minutes - September 25, 2026