
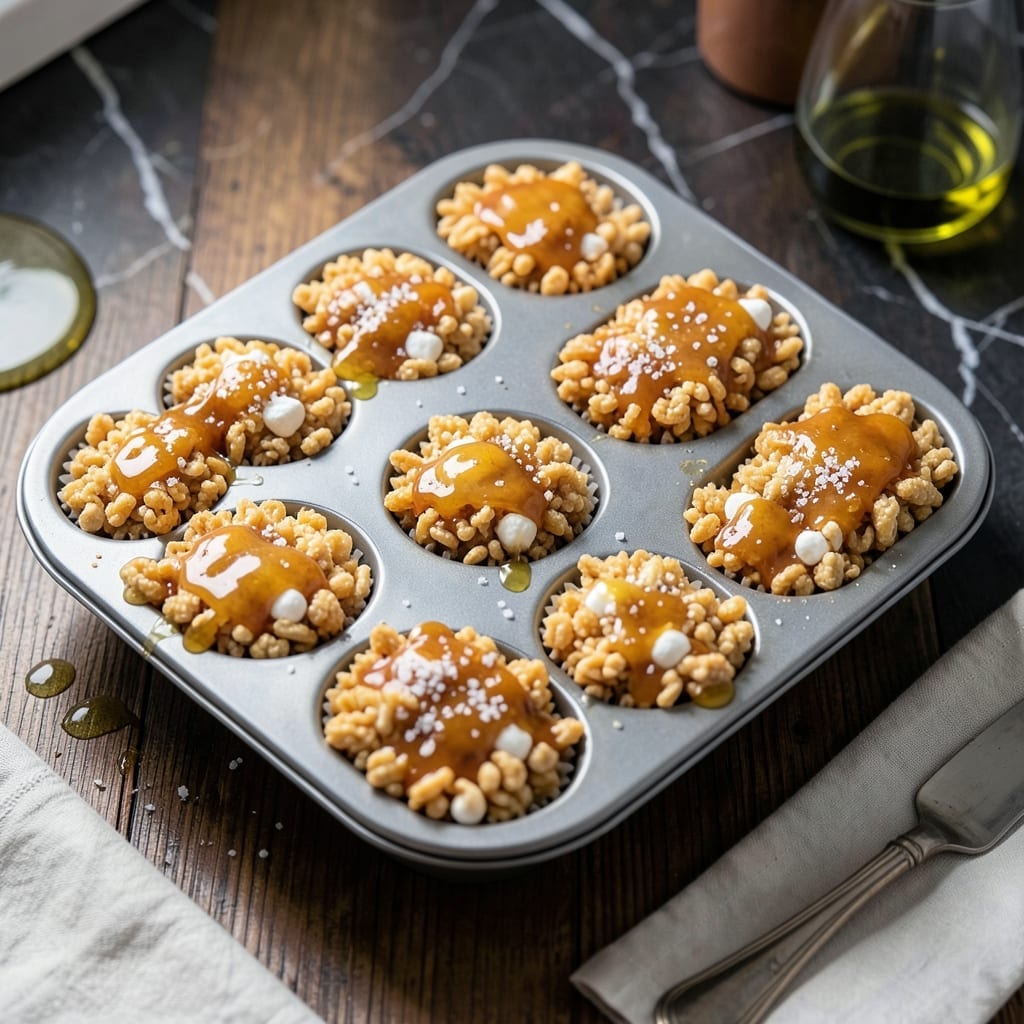
I developed this recipe after one too many sticky, uneven batches ruined my baking sheets. The solution lies in precise measurements and controlled melting—no more rock-hard or crumbling treats.
Using a muffin tin creates perfectly portioned squares with that classic crispy texture we all love. The marshmallows melt into a glossy, stretchy glue that binds every cereal piece without turning brittle.
What you get are individual treats with golden edges and a gooey center that pulls apart just enough. No knife required, no messy cleanup—just consistent, professional-quality results every time.
Ideal for parties, lunchboxes, or when you want a single serving without leftovers. Here’s how to make them right.
Ingredients for Individual Rice Crispy Treats
Six simple ingredients create perfectly portioned, crispy-edged treats every time.
| Ingredient | Amount | Notes |
|---|---|---|
| Crispy Rice Cereal 🥣 | 6 cups | Plain variety, not puffed |
| Miniature Marshmallows ⚪ | 10 oz | Fresh for best melt |
| Unsalted Butter 🧈 | 4 tbsp | For smooth melting |
| Vanilla Extract 🌿 | ½ tsp | Pure for best flavor |
| Sea Salt 🧂 | ¼ tsp | Fine grain preferred |
| Nonstick Cooking Spray 💨 | 1 can | For muffin tin prep |
| Vegetable Oil 🫒 | ½ tsp | For greasing utensils |
The marshmallows are the star here—Jet-Puffed or Kraft melt smoothly without getting grainy. Use fresh marshmallows (stale ones won’t stretch right). Butter quality matters too; Land O’Lakes unsalted gives that clean, rich base. The cereal should be plain Rice Krispies—store brand works fine but avoid the sugar-coated versions. You’ll taste the difference.
No mini marshmallows? 10 large marshmallows (about 1 cup) work in a pinch—just chop them first for even melting. Swapping in puffed rice cereal changes the texture (less crunch). Want more flavor? Add a dash of cinnamon or almond extract with the vanilla. For extra gooeyness, melt an extra tablespoon of butter.
These keep 3-4 days at room temp in an airtight container. Separate layers with parchment to prevent sticking. For longer storage, freeze for up to 2 months (thaw overnight before serving). Best eaten fresh though—nothing beats that first crispy bite.
Why You’ll Love This Recipe
- One Bowl Wonder: I melt the butter and marshmallows in the same pot I mix everything in—no extra dishes, just easy cleanup.
- Vanilla Sea Salt Magic: The vanilla extract and pinch of sea salt turn the sweet marshmallow and cereal combo into something crave-worthy.
- Portion Control Perfection: Individual servings mean no messy cutting, and they’re ideal for lunchboxes, bake sales, or a midnight snack.
- Budget-Friendly Batch: A box of cereal and a bag of marshmallows make dozens—honestly, it’s my go-to for feeding a crowd without breaking the bank.
Step-by-Step Instructions for Individual Rice Crispy Treats
Follow this method for perfectly gooey single-serve squares with ideal crispy texture every time.
Step 1: Prepare Your Muffin Tin and Measure Ingredients
Begin by thoroughly coating a 12-cup muffin tin with the nonstick cooking spray, ensuring every crevice is covered to prevent sticking. This step is crucial for easy release of your treats later. I like to hold the can about 6 inches away for even coverage.
Measure out all your ingredients precisely: 6 cups Crispy Rice Cereal, 10 oz Miniature Marshmallows, 4 tbsp Unsalted Butter, 0.5 tsp Vanilla Extract, and 0.25 tsp Sea Salt. Having everything ready to go creates a seamless process.
Step 2: Melt the Butter and Marshmallows Together
In a large saucepan, melt the 4 tbsp Unsalted Butter over low heat until just liquid. Add the entire 10 oz Miniature Marshmallows and stir continuously with a silicone spatula coated with the 0.5 tsp Vegetable Oil to prevent sticking.
The marshmallows will begin to melt within 2-3 minutes. Keep stirring until the mixture is completely smooth with no visible lumps. Remove from heat immediately once fully melted to prevent scorching. Stir in the 0.5 tsp Vanilla Extract and 0.25 tsp Sea Salt until evenly distributed.
Step 3: Fold in the Crispy Rice Cereal
Working quickly while the marshmallow mixture is still hot, add all 6 cups Crispy Rice Cereal to the saucepan. Use your oiled spatula to fold the cereal into the marshmallow mixture, pressing gently to ensure every piece is thoroughly coated.
You’ll notice the cereal will start to soften slightly as it absorbs the warm marshmallow mixture. This is exactly what you want. Continue folding until the mixture is uniform in color and texture, with no dry cereal remaining. The entire process should take about 1 minute.
Step 4: Portion and Press into Muffin Tin
Using your oiled spatula or a large spoon, divide the mixture evenly among the 12 prepared muffin cups. Press down firmly into each cup, using the back of the spoon or your fingers (lightly oiled) to create a slight dome in the center.
Apply consistent pressure to each portion to ensure they hold their shape when cooled. The mixture will be sticky but manageable. If it starts to cool and become difficult to work with, simply warm the pan slightly over low heat for 10-15 seconds to soften.
Step 5: Cool and Release the Treats
Allow the treats to cool at room temperature for 20-25 minutes until completely set. You’ll know they’re ready when they pull away slightly from the edges of the muffin tin and feel firm to the touch.
To remove, run a small offset spatula or butter knife around the edge of each treat, then gently lift out. If any stick slightly, a quick dip of the spatula in warm water helps release them cleanly. Serve at room temperature for the perfect balance of crispy edges and gooey centers.
Pro Tips For Making Individual Rice Crispy Treats
- Melt Butter Low: Use medium-low heat when melting the butter—high heat will brown it too fast and give your treats a burnt, bitter edge. I learned this the hard way after ruining a batch with overzealous heat.
- Fresh Marshmallows Only: Skip the stale marshmallows; they won’t melt smoothly and can leave your treats grainy. Grab the freshest bag you can find—it actually changes the outcome.
- Press While Warm: Shape the treats into individual portions right after mixing, while the marshmallow is still pliable. Waiting even 5 minutes makes them harder to mold without crushing the cereal.
- Salt the Butter: Add a pinch of sea salt to the melted butter before mixing with marshmallows—more salt than you think, especially if using unsalted butter. Sounds weird, but it balances the sweetness perfectly.
Health Benefits of These Flavors
Quick Energy Boost
These treats pack a surprising energy punch from the Crispy Rice Cereal, offering a quick source of carbohydrates. The 6 cups of cereal provides complex carbs that fuel your body efficiently, making them a great pick-me-up for busy afternoons. I often grab one when I need a quick energy lift in my small kitchen.
Low Fat Indulgence
With only 4 tbsp Unsalted Butter for the entire batch, these are relatively low in fat compared to other desserts. Each serving contains minimal saturated fat, allowing you to enjoy a sweet treat without excessive guilt. The marshmallows add sweetness without adding significant fat content.
Portion Control Made Easy
Making them in individual servings helps with portion control—no need to cut large sheets or overindulge. The 12-cup muffin tin creates perfectly sized treats that satisfy cravings without going overboard. This method was a game-changer for me when I wanted to enjoy sweets in moderation. 💪
Minimal Additives
Using simple ingredients like Miniature Marshmallows and Vanilla Extract means you avoid artificial preservatives found in many store-bought snacks. The Sea Salt enhances flavor without adding unnecessary sodium. I appreciate knowing exactly what’s in my treats.
Gluten-Free Option
With naturally gluten-free Crispy Rice Cereal, these can easily be made gluten-free. Just ensure your marshmallows and other ingredients are certified gluten-free. This makes them accessible to friends and family with gluten sensitivities.
Comfort Food Benefits
There’s something about this classic treat that just feels good. The combination of crispy and gooey textures can be surprisingly comforting. I find that making them in my tiny Boston kitchen brings back happy memories of simpler times. 💛
Nutrition Facts
Frequently Asked Questions
Can I use regular marshmallows instead of mini?
Yes, but chop 10 large marshmallows into small pieces first for even melting. Mini ones dissolve faster and more uniformly.
Why did my treats turn out hard?
Overheating the marshmallow-butter mixture causes this. Keep it on low heat and remove immediately once smooth. Stirring too long after melting can also make them tough.
How do I make them extra gooey?
Add an extra 1 tbsp butter to the marshmallow mixture. Press lightly when portioning—over-packing removes air and makes them dense.
Can I make these ahead of time?
They keep 3-4 days in an airtight container at room temp. For longer storage, freeze for up to 2 months and thaw overnight before serving.

- Mujadara Rice and Lentils Recipe: Earthy Spiced Lentils With Caramelized Onions - November 1, 2026
- Naija Fried Rice Recipe: Street-Style Spice With Veggie Crunch - November 1, 2026
- Mushy Rice Recipe: Fluffy Grains Transformed in Minutes - November 1, 2026