
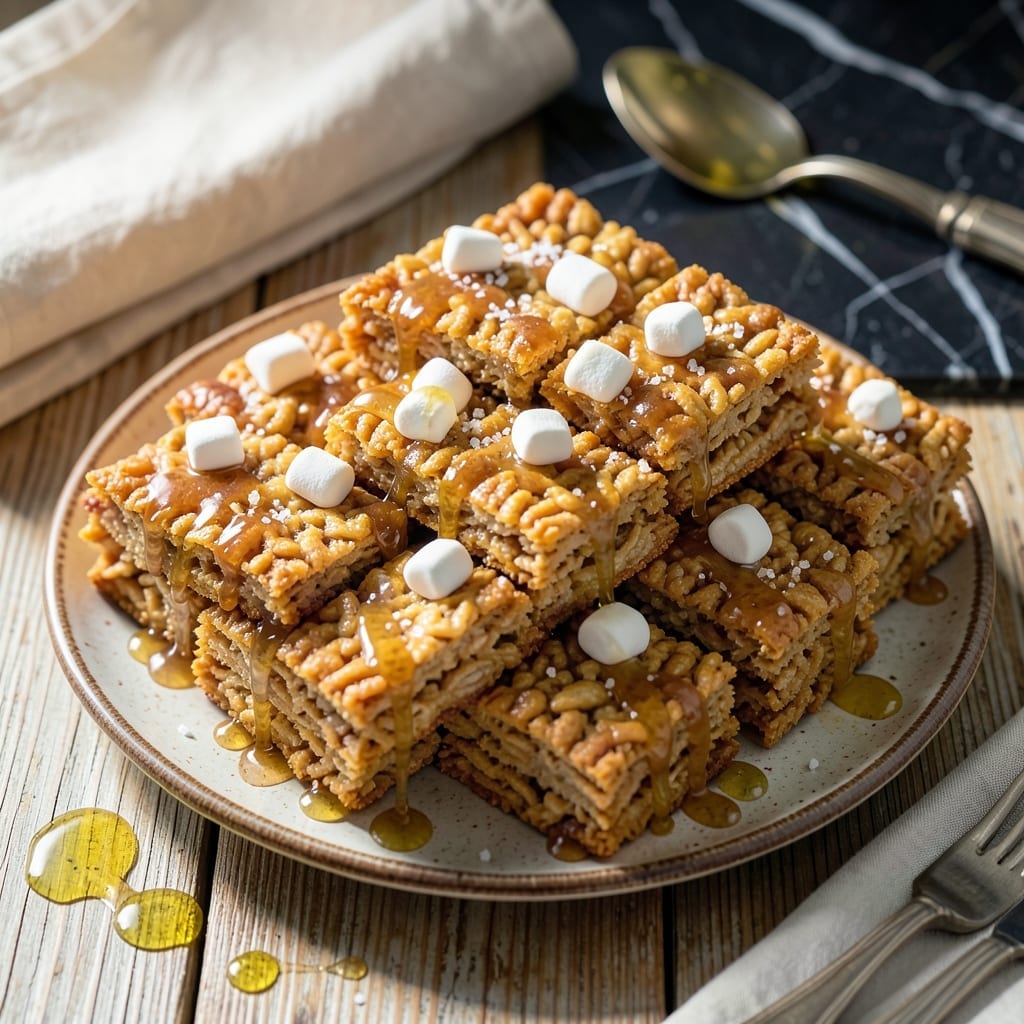
There’s nothing quite like the first bite of a perfectly made rice krispie square—soft, sticky, and just the right amount of sweet. I developed this recipe after realizing most versions missed the gooey center that makes them irresistible.
The secret lies in melting the butter and marshmallows together slowly until completely smooth, then mixing just until the cereal is coated. Pressing the mixture into the pan while still warm ensures that signature chewy texture we all love.
What you get is a treat that holds its shape when cut but melts in your mouth. The edges get slightly firm while the center stays wonderfully soft and stretchy, delivering that nostalgic marshmallow magic in every bite.
Perfect for lunchboxes, parties, or a simple afternoon pick-me-up. This method guarantees consistent results every time.
Ingredients for Gooey Rice Krispie Squares
Six simple ingredients transform into these nostalgic, gooey squares everyone loves.
| Ingredient | Amount | Notes |
|---|---|---|
| Rice Krispies Cereal 🥣 | 6 cups | Fresh for maximum crisp |
| Mini Marshmallows 🍬 | 10 oz | About 4 cups unpacked |
| Unsalted Butter 🧈 | ¼ cup | 1/2 stick, melted |
| Vanilla Extract 🌿 | 1 tsp | Pure extract preferred |
| Fine Sea Salt 🧂 | ¼ tsp | Enhances sweetness balance |
| Light Corn Syrup 💧 | 1 tbsp | Optional for extra gooeyness |
The marshmallows are the star here. Jet-Puffed mini marshmallows melt faster and more evenly than regular—look for them in the baking aisle at Walmart or Target. The cereal should be fresh (check the date) because stale Rice Krispies won’t give you that signature snap. I always use Kellogg’s for consistency, but store brand works too in a pinch.
Out of mini marshmallows? Regular ones work—just chop them roughly (or microwave in 15-second bursts). Want more depth? Swap vanilla extract for almond extract at half the amount. The corn syrup is optional but adds that stretchy texture we all remember from childhood. Salt can be omitted, but a pinch really balances the sweetness.
These keep beautifully at room temperature for 2-3 days in an airtight container. For longer storage, freeze for up to 6 weeks (wrap individual squares in parchment). Let them come to room temp before serving—they soften up perfectly.
Why You’ll Love This Recipe
- One Pot Wonder: I melt the butter, toss in marshmallows, and stir in cereal—cleanup is just one bowl and a spatula.
- Vanilla Kissed: The vanilla extract turns the gooey marshmallow-butter base into something rich and aromatic.
- Crowd Pleaser: Honestly, these disappear faster at potlucks than anything else I bring.
- Budget Win: Mini marshmallows and store-brand cereal keep costs low, and a batch feeds a dozen.
Step-by-Step Instructions for Gooey Rice Krispie Squares
Here’s the method that guarantees perfectly chewy squares with maximum gooey goodness.
Step 1: Melt and Prepare the Butter Base
In a large saucepan, melt the 0.25 cup Unsalted Butter over low heat. I always use a heavy-bottomed pot to prevent hot spots. Once melted, add the 1 tbsp Light Corn Syrup and stir to combine. This syrup is the secret to that extra stretchy texture everyone loves.
After about 1 minute, when the mixture is fully liquid and just starting to bubble at the edges, remove it from heat. The butter should be completely melted but not browned—we’re building a smooth base, not making brown butter here. Stir in the 0.25 tsp Fine Sea Salt to enhance all the sweet flavors.
Step 2: Incorporate Marshmallows for Maximum Gooeyness
Add all 10 oz Mini Marshmallows to the warm butter mixture. I use mini marshmallows because they melt faster and more evenly than regular ones. Return the saucepan to low heat and stir constantly with a silicone spatula.
This step requires patience. Keep stirring until every last marshmallow is fully melted and the mixture is completely smooth—this takes about 5-7 minutes. You’ll notice the volume reduce as the marshmallows collapse. Once melted, stir in the 1 tsp Vanilla Extract for that warm, aromatic depth.
Step 3: Combine with Cereal for Perfect Texture
Working quickly, add all 6 cups Rice Krispies Cereal to the marshmallow mixture. I always use fresh cereal for maximum crispness and snap. Fold gently with your spatula, pressing down slightly to ensure every piece gets coated in that glossy marshmallow mixture.
The cereal will start to soften immediately from the heat, but don’t overmix—you want those distinct crispy bits suspended in the gooey marshmallow. You’ll know it’s ready when the cereal is evenly distributed and the mixture pulls away from the sides of the pan as you stir.
Step 4: Press and Set for the Final Touch
Transfer the mixture to a greased 9×13-inch baking dish (or line with parchment paper for easy removal). I like to use a piece of parchment paper to press down the mixture—this prevents sticking to your hands and helps create an even surface.
Press firmly but don’t compact too tightly—you want the squares to hold together but still have that light, airy texture. Let them set at room temperature for 1-2 hours until completely cool and firm. The top should look glossy and slightly sticky when fully set.
Step 5: Cut and Serve Your Creations
Once completely cool, use a sharp knife to cut into 16 even squares. I run the knife under hot water between cuts for clean edges. The squares should hold their shape but still have that signature gooey pull when you separate them.
Store in an airtight container at room temperature for up to 3 days, though I doubt they’ll last that long. For best texture, serve at room temperature—they’ll be at peak gooeyness when slightly warm from your hands.
Pro Tips For Making Gooey Rice Krispie Squares
- Melt Butter Slowly: Use low heat when melting the butter for the marshmallows—high heat can cause the sugar in the marshmallows to caramelize too quickly, making the squares hard instead of gooey.
- Use Fresh Marshmallows: Mini marshmallows that are even slightly stale won’t melt as smoothly, so check the bag’s freshness date and avoid any that feel firm or dry.
- Press Lightly: I learned this the hard way—packing the Rice Krispies mixture too tightly into the pan turns them into dense bricks; press just enough to shape, then stop.
- Add Salt Last: Sprinkle the fine sea salt over the top after pressing the mixture into the pan—this keeps the salt from dissolving into the marshmallow mix and lets each bite have a little punch.
Perfect Pairings for This gooey rice krispie squares
Beverage Pairings
I love serving these with a cold 8 oz glass of milk—the creaminess balances the sweetness perfectly. For adults, a chilled vanilla chai latte from your local café adds warm spice notes that complement the marshmallow flavor beautifully. 🥛
Dessert Pairings
A scoop of vanilla ice cream alongside creates a textural contrast between the chewy squares and creamy cold. I also enjoy these with fresh berries like strawberries or raspberries for a refreshing, tart counterpoint.
Savory Balance
For parties, pair these with cheese and crackers to cut through the sweetness. A sharp cheddar or aged gouda works wonders. I often serve them with my Nonna’s proscuitto-wrapped melon for a sweet-savory Italian-inspired spread.
Festive Drinks
During the holidays, I pair these with hot chocolate topped with whipped cream and a sprinkle of cinnamon. For summer gatherings, lemonade or iced tea keeps things light and refreshing. The acidity in citrus drinks enhances the buttery marshmallow flavor. ✨
Nutrition Facts
Frequently Asked Questions
Can I use regular marshmallows instead of mini?
Yes! Chop regular marshmallows roughly before melting. Mini ones melt faster and more evenly, but regular work in a pinch. Just expect to stir for 8-10 minutes instead of 5-7 minutes.
Why did my squares turn out hard?
This usually happens from overcooking the marshmallow mixture or pressing too firmly. Keep heat on low and avoid compacting when pressing into the pan. Light hands make light squares.
How do I get them extra gooey?
Add an extra 1 tablespoon of corn syrup or let them set for only 1 hour instead of 2 hours. The cereal will stay softer and stretchier with less cooling time.
Can I make these ahead of time?
They keep well at room temperature for 2-3 days in an airtight container. For longer storage, freeze for up to 6 weeks and thaw at room temperature.

- Ground Beef Rice and Beans Recipe: Slow-Simmered Savory Harmony - October 17, 2026
- Guyanese Fried Rice Recipe: Caribbean Spice With Wok-Charred Aromatics - October 17, 2026
- Hakka Thunder Tea Rice Recipe: Wok-Charred Herbal Infusion - October 17, 2026