
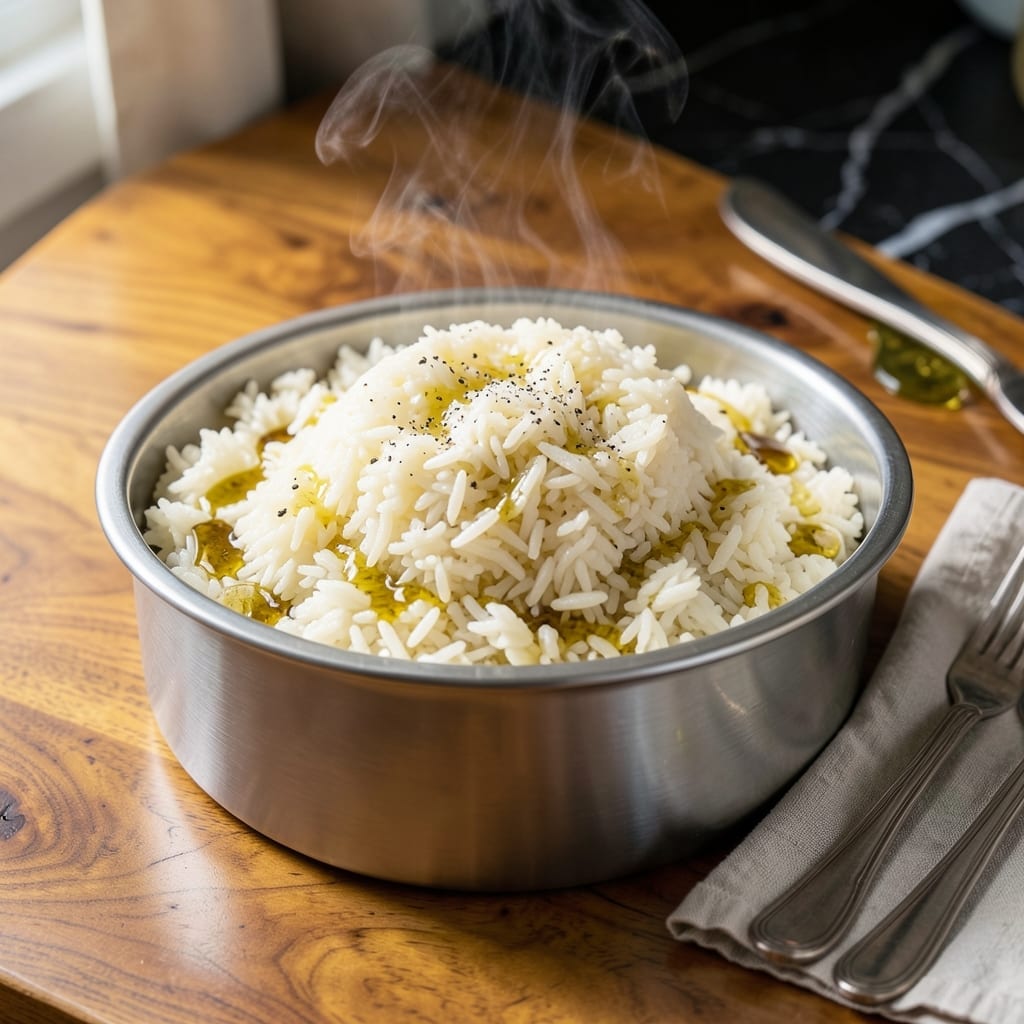
Perfect rice in an 8-quart Instant Pot is simpler than you think. This method delivers consistently fluffy grains with no sticking or burning.
I’ve tested countless ratios and times to find the ideal balance. The key is the right water-to-rice proportion and a natural pressure release for even cooking.
Whether you’re making white, brown, or jasmine rice, this technique adapts easily. Each variety comes out light and separate every time.
No more guesswork—just reliable, restaurant-quality rice with minimal effort. Follow these steps for foolproof results.
Ingredients for Instant Pot 8 Quart Rice
Pantry staples come together for foolproof rice every single time.
| Ingredient | Amount | Notes |
|---|---|---|
| Long-Grain White Rice 🌾 | 2 cups | Rinsed until water runs clear |
| Water 💧 | 2 ½ cups | Filtered or distilled preferred |
| Kosher Salt 🧂 | ½ tsp | Diamond Crystal brand recommended |
| Unsalted Butter 🧈 | 1 tbsp | Optional, for richness |
| Olive Oil 🫒 | 1 tsp | Light or extra-virgin |
| Garlic Powder 🧄 | ¼ tsp | For subtle aromatic depth |
| Bay Leaf 🌿 | 1 whole | Dried, for infusion |
| Vegetable Broth 🥕 | ½ cup | Low-sodium preferred |
| Fresh Cilantro 🌿 | 2 tbsp | Chopped, for garnish |
| Lemon Juice 🍋 | ½ tsp | Freshly squeezed |
The rice matters most here. Jasmine or basmati give the fluffiest results—avoid instant or minute rice (they turn mushy). Costco or Sam’s Club have great bulk options if you’re cooking often. For water, filtered tastes cleaner, but tap’s fine in a pinch. I like adding a bay leaf or garlic powder for extra depth (worth the extra minute).
Out of long-grain? Basmati works at a 1:1.25 rice-to-water ratio. Brown rice needs 3 cups water and double the time. No broth? Water plus a bouillon cube gets you close. The butter’s optional but adds richness—vegan butter or coconut oil swap in easily. If using oil, toast the rice first for nuttier flavor.
Cooked rice holds in the Instant Pot on ‘keep warm’ for 2 hours without drying out. Leftovers stay fresh 4-5 days in the fridge. Freeze in portions for up to 3 months—microwave straight from frozen with a splash of water.
Why You’ll Love This Recipe
- Set and Forget: I just dump in the rice, water, salt, and a pat of butter, then walk away—my 8-quart Instant Pot does the rest.
- Buttery Bite: The combo of butter and olive oil gives every grain a rich, slightly toasty flavor that plain rice just can’t match.
- Meal Prep Magic: Cooks a big batch all at once, so I’ve got fluffy rice ready for burrito bowls, stir-fries, or fried rice all week long.
- Budget Hero: A 2-pound bag of long-grain rice costs pennies and fills the pot, feeding my family for days without breaking the bank.
Step-by-Step Instructions for Instant Pot Rice
Here’s my go-to method for perfectly fluffy grains with minimal effort and maximum flavor.
Step 1: Rinse and Prepare the Rice
Place the 2 cups Long-Grain White Rice in a fine-mesh strainer and rinse under cold water, agitating with your fingers, until the water runs completely clear. This removes excess starch that could make your rice gummy.
Drain thoroughly and transfer to the Instant Pot insert. I can’t stress this enough—any residual water from rinsing will throw off your liquid-to-rice ratio and result in mushy grains. Trust me, I learned this the hard way.
Step 2: Add Liquids and Aromatics
To the rinsed rice, add the 2.5 cups Water, 0.5 cup Vegetable Broth, 1 tsp Olive Oil, 1 tbsp Unsalted Butter, 0.5 tsp Kosher Salt, 0.25 tsp Garlic Powder, and 1 whole Bay Leaf.
Stir gently to combine, making sure all the rice is submerged in the liquid. The bay leaf infuses subtle depth, while the garlic powder adds aromatic complexity without overpowering. Don’t skip the olive oil—it prevents the rice from sticking to the bottom of the pot.
Step 3: Pressure Cook to Perfection
Secure the lid on your Instant Pot, ensuring the valve is set to “Sealing.” Select the “Pressure Cook” or “Manual” setting and set the timer for 3 minutes on high pressure.
Here’s the thing: the rice will actually cook during the pressure-building phase. The 3-minute cook time might seem short, but it’s perfect for this method. The pot will take about 10-12 minutes to come to pressure, and you’ll see the float valve pop up when it’s ready. Resist the urge to release the pressure manually—let it sit undisturbed.
Step 4: Natural Release and Rest
Once the cooking cycle completes, allow the pressure to release naturally for 10 minutes. You’ll notice the float valve drop when it’s safe to open. This resting period is crucial—it lets the rice steam in its own moisture, ensuring even cooking and preventing a gummy texture.
After 10 minutes, carefully quick-release any remaining pressure by turning the valve to “Venting.” Open the lid away from you to avoid the hot steam, then remove the bay leaf and discard it.
Step 5: Fluff and Finish
Gently fluff the rice with a fork, breaking up any clumps. The grains should be separate, tender, and slightly glossy. This is the moment that matters: if it looks wet, let it sit covered for another 5 minutes to absorb any residual liquid.
Finally, drizzle with the 0.5 tsp Lemon Juice and sprinkle with the 2 tbsp Fresh Cilantro. The lemon juice brightens all the flavors, while the cilantro adds a fresh, vibrant touch to every bite. Serve immediately while hot and fluffy.
Pro Tips For Making Instant Pot 8 Quart Rice
- Rinse the Rice: Always rinse your long-grain white rice until the water runs clear—I learned this the hard way after ending up with gummy rice more than once.
- Use a 1:1 Ratio: For an 8-quart Instant Pot, stick to a 1:1 rice-to-water ratio (1 cup rice to 1 cup water) for perfectly fluffy grains, especially with long-grain white rice.
- Natural Release Only: Resist the urge to quick-release; let the pressure drop naturally for 10 minutes to prevent undercooked or sticky rice.
- Toast with Butter: Before adding water, sauté the rice in 1 tablespoon of unsalted butter and olive oil for 2 minutes—it adds a subtle nutty depth that plain rice lacks.
Perfect Pairings for This Recipe
Protein Pairings
This rice makes an excellent base for grilled chicken thighs—marinate them in soy sauce, garlic, and ginger for 30 minutes before cooking. The rice absorbs the savory juices beautifully. For a quick option, pan-seared salmon fillets with lemon butter complement the fluffy texture. 💪
Vegetable Sides
Steamed broccoli florets tossed with 1 tbsp sesame oil and a sprinkle of red pepper flakes add color and crunch. I also love sautéed snap peas with a splash of oyster sauce for an Asian-inspired twist.
Sauce Enhancements
Drizzle with teriyaki sauce or sweet chili sauce for instant flavor elevation. A simple garlic butter sauce made with 2 tbsp melted butter and 1 minced garlic clove adds richness without overpowering the rice.
Global Flavors
For Mexican night, serve with black beans, avocado slices, and salsa. For an Indian twist, pair with chana masala or tandoori chicken. The rice’s neutral base adapts to any cuisine. ✨
Fresh Garnishes
Top with sliced green onions or toasted sesame seeds for texture. A squeeze of lime juice and chopped fresh cilantro brightens the dish. I always keep these on hand for last-minute garnishing.
Comfort Food
Turn it into a hearty meal by mixing in scrambled eggs and diced ham for fried rice. The Instant Pot rice holds up well to stir-frying. Add 1 tbsp soy sauce and ½ tsp white pepper for authentic flavor.
Nutrition Facts
Frequently Asked Questions
Can I double the recipe in my 8-quart Instant Pot?
Yes, but don’t exceed 4 cups dry rice or the max fill line. Double the water and seasonings accordingly. The cook time stays at 3 minutes but pressure build may take slightly longer.
Why did my rice turn out mushy?
This usually happens from too much liquid or not rinsing the rice. Stick to the 1:1.25 rice-to-water ratio and always rinse until water runs clear. Natural release is key too.
How do I cook brown rice in it?
Use 1:1.5 rice-to-water ratio and increase cook time to 22 minutes on high pressure. Let it naturally release for 15 minutes for best texture.
Can I use broth instead of water?
Yes! Substitute 1:1 but reduce added salt since broths are salty. Vegetable, chicken, or beef broth all work well. The rice will have a richer flavor.

- Jimmy Dean Sausage and Rice Recipe: Hearty One-Pot Savory Delight - October 19, 2026
- Indian Jasmine Rice Recipe: Fragrant Basmati-Free Elegance - October 19, 2026
- KFC Rizo Rice Recipe: Copycat Side Dish With Savory Spice Blend - October 19, 2026