
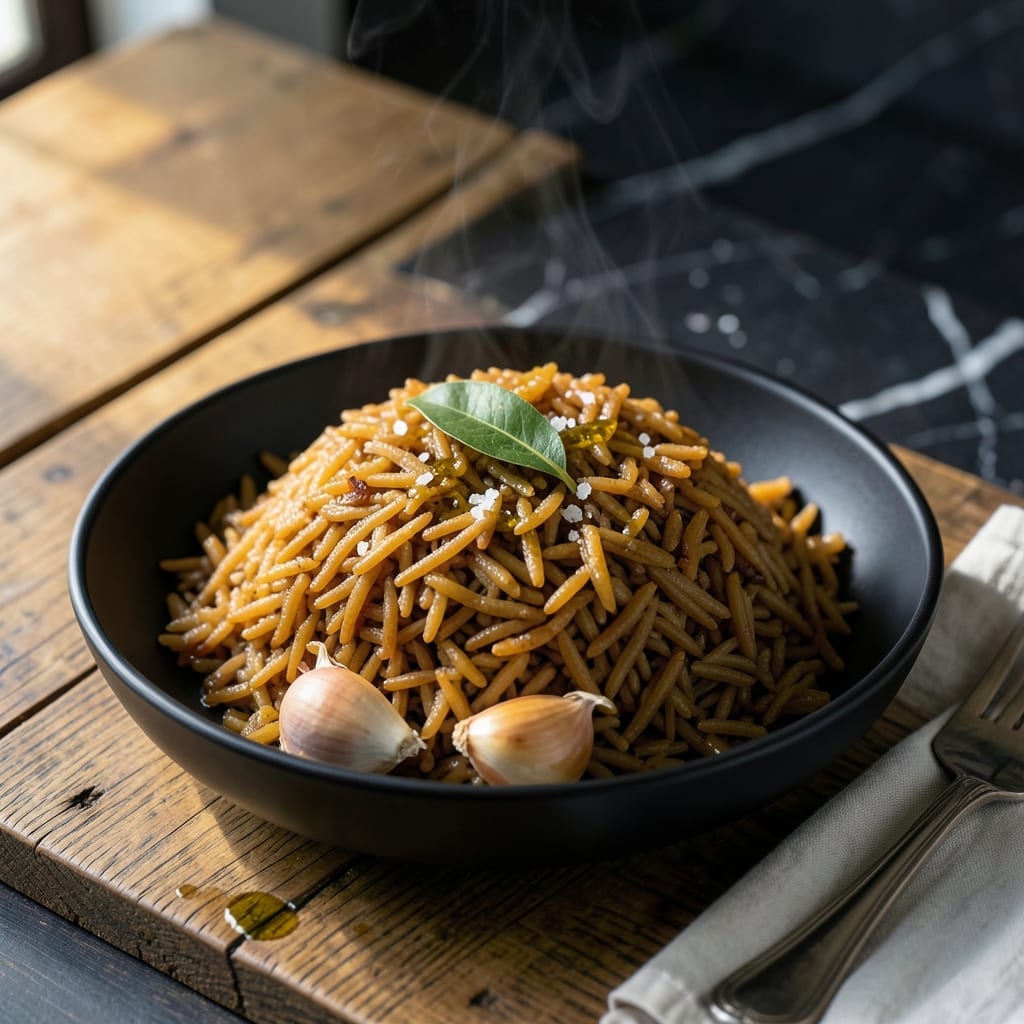
Achieving perfectly cooked brown basmati rice in the Instant Pot is simpler than you think. This method delivers fluffy, separate grains with that signature nutty flavor every time.
With the right liquid ratio and precise pressure cooking time, you’ll get consistent results without babysitting the pot. The natural release ensures the rice finishes cooking gently for ideal texture.
Ingredients for Instant Pot Brown Basmati Rice
Simple, flavorful ingredients for fluffy grains with that signature nutty taste.
| Ingredient | Amount | Notes |
|---|---|---|
| Brown Basmati Rice 🌾 | 2 cups | Rinsed until water runs clear |
| Water 💧 | 3 ½ cups | Or vegetable broth for extra flavor |
| Olive Oil 🫒 | 1 tbsp | Extra-virgin or neutral oil |
| Sea Salt 🧂 | 1 tsp | Fine grain preferred |
| Bay Leaf 🍃 | 1 whole | Optional for depth of flavor |
| Garlic Cloves 🧄 | 2 cloves | Minced or pressed |
| Onion 🧅 | ¼ cup | Finely diced, yellow or white |
| Fresh Cilantro 🌿 | ¼ cup | Chopped, for garnish |
| Lemon Juice 🍋 | 1 tbsp | Freshly squeezed |
| Ground Cumin 🌶️ | ½ tsp | Toasted for warmth |
The rice quality is key here. Brown basmati from Trader Joe’s or Whole Foods delivers consistent texture and nutty flavor. Rinsing removes excess starch—keep going until the water runs clear (worth the extra minute). I always use vegetable broth instead of water for a subtle depth, but plain water works fine. Look for rice labeled ‘aged’ for the best results.
No basmati? Long-grain brown rice works but may need 2-3 extra minutes under pressure. Skip the bay leaf if you don’t have it. For the onion, shallots at half the amount add a nice sweetness. The cilantro is optional—parseley or green onions work too. If you’re not into cumin, a pinch of turmeric adds color and earthiness without overpowering.
Uncooked rice keeps in a sealed container for 6-12 months. Once cooked, it holds in the fridge for 4-5 days or freezes for 3 months. Reheats beautifully—splash of water and a quick microwave does the trick (don’t skip this part).
Why You’ll Love This Recipe
- Set It & Forget: I toss everything in, press a button, and walk away—no stirring, no babysitting.
- Nutty Perfection: The bay leaf and olive oil give the brown basmati this deep, toasty aroma that’s way better than plain rice.
- Meal Prep Hero: I make a big batch Sunday and it stays fluffy all week for bowls, stir-fries, or under curry.
- Budget Stretch: One pound of brown basmati costs pennies and feeds us for days—honestly, it’s my cheapest pantry win.
Step-by-Step Instructions for Instant Pot Brown Basmati Rice
Here’s the method that delivers perfectly cooked, nutty grains every single time.
Step 1: Rinse and Sauté Aromatics
Start by rinsing the 2 cups Brown Basmati Rice under cold water until the water runs completely clear. This removes excess starch and prevents the grains from becoming gummy during cooking. Drain thoroughly in a fine-mesh strainer.
Set your Instant Pot to the sauté function on normal heat. Add the 1 tbsp Olive Oil and let it heat for 30 seconds. Then add the 0.25 cup Onion and cook for 2 minutes, stirring frequently, until it begins to soften. Stir in the minced 2 cloves Garlic Cloves and the 0.5 tsp Ground Cumin, cooking for another 30 seconds until fragrant. Be careful not to let the garlic burn—it should turn golden, not brown.
Step 2: Combine Ingredients and Deglaze
Add the drained 2 cups Brown Basmati Rice to the Instant Pot and stir to coat the grains in the oil and aromatics. Pour in the 3.5 cups Water, then add the 1 tsp Sea Salt and the 1 whole Bay Leaf. Stir well to combine, ensuring the rice is evenly distributed in the liquid.
Use a wooden spoon to deglaze the bottom of the pot, scraping up any browned bits. This prevents the “burn” notice on your Instant Pot and incorporates all the flavor into the rice. The liquid should look slightly cloudy from the starch released during rinsing.
Step 3: Pressure Cook to Perfection
Secure the lid on your Instant Pot and set the valve to sealing. Select the high-pressure cook function and set the timer for 22 minutes. The Instant Pot will take about 10-15 minutes to come to pressure before the cooking time begins.
Once the cooking cycle completes, let the pressure release naturally for 10 minutes, then carefully switch the valve to venting to release any remaining pressure. This natural release prevents the rice from becoming mushy and ensures even cooking throughout.
Step 4: Rest and Fluff the Rice
Remove the lid and discard the 1 whole Bay Leaf. Let the rice rest, covered, for 5 minutes to allow the grains to fully absorb any remaining liquid and steam. This resting period is crucial for achieving light, fluffy rice with distinct grains.
After resting, use a fork to gently fluff the rice, separating any clumps and redistributing the moisture. The grains should be tender with a slight bite, and the texture should be light and airy, not sticky or compacted.
Step 5: Finish with Fresh Flavors
Drizzle the 1 tbsp Lemon Juice over the rice and sprinkle with the 0.25 cup Fresh Cilantro. Toss gently with a fork to distribute the fresh flavors evenly. The lemon juice brightens the nutty taste of the basmati, while the cilantro adds a fresh, herbal note.
Taste and adjust the seasoning if needed, though the 1 tsp Sea Salt should provide the perfect balance. Serve immediately while the rice is hot and the flavors are at their peak. Each grain should be distinct, fragrant, and perfectly tender.
Pro Tips For Making Instant Pot Brown Basmati Rice
- Rinse the Rice: Soak brown basmati for 10 minutes then rinse until water runs clear—I learned this the hard way after ending up with gummy rice more than once.
- Use the Right Ratio: For perfectly cooked grains, stick to 1:1.25 rice-to-water ratio (1 cup rice to 1.25 cups water) and don’t be tempted to eyeball it.
- Skip the Quick Release: Let the pressure release naturally for 10 minutes before switching to quick release, or you’ll get undercooked rice with a hard center.
- Toast with Oil: Sauté the rice in 1 tablespoon olive oil for 2 minutes before adding water—sounds small, but it adds a nutty depth that plain steamed rice lacks.
Essential Equipment for Great instant pot brown basmati rice
Instant Pot Models
Any 6-quart or 8-quart Instant Pot works for this recipe. I use my trusty Instant Pot Duo Crisp—it’s versatile for rice, stews, and even air frying. The Lux model is budget-friendly and perfect for beginners.
Must-Have Accessories
A fine-mesh strainer is essential for rinsing the rice thoroughly. I also recommend a wooden spoon for deglazing and stirring. Silicone tongs help when fluffing the rice without crushing the grains.
Optional Upgrades
A second sealing ring (in a different color) prevents flavor transfer if you use your Instant Pot for both sweet and savory dishes. I keep a red ring for savory and a blue ring for desserts.
Safety First
Always check that the sealing ring is properly seated before starting. Ensure the steam release valve is set to sealing before pressure cooking. I double-check these every time—better safe than sorry.
Alternative Cookers
This method works in other electric pressure cookers like the Ninja Foodi or Cuisinart Multi-Cooker. Just match the 22-minute cook time and use the same liquid ratio. 💡
Cleanup Tools
Keep a non-abrasive sponge and mild dish soap handy. The inner pot is dishwasher-safe, but I hand-wash mine to preserve the non-stick coating. A soft cloth works well for wiping the exterior.
Nutrition Facts
Frequently Asked Questions
What’s the ideal water-to-rice ratio?
Use 1.75 cups liquid for every 1 cup of brown basmati. This ensures perfect texture without mushiness.
Why does the recipe call for a natural release?
A 10-minute natural release prevents sudden pressure drops that can make rice gummy. Quick release risks uneven cooking.
Can I double the recipe?
Yes, but don’t exceed 4 cups rice in a 6-quart Instant Pot. Keep the same ratio and 22-minute cook time.
My rice came out undercooked. What went wrong?
Old rice or insufficient liquid often causes this. Always rinse until water runs clear and use fresh, unexpired grains.

- Mujadara Rice and Lentils Recipe: Earthy Spiced Lentils With Caramelized Onions - November 1, 2026
- Naija Fried Rice Recipe: Street-Style Spice With Veggie Crunch - November 1, 2026
- Mushy Rice Recipe: Fluffy Grains Transformed in Minutes - November 1, 2026