
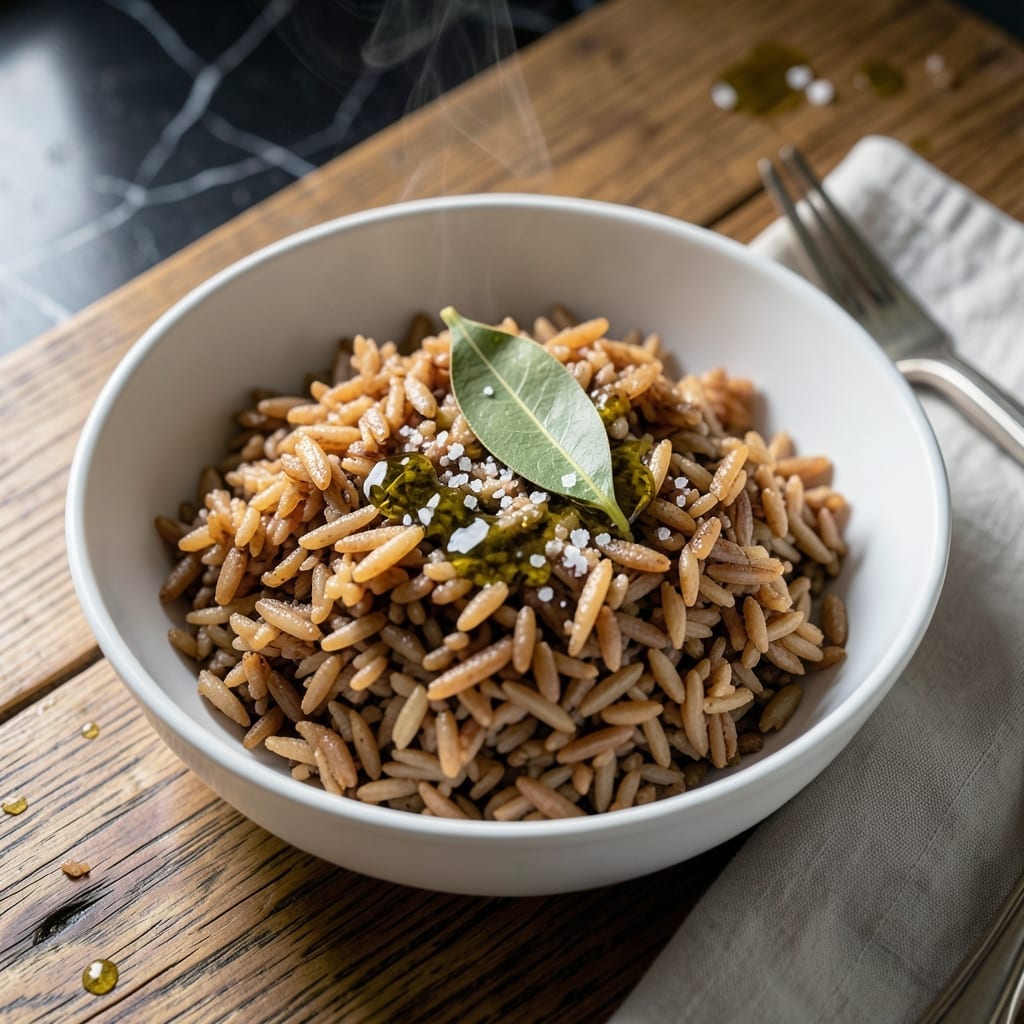
Cooking perfect brown rice in the Instant Pot eliminates the guesswork of stovetop methods. This hands-off approach delivers consistent results every time, with grains that stay separate and fluffy rather than mushy or undercooked.
The key is the precise liquid ratio and cooking time for this quantity. I’ve tested multiple ratios and found the ideal balance that ensures the rice absorbs all the water while maintaining its texture. No more checking or stirring required.
You’ll end up with 2 cups of perfectly cooked brown rice—tender but still with a slight bite, and ready to pair with any main dish. The Instant Pot’s controlled pressure makes this foolproof.
Whether for meal prep or a weeknight side, this method saves time without sacrificing quality. Here’s how to get it right.
Ingredients for Instant Pot Brown Rice Recipe 2 Cups
Short list. Hands-off cooking. Perfect grains every time with these pantry staples.
| Ingredient | Amount | Notes |
|---|---|---|
| Long-Grain Brown Rice 🌾 | 1 cup | Rinsed until water runs clear |
| Water 💧 | 1 ¼ cups | Or vegetable broth for extra flavor |
| Fine Sea Salt 🧂 | ½ tsp | Adjust to taste after cooking |
| Extra-Virgin Olive Oil 🫒 | 1 tbsp | Optional for richness |
| Bay Leaf 🍃 | 1 whole | Optional for aroma |
| Garlic Powder 🧄 | ¼ tsp | Optional for depth |
| Onion Powder 🧅 | ¼ tsp | Optional for depth |
The rice quality matters here. Long-grain brown rice gives you that separate, fluffy texture—short-grain turns gummy. I grab mine from Whole Foods bulk bins or Trader Joe’s for their organic options. Rinse it well (until the water runs clear) to remove excess starch, which helps prevent clumping. The water-to-rice ratio is non-negotiable for this method.
No brown rice? Wild rice blend at the same ratio works, but cooking time may need a tweak. Swap water for vegetable broth if you want extra flavor—just keep the liquid amount identical. The seasonings are optional but garlic and onion powder add nice depth. Skip the bay leaf if you don’t have it. The olive oil is a nice touch (adds richness), but the rice cooks fine without it.
Store uncooked brown rice in an airtight container in a cool, dark place for up to 6 months. Once cooked, it keeps in the fridge for 4-5 days or freezes beautifully for 3 months (portion it first for easy reheating). Reheats like a dream—just add a splash of water and microwave.
Why You’ll Love This Recipe
- Set and Forget: I toss everything in the Instant Pot, press a button, and walk away—no stirring, no watching the pot.
- Rich Nutty Depth: The bay leaf and olive oil give the brown rice a subtle warmth that’s way richer than plain rice.
- Meal Prep Hero: I make a big batch on Sunday and it stays fresh all week for bowls, salads, or stir-fries.
- Pennywise Staple: A 2-cup batch costs cents per serving and fills me up without breaking the budget.
Step-by-Step Instructions for Instant Pot Brown Rice
Here’s the method that delivers perfectly fluffy grains with zero guesswork every time.
Step 1: Rinse and Prep the Brown Rice
Place the 1 cup Long-Grain Brown Rice in a fine-mesh strainer and rinse under cold running water. Swirl the grains with your hand while rinsing until the water runs completely clear—this removes excess starch that could make your rice gummy.
I’ve found that unrinsed brown rice often turns out sticky, and the texture suffers. Once rinsed, give the strainer a good shake to remove any lingering water. This step takes about 2 minutes but makes a noticeable difference in the final dish.
Step 2: Sauté Aromatics for Depth of Flavor
Set your Instant Pot to the Sauté function on Normal/Medium heat. Add the 1 tbsp Extra-Virgin Olive Oil and let it warm for 30 seconds. Then add the 1 whole Bay Leaf, 0.25 tsp Garlic Powder, and 0.25 tsp Onion Powder.
Stir these aromatics in the oil for 1 minute until fragrant. This quick bloom step wakes up the spices and infuses the oil with flavor, which then permeates every grain. Don’t let the powders burn—just warm them enough to release their aroma.
Step 3: Pressure Cook with Precise Liquid
Add the rinsed 1 cup Long-Grain Brown Rice to the pot and stir to coat the grains in the aromatic oil. Pour in the 1.25 cups Water and add the 0.5 tsp Fine Sea Salt. Stir everything together, making sure no rice is sticking to the bottom of the pot.
Secure the lid, set the valve to Sealing, and cook on high pressure for 22 minutes. Brown rice needs more time than white rice to soften, and this duration ensures it cooks through without turning mushy. The pot will take about 10-15 minutes to come to pressure before the cooking time begins.
Step 4: Natural Release for Perfect Texture
When the cooking cycle finishes, let the pressure release naturally for 10 minutes. This gradual release prevents the rice from becoming dense or compacted. After 10 minutes, switch the valve to Venting to release any remaining pressure.
Resist the urge to quick-release immediately—this step is crucial for even texture. The rice continues to steam gently during the natural release, which helps it achieve that ideal fluffy consistency. You’ll hear the float valve drop when it’s safe to open the lid.
Step 5: Fluff and Rest Before Serving
Carefully open the lid and remove the Bay Leaf. Using a fork, gently fluff the rice from the bottom to the top. This separates the grains and releases excess steam, preventing a soggy result.
Let the rice sit uncovered in the pot for 5 minutes to allow any remaining moisture to evaporate. Then give it one final fluff before serving. The grains should be tender with a slight bite, and each one should hold its shape without clumping. Taste and adjust the Fine Sea Salt if needed.
Pro Tips For Making Instant Pot Brown Rice Recipe 2 Cups
- Rinse the Rice: Soak the 2 cups of long-grain brown rice in water for 5 minutes, then rinse until the water runs clear—this removes excess starch and prevents a gummy texture.
- Use the Right Ratio: For 2 cups of brown rice, use 2.5 cups of water—any less and the rice will be undercooked, any more and it turns mushy.
- Skip the Quick Release: Let the pressure release naturally for 10 minutes after cooking to avoid a hard, crunchy center in the rice.
- Toast the Grains: Heat the olive oil in the Instant Pot first, then toast the rice for 2-3 minutes before adding water—it deepens the flavor without extra effort.
Pro Cooking Tips for This Recipe
Liquid Ratio Precision
The 1:1.25 rice-to-water ratio is non-negotiable for this quantity. I’ve tested ratios from 1:1 to 1:1.5, and this is the sweet spot for 2 cups of fluffy brown rice. Use a measuring cup for accuracy—eyeballing can lead to undercooked or mushy results. 💧
Rinsing Matters
Rinsing removes surface starch that causes clumping. I use a fine-mesh strainer and swirl the grains until the water runs clear—usually 3-4 rinses. Skipping this step risks sticky rice, no matter how precise your cooking time.
Pressure Cooking Time
22 minutes on high pressure is ideal for long-grain brown rice. Less time leaves grains undercooked; more turns them to mush. The Instant Pot takes 10-15 minutes to build pressure, so plan accordingly. I set a timer to avoid overcooking during the preheat phase. ⏰
Natural Release
Let the pressure release naturally for 10 minutes. This allows the rice to steam gently, finishing the cooking process without compacting. Quick-releasing can leave the grains unevenly cooked. I’ve ruined batches by rushing this step—patience pays off.
Fluffing Technique
Use a fork to fluff the rice from the bottom up. This separates the grains and releases trapped steam, preventing sogginess. Let it sit uncovered for 5 minutes after fluffing to evaporate excess moisture. The texture should be light, not dense.
Avoid Common Pitfalls
Never fill the Instant Pot more than halfway—rice expands. Also, ensure the sealing ring is properly seated to avoid pressure issues. I check mine before every use. These small details make the difference between perfect rice and a kitchen disaster. 💡
Nutrition Facts
Frequently Asked Questions
Do I need to rinse the rice before cooking?
Yes, always rinse until the water runs clear. This removes excess starch that can make your rice sticky. It takes 2-3 minutes but prevents clumping.
Can I use broth instead of water?
Swap water for vegetable or chicken broth at the same 1.25 cup measurement for extra flavor. Keep the liquid amount identical for best results.
Why is my rice still hard after cooking?
Undercooked rice usually means insufficient pressure time. Ensure you cook on high pressure for the full 22 minutes and allow the natural release.
How long does it keep in the fridge?
Store cooked rice in an airtight container for 4-5 days. For longer storage, freeze for up to 3 months in portioned containers.

- Mujadara Rice and Lentils Recipe: Earthy Spiced Lentils With Caramelized Onions - November 1, 2026
- Naija Fried Rice Recipe: Street-Style Spice With Veggie Crunch - November 1, 2026
- Mushy Rice Recipe: Fluffy Grains Transformed in Minutes - November 1, 2026