
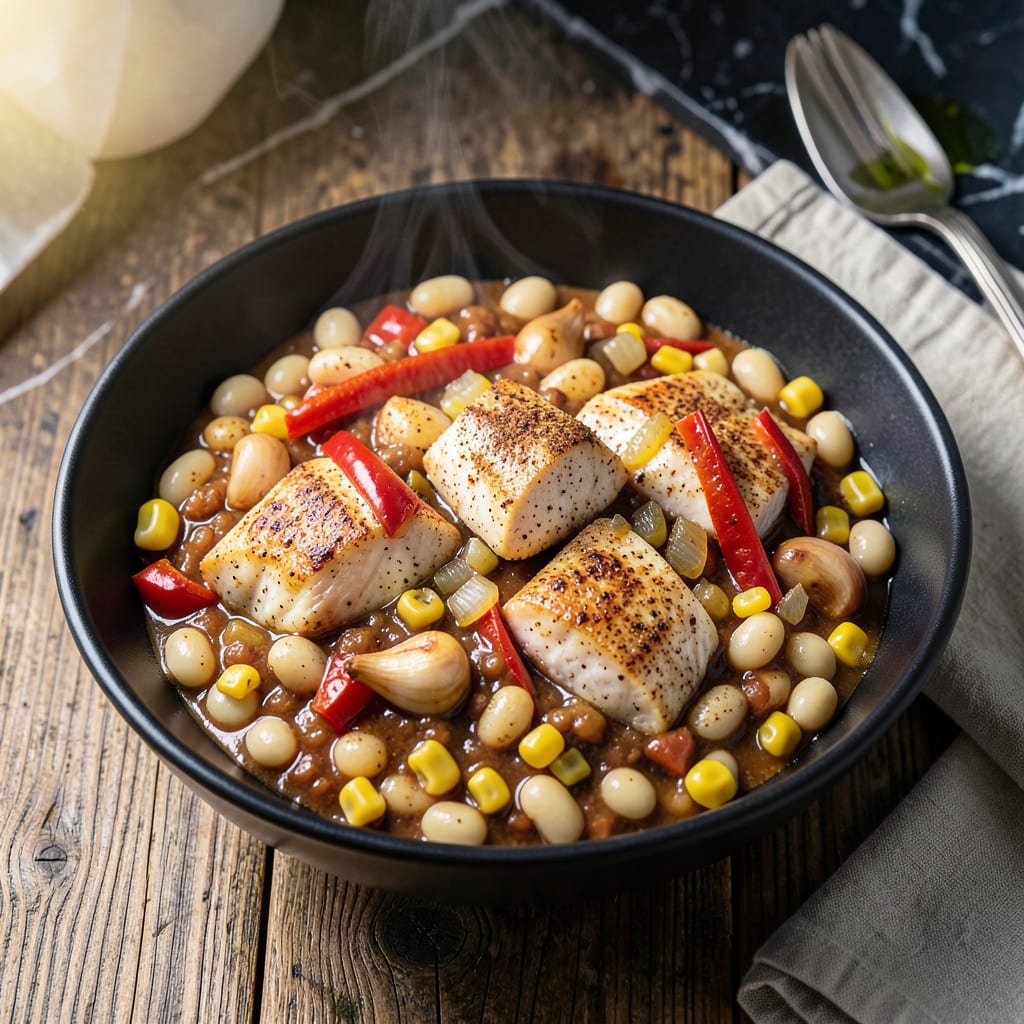
This hearty chili delivers comfort in every spoonful, combining tender chicken with white beans and sweet corn for a satisfying meal. The Instant Pot makes it effortless to achieve deep, layered flavors in a fraction of the time.
With simple ingredients and minimal prep, this dish comes together quickly while still offering that slow-cooked taste. It’s the perfect balance of rich and wholesome, ideal for cozy dinners or meal prep.
Ingredients for Instant Pot Chicken Chilli
Tender chicken, white beans, and corn come together for this comforting, rich dish.
| Ingredient | Amount | Notes |
|---|---|---|
| Boneless Skinless Chicken Breasts 🍗 | 1 ½ lb | Cut into bite-sized pieces |
| Cannellini Beans 🫘 | 2 cans | Drained and rinsed thoroughly |
| Sweet Corn Kernels 🌽 | 1 cup | Fresh, frozen, or canned |
| Yellow Onion 🧅 | 1 whole | Medium, finely diced |
| Garlic Cloves 🧄 | 3 cloves | Minced for depth of flavor |
| Red Bell Pepper 🌶️ | 1 whole | Seeds removed, diced |
| Chicken Broth 💧 | 2 cups | Low-sodium preferred for control |
| Diced Tomatoes 🍅 | 1 can | Fire-roasted for smoky depth |
| Tomato Paste 🍅 | 2 tbsp | For rich, concentrated flavor |
| Chili Powder 🌶️ | 1 tbsp | Adjust for heat preference |
| Ground Cumin 🌿 | 1 tsp | Toasted for enhanced aroma |
| Dried Oregano 🍃 | 1 tsp | Mediterranean oregano ideal |
| Olive Oil 🫒 | 1 tbsp | Extra-virgin for sautéing |
| Salt 🧂 | 1 tsp | Diamond Crystal kosher preferred |
| Black Pepper 🌶️ | ½ tsp | Freshly ground for best results |
[recipeingredientscaler]
The chicken quality matters here. Boneless, skinless breasts keep the dish lean but juicy—avoid pre-frozen versions which can turn rubbery. Cannellini beans add creaminess without overpowering; Goya or Progresso brands are reliable for canned. For the corn, fresh in summer (cut from the cob) or frozen off-season works equally well. The bell pepper adds sweetness and crunch—choose one with firm, vibrant color.
No cannellini beans? Great Northern or navy beans work just as well. Out of fresh corn? Frozen is actually preferred by many chefs for consistency. If you dislike chunky peppers, substitute an extra diced onion. For a smokier flavor, add half a teaspoon of smoked paprika. The tomato paste can be swapped with sun-dried tomato paste for intensity, but reduce by half.
This chili tastes even better the next day. Store in an airtight container in the fridge for up to 4 days or freeze for 3 months. Reheat gently on the stove with a splash of broth to restore consistency.
Why You’ll Love This Recipe
- Dump and Run: I toss in the chicken, beans, corn, and spices, then let the Instant Pot do all the work—no babysitting required.
- Garlic-Punch Flavor: The garlic and onions sauté right in the pot, filling my kitchen with that rich, savory aroma before the chili even starts cooking.
- Meal Prep Hero: I make a double batch on Sunday and portion it out for lunches all week—it reheats like a dream.
- Stretches Your Dollar: One pound of chicken breasts plus pantry staples feeds my family for two nights, and honestly, it tastes even better the next day.
Step-by-Step Instructions for Instant Pot Chicken Chili
Master this method and you’ll deliver rich, comforting chili with minimal hands-on time.
Step 1: Sauté Aromatics and Build Flavor Base
Set your Instant Pot to the sauté function on normal heat. Add the 1 tbsp Olive Oil and allow it to heat for 30 seconds until it shimmers slightly. This prevents the vegetables from sticking and ensures proper browning.
Add the finely diced Yellow Onion and diced Red Bell Pepper, cooking for 4-5 minutes until the onion becomes translucent and the pepper softens. Stir in the 3 cloves minced Garlic Cloves and cook for an additional 30 seconds until fragrant. Be careful not to let the garlic burn—it becomes bitter quickly.
Step 2: Incorporate Spices and Tomato Elements
Stir in the 2 tbsp Tomato Paste, 1 tbsp Chili Powder, 1 tsp Ground Cumin, and 1 tsp Dried Oregano. Cook for 1-2 minutes, stirring constantly, until the tomato paste darkens slightly. This step deepens the flavor and removes any raw spice taste.
Add the 1 can Diced Tomatoes (with juices) and stir to combine. The mixture should be thick and aromatic at this stage. If it looks too dry, add a splash of the 2 cups Chicken Broth to deglaze the pot, scraping up any browned bits from the bottom.
Step 3: Add Remaining Ingredients and Pressure Cook
Add the 1.5 lb Boneless Skinless Chicken Breasts (cut into bite-sized pieces), 2 cans Cannellini Beans (drained and rinsed), 1 cup Sweet Corn Kernels, and the remaining 2 cups Chicken Broth. Stir well to combine, ensuring the chicken pieces are submerged in the liquid.
Secure the Instant Pot lid, set the valve to sealing, and cook on high pressure for 12 minutes. The pot will take approximately 10-15 minutes to come to pressure before the cooking time begins. This method ensures the chicken cooks evenly and absorbs all the flavors from the spices and aromatics.
Step 4: Release Pressure and Finish
Allow the pressure to release naturally for 5 minutes, then switch the valve to venting to release any remaining pressure. Open the lid carefully, as there will still be hot steam inside. The chili should be thick and hearty, with the chicken fully cooked and tender.
Season with 1 tsp Salt and 0.5 tsp Black Pepper, stirring to combine. Taste and adjust seasoning if needed. For a thicker chili, use the sauté function for an additional 2-3 minutes to reduce the liquid slightly. Serve hot, garnished with your favorite toppings.
Pro Tips For Making Instant Pot Chicken Chilli
- Sear the Chicken First: I learned this the hard way—skipping the sauté step leaves the chicken bland. Brown the breasts in the Instant Pot first (3-4 minutes per side) for depth of flavor that simmering alone can’t achieve.
- Drain the Beans: Sounds weird, but it works: rinse and drain the cannellini beans before adding them. It cuts the metallic taste and keeps the chili from turning starchy.
- Avoid Overfilling: After burning three batches, I finally figured out the Instant Pot needs room to pressure cook. Never exceed the 2/3 max fill line, especially with beans and corn expanding.
- Use Frozen Corn: Skip thawing—toss frozen sweet corn kernels straight in. It saves prep time and actually releases a fresher, sweeter flavor into the chili as it cooks.
Essential Equipment for This Dish
Instant Pot Essentials
Your 6-quart Instant Pot is the star here—I use the Duo Nova model for its user-friendly controls. This size comfortably fits all ingredients with room for stirring. The non-stick inner pot makes cleanup a breeze after sautéing onions and peppers. 🔥
Sautéing Success
A wooden spoon is ideal for scraping the bottom while sautéing, preventing the fond from burning. I keep a silicone spatula on hand too for folding in delicate ingredients like the corn. These tools won’t scratch your pot’s surface.
Precision Tools
Measure spices accurately with a magnetic spice jar set—I love OXO’s Good Grips for their clear markings and stay-put lids. A garlic press speeds up mincing, but a sharp 8-inch chef’s knife gives better control for dice consistency.
Safety First
Always use heat-resistant silicone mitts when handling the lid—the steam release can reach 212°F. I keep a long-handled wooden spoon nearby to stir without leaning over the pot. Never fill past the ⅔ max fill line for safe pressure cooking.
Serving Setup
A ladle with a long handle helps serve deep from the pot. I use a soup bowl set with wide rims for easy topping access. A microplane comes in handy for fresh cheese garnishes at the table.
Cleanup Helpers
Keep Bar Keepers Friend powder on hand for stubborn stains on the stainless steel inner pot. The dishwasher-safe sealing ring can absorb odors—soak in vinegar and water between uses. A small brush cleans the steam release valve thoroughly. 💡
Nutrition Facts
Frequently Asked Questions
Can I use chicken thighs instead of breasts?
Chicken thighs stay juicier and add richer flavor. Use 1.5 lb boneless, skinless thighs and reduce pressure cooking to 10 minutes since dark meat cooks faster.
Why do we sauté the vegetables first?
Sautéing builds a deep flavor base called fond. It caramelizes the onions and peppers, creating complex tastes that pressure cooking alone can’t achieve. Don’t skip this step!
What if my chili is too thin?
Use the sauté function to simmer uncovered for 3-5 minutes. Mash some beans with a fork to thicken naturally, or mix 1 tbsp cornstarch with water and stir in.

- Jollof Rice Sauce Recipe: West African Tomato and Spice Infusion - September 25, 2026
- Japanese Rice Soup Recipe: Umami-Rich Comfort in a Bowl - September 25, 2026
- Homemade Cream Of Rice Recipe: Silk-Smooth Breakfast in Minutes - September 25, 2026