
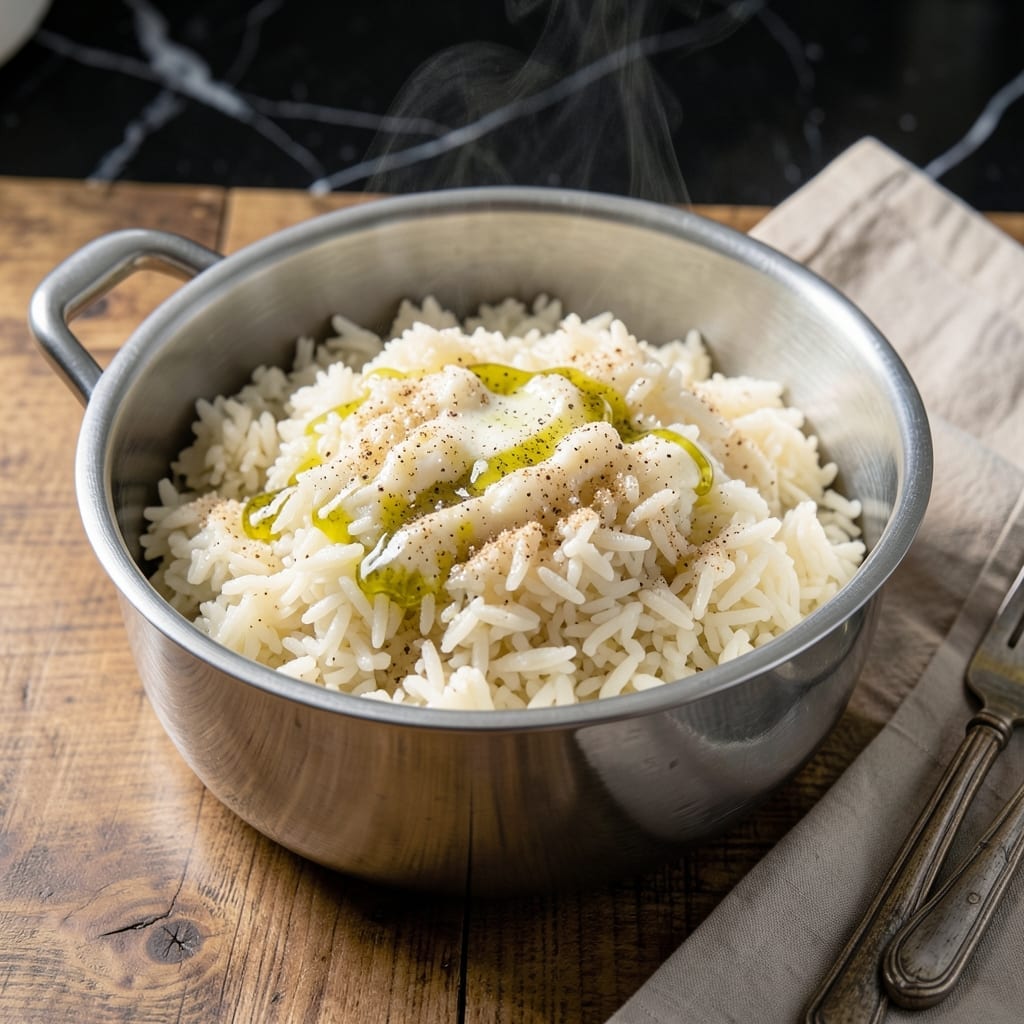
Cooking perfect rice in the Instant Pot Duo Nova is simpler than you think. This method delivers consistent results with minimal effort, ensuring fluffy grains every time without constant monitoring.
The beauty of this approach lies in its precision. A simple ratio of 1:1 rice to water, combined with the Duo Nova’s pressure cooking function, eliminates guesswork. No more burnt bottoms or mushy textures.
What you get is rice with distinct, separate grains that hold their shape. The pressure cooking process locks in moisture and flavor, creating a side dish that pairs perfectly with any main course.
Whether you’re serving four or fourteen, this technique scales effortlessly. The Duo Nova’s consistent heat distribution means you’ll achieve professional-quality rice with every batch.
Ingredients for Instant Pot Duo Nova Rice
Pantry basics meet precision cooking for fluffy, separate grains every time.
| Ingredient | Amount | Notes |
|---|---|---|
| Long-Grain White Rice 🍚 | 2 cups | Rinsed until water runs clear |
| Water 💧 | 2 cups | Filtered or distilled preferred |
| Fine Sea Salt 🧂 | ½ tsp | Adjust to taste after cooking |
| Unsalted Butter 🧈 | 1 tbsp | Optional for richness |
| Garlic Powder 🧄 | ¼ tsp | For subtle aromatic depth |
| Onion Powder 🧅 | ¼ tsp | Complements the garlic well |
| Bay Leaf 🍃 | 1 whole | Removes after cooking |
| Fresh Parsley 🌿 | 2 tbsp | Chopped, for garnish |
The rice is the star here. Long-grain white rice (jasmine or basmati) gives you those distinct grains the intro promises. Rinsing until water runs clear removes excess starch—this is non-negotiable for that fluffy texture. I grab mine in bulk at Whole Foods or the Asian market for the freshest stock. The water-to-rice ratio is sacred: 1:1 by volume, no exceptions.
No long-grain? Medium-grain works but will be slightly stickier—reduce water by 2 tbsp per cup. Skip the bay leaf if you must, but the garlic and onion powders add subtle depth worth the extra 30 seconds. Using pre-cooked or instant rice? Cut the cook time in half and use 1.75 cups water per cup of rice. The Duo Nova handles it all.
Cooked rice keeps 4-5 days in the fridge (store in the pot with lid slightly ajar to prevent sogginess). Freezes beautifully for 3 months in portions. Reheat with a splash of water and a microwave cover—good as new. That bay leaf? Toss it after cooking (don’t eat it).
Why You’ll Love This Recipe
- Set and Forget: The Duo Nova does all the work—I just toss in rice, water, and a pinch of salt, then walk away.
- Buttery Garlic Magic: That melted butter and garlic powder turn plain rice into something I crave daily.
- Meal Prep Hero: I make a big batch Sunday and it pairs with everything from stir-fry to roasted chicken all week.
- Budget Stretcher: A pound of long-grain rice feeds my family for days, and the ingredients cost less than a coffee.
Step-by-Step Instructions for Instant Pot Duo Nova Rice
Here’s the method that guarantees perfect rice without fail in your pressure cooker.
Step 1: Rinse and Prepare the Rice
Place the 2 cups Long-Grain White Rice in a fine-mesh strainer and rinse under cold running water. Continue rinsing until the water runs completely clear—this removes excess starch that can make your rice gummy. I always do this step in the sink with my fingers swirling the grains to ensure thorough cleaning.
While the rice drains, add the 2 cups Water to your Instant Pot Duo Nova. The water-to-rice ratio is critical here—equal parts by volume is what you want. I use filtered water for the cleanest flavor, but tap water works fine too.
Step 2: Add Flavorings and Rice to the Pot
Once the rice is fully drained, add it to the Instant Pot along with the 0.5 tsp Fine Sea Salt, 1 tbsp Unsalted Butter, 0.25 tsp Garlic Powder, and 0.25 tsp Onion Powder. The butter adds a subtle richness, while the powders provide gentle aromatic depth. Stir gently to distribute the seasonings evenly.
Drop in the 1 whole Bay Leaf—this will infuse the rice with a subtle, earthy note as it cooks. Don’t skip this; it makes a noticeable difference in the final flavor. Make sure the bay leaf is fully submerged in the liquid.
Step 3: Pressure Cook to Perfection
Secure the lid on your Instant Pot and set the valve to Sealing. Select the Rice function and set the time to 3 minutes on High Pressure. It will take about 10-15 minutes for the pot to come to pressure before the cooking time begins.
Once the cooking cycle completes, let the pressure release naturally for 10 minutes. This gradual release prevents the rice from becoming mushy. After 10 minutes, quick-release any remaining pressure by carefully turning the valve to Venting.
Step 4: Rest and Fluff for Ideal Texture
Remove the lid and discard the bay leaf. Let the rice sit uncovered for 5 minutes—this allows excess moisture to evaporate and the grains to firm up slightly. You’ll see the rice transform from a wet porridge to distinct, fluffy grains.
Gently fluff the rice with a fork, starting from the outer edges and working your way inward. This separates the grains without crushing them. Taste and adjust the seasoning with additional salt if needed.
Step 5: Garnish and Serve Immediately
Sprinkle the 2 tbsp Fresh Parsley over the top of the rice just before serving. The parsley adds a pop of freshness and color that complements the rich, savory notes of the dish. Stir it in lightly or leave it as a garnish on top.
Serve the rice hot, straight from the pot. The grains should be tender but distinct, with no hard centers or mushy spots. This method works every time, giving you restaurant-quality rice with minimal effort.
Pro Tips For Making Instant Pot Duo Nova Rice
- Rinse the Rice: Give the long-grain white rice a quick rinse under cold water before adding it to the pot—removes excess starch so you don’t end up with a gummy, sticky mess. I learned this the hard way after my first few batches turned out more like porridge.
- Use Equal Water: For the Duo Nova, stick to a 1:1 rice-to-water ratio—1 cup rice to 1 cup water. Sounds weird, but it works: this model runs a little hotter, and the rice comes out fluffy every time.
- Skip the Stir: After adding the rice, water, and butter, resist the urge to stir—just gently swirl the pot to distribute the garlic powder and salt. Stirring can break the grains and turn your rice mushy.
- Let It Steam: Once the cook time ends, let the rice sit sealed for a full 10 minutes. My grandmother swore by this, and she was right: it lets the grains firm up and absorb any remaining liquid, so you don’t get a wet, undercooked bite.
Serving Suggestions for Leftovers
Family Style Serving
Transfer the rice to a large, shallow bowl for family-style serving. The Duo Nova pot itself makes a great serving dish—just remove the inner pot and place it on a trivet. I love how the steam rising from the pot adds a dramatic touch to the presentation. 💛
Plated Portions
For individual servings, use a 1-cup measuring cup to portion the rice onto plates. Press lightly to create a mound shape, then garnish with fresh parsley. The uniform portions look restaurant-worthy and ensure everyone gets their fair share.
Protein Pairings
This rice pairs beautifully with grilled chicken, salmon, or tofu. I often serve it with lemon garlic shrimp—the bright citrus notes complement the subtle seasoning of the rice. For a heartier meal, try it alongside beef stir-fry or baked chicken thighs.
Vegetable Sides
Balance the meal with steamed broccoli, roasted asparagus, or a fresh cucumber salad. The rice also works well in grain bowls—top with avocado, cherry tomatoes, and a drizzle of olive oil. The possibilities are endless, and the rice always shines.
Sauce Integration
For a flavor boost, serve the rice with a side of teriyaki sauce, peanut sauce, or a simple garlic butter drizzle. I like to mix 2 tbsp soy sauce with 1 tbsp sesame oil for an easy Asian-inspired topping that soaks into the grains beautifully.
Leftovers Tip
If you have leftovers, store them in the fridge for up to 4-5 days. Reheat in the microwave with a splash of water and a damp paper towel to maintain moisture. The rice retains its texture surprisingly well, making it perfect for fried rice the next day. 🔥
Nutrition Facts
Frequently Asked Questions
What’s the ideal water-to-rice ratio?
Use a 1:1 ratio by volume for white rice. This means 2 cups water for every 2 cups rice. For medium-grain rice, reduce water by 2 tbsp per cup.
How long does it take to cook?
Set the pressure cooker to 3 minutes on High. It takes about 10-15 minutes to come to pressure, plus a 10-minute natural release. Total time: around 25-30 minutes.
Can I use brown rice instead?
Yes, but increase the water to 1.25 cups per cup of rice and cook for 22 minutes on High Pressure. Let the pressure release naturally for best results.
Why rinse the rice first?
Rinsing removes excess starch, preventing gummy or sticky rice. Continue until the water runs completely clear for the fluffiest grains.

- Jamaican Jollof Rice Recipe: Island Spice in Every Bite - October 18, 2026
- Hamburger Rice Hot Dish Recipe: Midwest Comfort in One Pan - October 18, 2026
- Iranian Cabbage Rice Recipe: Aromatic Herbs and Spiced Layers - October 18, 2026