
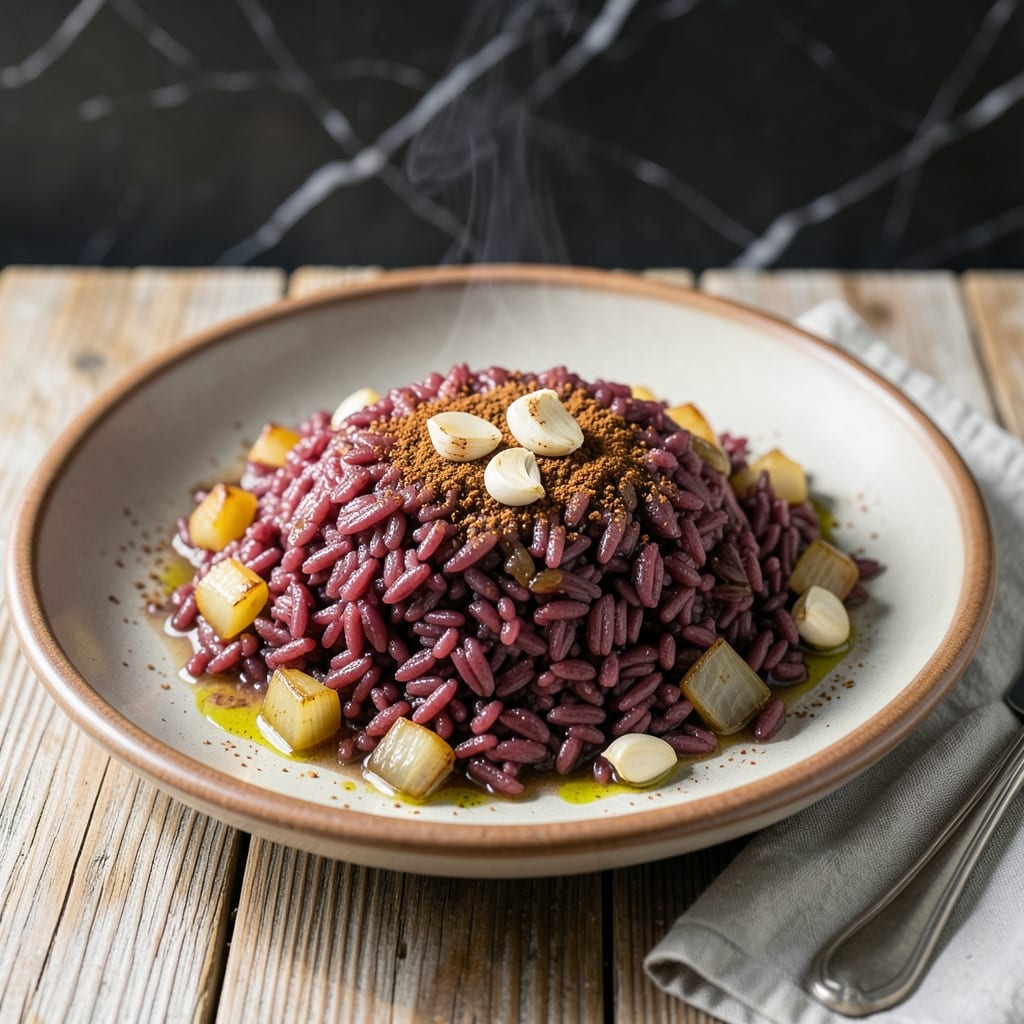
This Instant Pot method transforms red rice into perfectly fluffy grains with rich, smoky depth in a fraction of traditional cooking time. The pressure cooker locks in flavor while ensuring consistent texture without constant monitoring.
What sets this approach apart is the precise liquid-to-rice ratio and controlled cooking environment. The result is tender, separate grains with a subtle nutty undertone that pairs beautifully with any main course.
No more watching pots or adjusting heat. The Instant Pot handles everything, delivering restaurant-quality red rice with minimal effort and maximum flavor extraction from each ingredient.
This reliable technique works every time, whether you’re serving four or prepping for the week ahead.
Ingredients for Instant Pot Red Rice
A handful of pantry staples and a few fresh elements create perfectly fluffy, smoky red rice in your Instant Pot.
| Ingredient | Amount | Notes |
|---|---|---|
| Red Rice 🍚 | 1 ½ cups | Rinsed until water runs clear |
| Vegetable Broth 🥣 | 2 ½ cups | Low-sodium preferred for control |
| Olive Oil 🫒 | 1 tbsp | Extra-virgin for depth of flavor |
| Yellow Onion 🧅 | ½ whole | Finely diced for even distribution |
| Garlic Cloves 🧄 | 3 cloves | Minced for maximum aromatic impact |
| Smoked Paprika 🌶️ | 1 tsp | Key for smoky depth |
| Ground Cumin 🌿 | ½ tsp | Toasted lightly before adding |
| Bay Leaf 🍃 | 1 whole | Removed before serving |
| Kosher Salt 🧂 | 1 tsp | Diamond Crystal preferred for consistency |
| Freshly Ground Black Pepper 🌶️ | ½ tsp | Coarse grind for texture |
| Dried Thyme 🌿 | ½ tsp | Crushed between fingers to release oils |
| Lemon Juice 🍋 | 1 tbsp | Freshly squeezed for brightness |
| Fresh Parsley 🌿 | 2 tbsp | Chopped for garnish and freshness |
The liquid-to-rice ratio is critical here. Use a 2:1 ratio of broth to rice for ideal texture. Red rice (often labeled as Bhutanese or Himalayan) is essential—Whole Foods or Asian specialty markets typically carry it. Avoid pre-cooked or parboiled varieties, as they won’t absorb flavors as effectively. The smoked paprika delivers that signature depth, so opt for Spanish smoked paprika if available.
No smoked paprika? Chipotle powder at half the amount adds a similar smokiness. Fresh garlic and onion can be swapped for 1 tsp each of garlic powder and onion powder, though the fresh versions offer superior complexity. Vegetable broth can be replaced with water plus 1 tsp vegetable bouillon. For a nuttier profile, toast the rice in the pot with olive oil for 2-3 minutes before adding liquids.
Cooked rice keeps in an airtight container in the fridge for up to 5 days. For longer storage, freeze in portions for up to 3 months. Reheat with a splash of water or broth to restore moisture. The flavors deepen over time, making leftovers even more delicious.
Why You’ll Love This Recipe
- Set It and Forget: I dump everything in the Instant Pot, press a button, and walk away—no stirring, no watching.
- Rich Garlic Depth: The onion and garlic simmer in olive oil first, so every bite of red rice is packed with savory warmth.
- Meal Prep MVP: Cooks a big batch that tastes just as good on day three in grain bowls or stuffed peppers.
- Budget Stretch: A pound of red rice plus pantry staples feeds my family twice for under five bucks.
Step-by-Step Instructions for Instant Pot Red Rice
This method ensures consistently fluffy grains with rich, smoky flavor in minimal time.
Step 1: Sauté Aromatics for Depth of Flavor
Set the Instant Pot to the Sauté function on Normal heat. Add the 1 tbsp Olive Oil and allow it to shimmer. Add the 0.5 whole Yellow Onion, finely diced, and cook for 3-4 minutes until translucent and just beginning to caramelize at the edges.
Add the 3 cloves Garlic Cloves, minced, and cook for an additional 30 seconds until fragrant. Stir in the 1 tsp Smoked Paprika and 0.5 tsp Ground Cumin, toasting lightly for 15-20 seconds to bloom their spices. This builds the smoky foundation for the rice.
Step 2: Combine Rice and Liquid
Add the 1.5 cups Red Rice, rinsed until water runs clear, to the pot along with the 2.5 cups Vegetable Broth. Stir well to combine, ensuring no grains stick to the bottom. Add the 1 whole Bay Leaf, 1 tsp Kosher Salt, 0.5 tsp Freshly Ground Black Pepper, and 0.5 tsp Dried Thyme.
Scrape the bottom of the pot with a wooden spoon to deglaze, preventing any risk of the “burn” error. The liquid should appear slightly murky from the spices—this is normal and ensures even distribution of flavor.
Step 3: Pressure Cook to Perfection
Secure the lid and set the valve to Sealing. Cook on High Pressure for 22 minutes. The Instant Pot will take approximately 10-12 minutes to come to pressure before the timer begins. Resist the urge to check or stir during this time.
Once cooking completes, allow a natural pressure release for 10 minutes. Then, carefully switch the valve to Venting to release any remaining pressure. The rice should be tender with all liquid absorbed and no crunchy bits remaining.
Step 4: Finish and Serve
Remove the lid and discard the Bay Leaf. Drizzle the 1 tbsp Lemon Juice over the rice and fluff gently with a fork to distribute. The grains should separate easily, with a slight sheen from the absorbed broth and oil.
Taste and adjust seasoning if needed, though the measured Kosher Salt and spices should provide perfect balance. Garnish with the 2 tbsp Fresh Parsley, chopped, and serve immediately while hot and fragrant.
Pro Tips For Making Instant Pot Red Rice
- Sauté the Aromatics: Cook the onion and garlic in olive oil for 2-3 minutes before adding rice—this builds a deep flavor base that plain broth can’t match.
- Use a 1:1.5 Ratio: For perfect texture, stick to 1 part red rice to 1.5 parts vegetable broth; I learned this the hard way after too many mushy or undercooked batches.
- Skip the Quick Release: Let the pressure release naturally for 10 minutes, then manually release the rest; this prevents the rice from turning to glue.
- Rinse the Rice First: A quick rinse removes excess starch so your red rice stays fluffy, not gummy—I was skeptical until I tried it.
Storing and Reheating This instant pot red rice
Refrigerator Storage
Let your rice cool for no more than 2 hours before transferring to airtight containers—I use glass with snap-tight lids. Store at 40°F or below for up to 5 days. The flavors actually deepen as the spices meld together. ❄️
Freezer Storage
For longer storage, freeze in portions for up to 3 months without quality loss. I recommend flat freezer bags (quart or gallon size) because they stack efficiently and thaw faster. Leave 1 inch of headspace for expansion.
Stovetop Reheating
This is my preferred method. Heat rice in a heavy-bottomed pot with ¼ cup water or broth over medium-low heat for 10-15 minutes. Stir occasionally and add a splash of liquid if it looks dry. 🔥
Microwave Reheating
For quick meals, microwave individual portions covered with a damp paper towel. Use 70% power for 2-3 minutes, stir, then continue in 1-minute intervals until reaching 165°F.
Nutrition Facts
Frequently Asked Questions
What if my rice comes out mushy?
This usually means too much liquid or over-stirring. Stick to the 2:1 broth-to-rice ratio and resist stirring after adding liquid. Let the pressure release naturally for best texture.
Can I use chicken broth instead of vegetable?
Use low-sodium chicken broth for a richer flavor. The cooking time and liquid ratio stay the same. Just adjust salt to taste at the end.
How do I prevent the burn notice?
Always deglaze the pot after sautéing. Add a splash of broth to loosen any browned bits before pressure cooking. This prevents the sensor from detecting stuck food.
Can I double the recipe?
Yes, but don’t exceed 2 cups rice in a 6-quart Instant Pot. The rice needs space to expand. Cook time remains 22 minutes—just increase liquid proportionally.

- Mujadara Rice and Lentils Recipe: Earthy Spiced Lentils With Caramelized Onions - November 1, 2026
- Naija Fried Rice Recipe: Street-Style Spice With Veggie Crunch - November 1, 2026
- Mushy Rice Recipe: Fluffy Grains Transformed in Minutes - November 1, 2026