
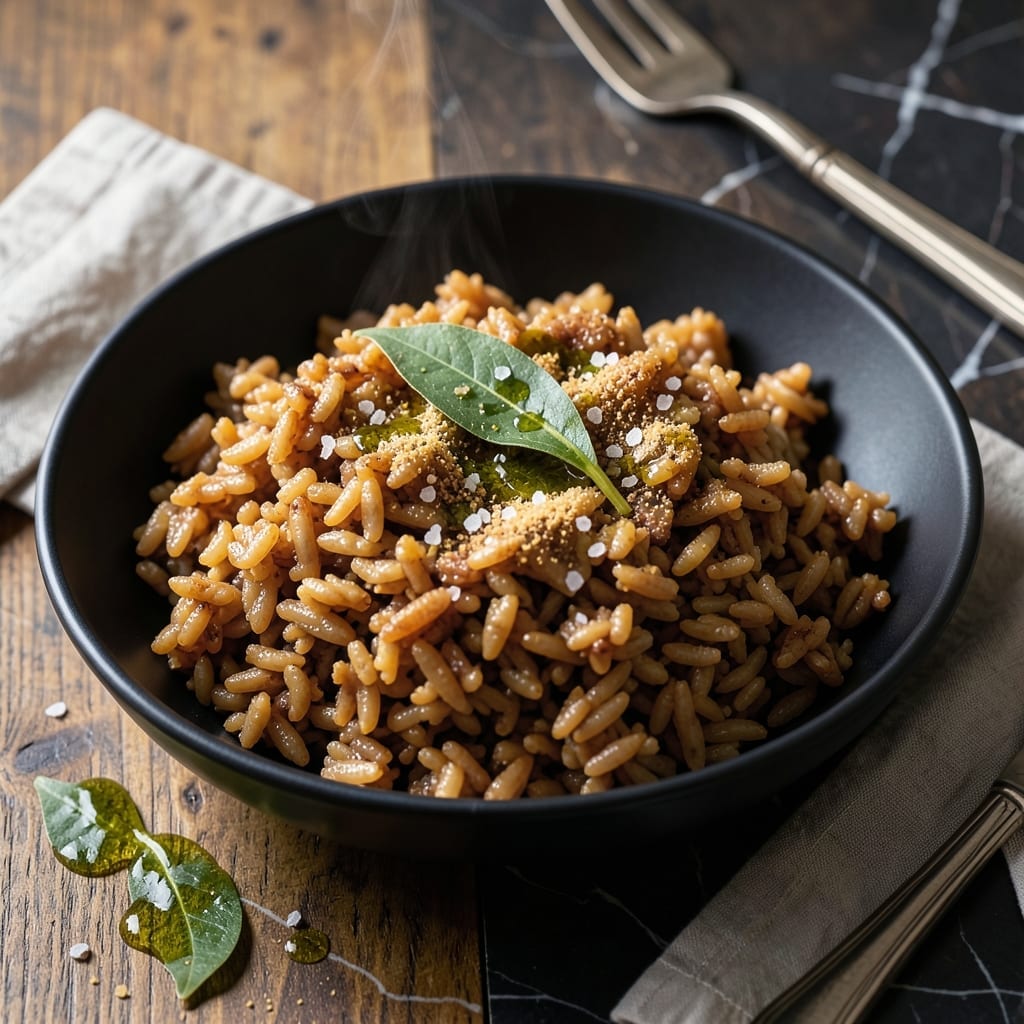
This proven method delivers perfectly fluffy brown rice with a nutty texture every time. The Instapot eliminates guesswork while maintaining ideal moisture and bite.
With precise water ratios and cooking times, you’ll achieve consistent results without monitoring. The rice emerges tender yet distinct, ready for any main course.
Ingredients for Instapot Brown Rice
These eight ingredients deliver perfectly fluffy brown rice with nutty depth every time.
| Ingredient | Amount | Notes |
|---|---|---|
| Long-Grain Brown Rice 🌾 | 2 cups | Rinsed until water runs clear |
| Water 💧 | 2 ½ cups | Filtered or distilled preferred |
| Extra-Virgin Olive Oil 🫒 | 1 tbsp | Optional for added richness |
| Sea Salt 🧂 | ½ tsp | Fine grain preferred |
| Bay Leaf 🍃 | 1 whole | Optional for subtle aroma |
| Garlic Powder 🧄 | ¼ tsp | For depth of flavor |
| Onion Powder 🧅 | ¼ tsp | Complements the garlic |
| Black Pepper 🌶️ | ¼ tsp | Freshly ground preferred |
The rice quality is paramount here. Lundberg or Goya long-grain brown rice yields the best texture—avoid instant or parboiled varieties as they lack the desired bite. Rinsing removes excess starch, which is critical for achieving distinct grains. Most Whole Foods or natural grocers carry high-quality options. For the water, filtered or distilled prevents any off-flavors from tap water minerals.
No brown rice? Basmati or jasmine brown rice work well (reduce water by 2 tbsp). For extra flavor, vegetable broth instead of water adds depth. Out of olive oil? Avocado or coconut oil at the same amount. The bay leaf can be swapped for a strip of kombu for umami. These swaps maintain the recipe’s integrity while offering flexibility.
Cooked rice keeps 4-5 days refrigerated in an airtight container. For longer storage, freeze portions for up to 3 months. Reheat with a splash of water to restore moisture. This method scales perfectly—use a 1:1.25 rice-to-water ratio for any batch size.
Why You’ll Love This Recipe
- Set and Forget: I toss everything in the Instant Pot, press a button, and walk away—no stirring, no watching, no stress.
- Rich and Aromatic: The bay leaf infuses the rice with a subtle depth, while the olive oil adds a silky finish.
- Meal Prep Hero: I make a big batch on Sunday and use it in bowls, salads, and stir-fries all week.
- Budget Stretch: A pound of brown rice costs pennies and feeds us for days, even with leftovers.
Step-by-Step Instructions for Instapot Brown Rice
Master the technique for consistent results with a nutty aroma and ideal texture each time.
Step 1: Rinse and Prepare the Rice
Place the 2 cups Long-Grain Brown Rice in a fine-mesh strainer and rinse under cold running water. Agitate the grains with your hand while rinsing until the water runs completely clear—this removes excess starch that could make the rice gummy.
Shake the strainer gently to remove any lingering water. Proper rinsing ensures each grain remains distinct and achieves that perfect fluff. I always take this extra minute; it makes a noticeable difference in the final texture.
Step 2: Combine Ingredients in the Pressure Cooker
Transfer the rinsed rice to the Instant Pot insert. Add the 2.5 cups Water, 1 tbsp Extra-Virgin Olive Oil, 0.5 tsp Sea Salt, 1 whole Bay Leaf, 0.25 tsp Garlic Powder, 0.25 tsp Onion Powder, and 0.25 tsp Black Pepper. Stir gently to distribute the seasonings evenly throughout the water.
The olive oil adds a subtle richness, while the bay leaf infuses a delicate aroma during cooking. Make sure the bay leaf is fully submerged to maximize its flavor contribution without overpowering the dish.
Step 3: Pressure Cook to Perfection
Secure the lid on the Instant Pot and set the valve to the sealing position. Select the “Pressure Cook” or “Manual” setting and adjust the time to 22 minutes on high pressure. The cooker will take about 10-15 minutes to come to pressure before the timer begins.
Once the cooking cycle completes, allow the pressure to release naturally for 10 minutes. This gradual release prevents the rice from becoming mushy. After 10 minutes, carefully switch the valve to venting to release any remaining pressure. You’ll know it’s safe to open when the float valve drops.
Step 4: Rest and Fluff the Rice
Remove the lid and discard the bay leaf. Let the rice rest in the pot for 5 minutes—this allows the grains to absorb any remaining liquid and settle into their final texture. The surface should look slightly dry with no standing water.
Using a fork, gently fluff the rice from the bottom up, breaking apart any clumps. The grains should be tender with a slight bite, and the color should be uniform throughout. If any rice sticks to the bottom, add a splash of hot water and let it sit for 1 minute before fluffing again.
Pro Tips For Making Instapot Brown Rice
- Rinse the Rice: Always rinse your long-grain brown rice under cold water until it runs clear—this removes excess starch and prevents gummy, sticky results.
- Use the Right Ratio: For perfectly cooked brown rice in the Instant Pot, stick to a 1:1.5 rice-to-water ratio (1 cup rice to 1.5 cups water). I learned this the hard way after a few mushy batches.
- Natural Release Only: Resist the urge to quick-release. Let the pressure release naturally for at least 10 minutes to avoid undercooked, crunchy rice.
- Toast the Rice First: Sauté the rice in the olive oil for 2-3 minutes before adding water—it adds a nutty depth that plain steamed rice just can’t match. Sounds weird, but it works.
Dietary Considerations for These Flavors
Gluten-Free Goodness
Brown rice is naturally gluten-free, making this dish safe for anyone with celiac disease or gluten sensitivity. I always double-check my ingredients—especially Lundberg or Goya brands—to ensure no cross-contamination occurred during processing. 💪
Vegan and Plant-Based
This dish fits perfectly into vegan and plant-based diets, as it contains no animal products. The olive oil adds richness without dairy, and vegetable broth (used as a water substitute) enhances the flavor profile while keeping it cruelty-free.
Low-Fat Option
For a low-fat version, simply omit the 1 tbsp olive oil—the rice will still turn out fluffy. You can also replace it with broth for added flavor without increasing the fat content.
Sodium Control
To reduce sodium, cut the sea salt in half or use low-sodium broth instead of water. The garlic and onion powders still provide plenty of flavor, so you won’t miss the extra salt. I often do this when serving it to guests with dietary restrictions.
Diabetic-Friendly
Brown rice has a lower glycemic index than white rice, making it a better option for blood sugar control. A ½-cup serving contains about 22g net carbs, which fits well into most diabetic meal plans. Pair it with protein and non-starchy veggies for a balanced plate.
Allergen-Free
This recipe is free from the top 9 allergens, including dairy, eggs, and nuts. Just ensure your brown rice is processed in a dedicated facility if you have severe allergies. Always check labels to be safe! ✨
Nutrition Facts
Frequently Asked Questions
Why rinse the rice before cooking?
Rinsing removes excess starch that can make rice gummy. This ensures each grain stays distinct and achieves that perfect fluff. It takes just a minute but makes a noticeable difference.
Can I use broth instead of water?
Yes! Substitute 2.5 cups vegetable or chicken broth for water to add depth of flavor. This works especially well with the garlic and onion powders already in the recipe.
What if my rice turns out mushy?
This usually happens from overcooking or too much water. Stick to the 1:1.25 rice-to-water ratio and 22 minutes cook time. Always let pressure release naturally for 10 minutes.
How do I store leftovers?
Keep in an airtight container in the fridge for 4-5 days, or freeze for up to 3 months. Reheat with a splash of water to restore moisture.

- Jeera Rice Recipe by VahChef: Cumin-Infused Basmati Perfection - October 20, 2026
- Jollof Rice Recipe Instant Pot: West African Flavor in a Fraction of the Time - October 20, 2026
- Keema Fried Rice Recipe: Spiced Minced Meat and Fluffy Grains - October 20, 2026