
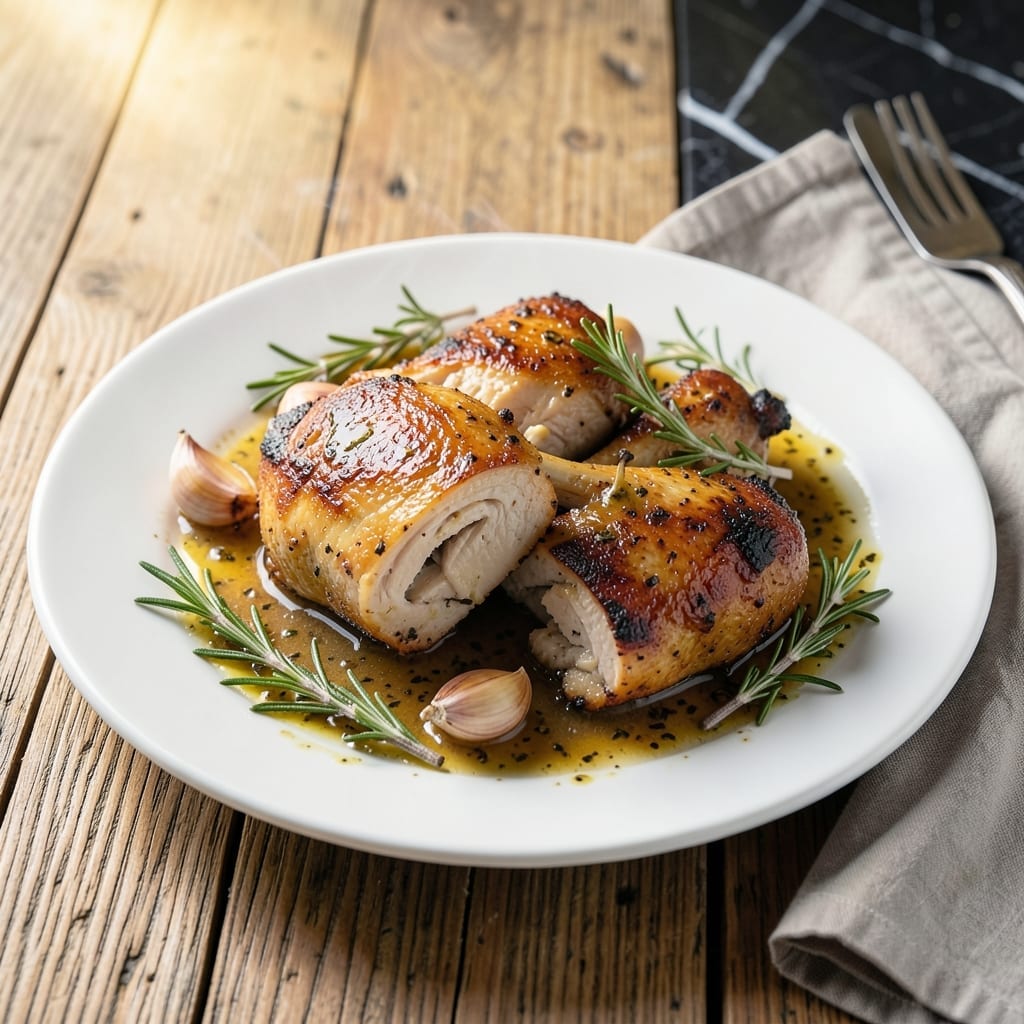
This recipe transforms humble chicken thighs into a garlic-herb infused masterpiece with minimal effort. The Instapot works its magic in under 30 minutes, sealing in juices while developing deep, complex flavors.
I rely on a simple yet precise method: sear first for color, then pressure cook with aromatics. The result is fall-off-the-bone tenderness with skin that stays intact. Fresh herbs and garlic elevate the dish without overpowering the chicken.
What emerges is succulent meat bathed in a lightly thickened, aromatic sauce. The thighs absorb every bit of flavor, making each bite consistently delicious. Pairs beautifully with rice or roasted vegetables.
This technique delivers restaurant-quality results with everyday ingredients. The process is streamlined yet never sacrifices on taste or texture.
Ingredients for Instapot Chicken Thigh
Transform humble chicken thighs with garlic, herbs, and a few pantry staples into something extraordinary.
| Ingredient | Amount | Notes |
|---|---|---|
| Bone-In Chicken Thighs 🍗 | 2 lb | Skin-on for crispiness |
| Garlic Cloves 🧄 | 6 cloves | Minced for maximum flavor |
| Fresh Rosemary 🌿 | 2 tbsp | Chopped, stems discarded |
| Fresh Thyme Sprigs 🍃 | 4 whole | Leaves stripped from stems |
| Olive Oil 🫒 | 2 tbsp | Extra-virgin preferred |
| Chicken Stock 🍲 | ¾ cup | Low-sodium recommended |
| Dry White Wine 🍷 | ¼ cup | Optional for deglazing |
| Yellow Onion 🧅 | 1 whole | Medium-sized, finely diced |
| Kosher Salt 🧂 | 1 ½ tsp | Diamond Crystal brand preferred |
| Black Pepper 🌶️ | 1 tsp | Freshly ground for best results |
| All-Purpose Flour 🌾 | 2 tbsp | For thickening sauce |
| Unsalted Butter 🧈 | 2 tbsp | For finishing sauce |
| Lemon Juice 🍋 | 1 tbsp | Freshly squeezed |
The chicken thighs are the star here. Bone-in, skin-on delivers unmatched flavor and texture—boneless versions dry out under pressure. Most grocery stores carry them pre-packaged, but Whole Foods or ButcherBox offer superior quality with better marbling. For the herbs, fresh rosemary and thyme (not dried) provide the aromatic backbone that defines this dish.
No white wine? Extra chicken stock with a splash of apple cider vinegar mimics the acidity. Dried herbs can substitute at one-third the amount, but fresh is non-negotiable for optimal results. If avoiding alcohol entirely, skip the wine and deglaze with stock—just add an extra teaspoon of lemon juice. The butter at the end can be swapped for olive oil (though the richness won’t be the same).
Leftovers keep beautifully. Store in an airtight container for up to 4 days in the fridge or freeze for 3 months. The sauce thickens as it cools, so reheat gently with a splash of stock or water to restore its velvety consistency.
Why You’ll Love This Recipe
- Dump and Go: I just toss everything in the Instant Pot—thighs, garlic, herbs, oil—and walk away.
- Herb-Infused Magic: The rosemary and thyme practically perfume the chicken while it cooks, and the garlic mellows into this sweet, savory depth.
- Feeds My Crew: Between us, this is my go-to for Sunday supper or packing into lunches for the week.
- Budget-Friendly Winner: Bone-in thighs are cheap, and one batch gives me leftovers for sandwiches or tacos the next day.
Step-by-Step Instructions for Garlic-Herb Chicken Thighs
This method delivers tender meat with rich, aromatic sauce in minimal time.
Step 1: Sear and Season the Chicken
Set your Instant Pot to the sauté function on normal heat. Add the 2 tbsp olive oil and let it heat until shimmering. Pat the 2 lb bone-in chicken thighs dry with paper towels, then season both sides evenly with the 1.5 tsp kosher salt and 1 tsp black pepper.
Working in batches to avoid crowding, place the chicken thighs skin-side down in the pot. Sear undisturbed for 4-5 minutes until the skin is deep golden brown and crisp. Flip and sear the other side for 2-3 minutes. Transfer to a plate and set aside.
Step 2: Build the Aromatic Base
In the same pot, add the finely diced 1 whole yellow onion. Sauté for 3 minutes until softened and translucent. Add the 6 cloves minced garlic cloves, 2 tbsp chopped fresh rosemary, and leaves from the 4 whole fresh thyme sprigs. Cook for 1 minute until fragrant.
Sprinkle the 2 tbsp all-purpose flour over the onion mixture and stir to coat evenly. Cook for 1 minute to remove the raw flour taste. This creates a roux that will thicken the sauce beautifully.
Step 3: Deglaze and Pressure Cook
Pour in the 0.25 cup dry white wine and scrape the bottom of the pot with a wooden spoon to release all the browned bits. Let it simmer for 2 minutes until reduced by half. Add the 0.75 cup chicken stock and stir to combine.
Return the chicken thighs to the pot, skin-side up, along with any accumulated juices. Secure the lid, set the valve to sealing, and cook on high pressure for 8 minutes. The sauce should be bubbling gently when you start the pressure cooking.
Step 4: Finish and Thicken the Sauce
Once the cooking time is complete, allow a 5-minute natural release, then quick-release the remaining pressure. Remove the lid and transfer the chicken to a serving platter.
Set the Instant Pot to sauté on low heat. Stir in the 2 tbsp unsalted butter and 1 tbsp lemon juice. Simmer for 3-4 minutes until the sauce thickens enough to coat the back of a spoon. Taste and adjust seasoning if needed.
Step 5: Serve with Pan Sauce
Pour the thickened sauce over the chicken thighs. The sauce should be rich and glossy, with visible herbs and a deep, savory aroma. The chicken should be fall-off-the-bone tender with crispy skin that holds up to the sauce.
Let the dish rest for 5 minutes before serving to allow the flavors to meld. Each serving should have a generous portion of sauce spooned over the chicken. This dish pairs excellently with mashed potatoes or crusty bread to soak up the sauce.
Pro Tips For Making Instapot Chicken Thigh
- Sear First, Always: Brown the chicken thighs in the Instant Pot on saute mode before pressure cooking—I learned this the hard way when my first batch came out pale and flavorless.
- Pat Dry the Thighs: Use paper towels to dry the chicken thoroughly before searing; it’s the only way to get that golden crust instead of a sad, steamed look.
- Skip the Overcrowding: Resist the urge to cram all the thighs in at once—cook in batches if needed, or they’ll steam instead of sear.
- Bruise the Herbs: Lightly crush the rosemary and thyme sprigs with the flat of your knife before adding them; it releases way more aroma into the dish.
Dietary Considerations for This Dish
Gluten-Free Option
Swap the 2 tbsp all-purpose flour for 2 tbsp cornstarch mixed with 2 tbsp water to create a slurry. Add it during the final 3-4 minutes of thickening. The sauce will be just as silky without gluten.
Dairy-Free Adaptation
Replace the 2 tbsp unsalted butter with 2 tbsp olive oil or vegan butter. The richness remains, and the sauce still clings beautifully to the chicken. I’ve tested this with Miyoko’s brand with great results.
Keto-Friendly Version
Skip the flour entirely and thicken the sauce with 1 tsp xanthan gum whisked into 1 tbsp cold water. Add it during the final simmer. Each serving stays under 5g net carbs while keeping all the flavor. 💪
Low-Sodium Adjustments
Use low-sodium chicken stock and reduce added salt to ½ tsp kosher salt. Boost flavor with extra herbs—add 1 tsp dried oregano or 1 tbsp fresh parsley at the end. The dish remains just as aromatic.
Paleo Modifications
Omit the flour and wine, using arrowroot powder for thickening instead. Deglaze with extra stock and a splash of apple cider vinegar. The result is just as rich and savory, fully compliant with paleo guidelines.
Allergy Considerations
For garlic allergies, swap the 6 cloves garlic for 1 tbsp asafoetida powder (hing). It provides a similar depth without the alliums. Always check labels on stock and wine for hidden allergens. ✨
Nutrition Facts
Frequently Asked Questions
Can I use boneless thighs instead?
Yes, but reduce pressure time to 6 minutes as they cook faster. Bone-in stays juicier, though.
Why sear the chicken first?
Searing builds a flavor foundation and renders fat for crispier skin. Skip this, and your sauce may taste flat.
How do I avoid the burn notice?
Always deglaze thoroughly after searing. Add at least ½ cup liquid before pressure cooking.
What if my sauce is too thin?
Simmer uncovered on sauté mode for 2-3 extra minutes. A cornstarch slurry works too.

- Jollof Rice Sauce Recipe: West African Tomato and Spice Infusion - September 25, 2026
- Japanese Rice Soup Recipe: Umami-Rich Comfort in a Bowl - September 25, 2026
- Homemade Cream Of Rice Recipe: Silk-Smooth Breakfast in Minutes - September 25, 2026