
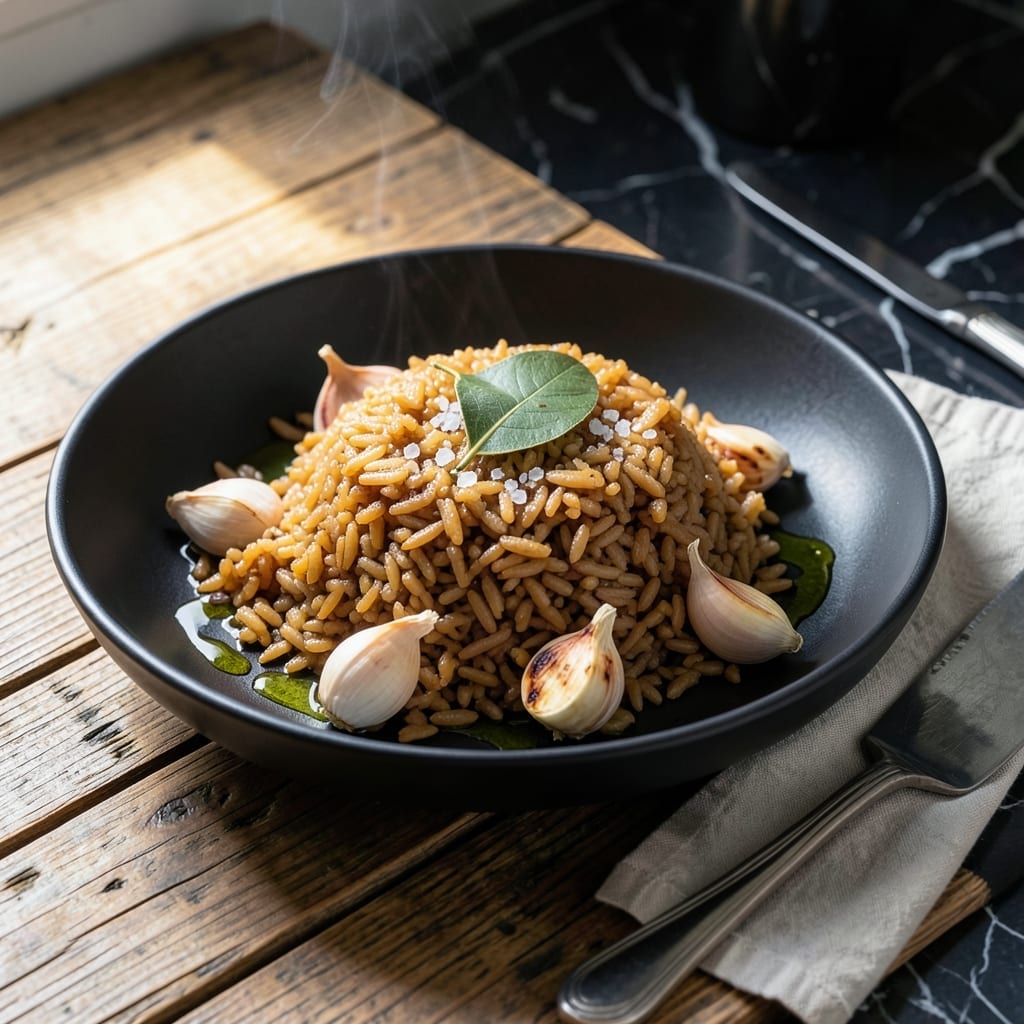
Achieving perfectly fluffy integral rice with that signature nutty depth requires one simple but precise approach. This whole grain demands a bit more attention than white rice, but the reward is worth every minute.
The key lies in the proper water-to-rice ratio and cooking time. Unlike refined grains, integral rice retains its bran layer, which means it absorbs liquid differently and needs a longer simmer to soften completely.
What emerges from the pot is a batch of grains that are tender yet distinct, with a subtle chew and a rich, toasty flavor that pairs beautifully with any main course. The texture stays separate and light, never mushy.
Master this technique, and you’ll have a reliable side dish that elevates simple meals to something special. The process is straightforward once you understand the fundamentals.
Ingredients for Integral Rice
Simple whole grain goodness with just a handful of kitchen staples you already have.
| Ingredient | Amount | Notes |
|---|---|---|
| Integral Rice 🌾 | 2 cups | Rinsed until water runs clear |
| Water 💧 | 4 ½ cups | Filtered or spring preferred |
| Olive Oil 🫒 | 1 tbsp | Extra-virgin or light |
| Sea Salt 🧂 | ½ tsp | Fine grain preferred |
| Bay Leaf 🍃 | 1 whole | Optional for aromatics |
| Garlic Cloves 🧄 | 2 cloves | Smashed, optional flavor boost |
| Fresh Parsley 🌿 | ¼ cup | Chopped, for garnish |
| Lemon Wedges 🍋 | 4 pieces | For serving brightness |
| Vegetable Broth 🥕 | ½ cup | Low-sodium, optional for cooking |
| Ground Black Pepper 🌶️ | ¼ tsp | Freshly cracked preferred |
The rice is the star here—look for integral (brown) rice with the bran layer intact, not parboiled or instant. Most grocery stores carry it in the bulk section or near regular rice. I like Lundberg Family Farms or Trader Joe’s organic for consistent quality. The bran gives that signature nutty flavor, so avoid pre-cooked or minute rice (they lack the depth).
No integral rice? Long-grain brown rice works the same. Short on time? Soak the rice for 30 minutes before cooking to speed things up. Bay leaf is optional but adds subtle complexity—dried thyme works too. Vegetable broth boosts flavor, but water is totally fine. The parsley and lemon? Just for finishing—skip if you’re serving it plain.
Uncooked integral rice keeps in a cool, dark place for 6-12 months. Cooked? Store in the fridge for 4-5 days or freeze for 3 months. Reheats well with a splash of water to fluff it back up.
Why You’ll Love This Recipe
- One Pot Wonder: I just toss the rice, water, olive oil, and bay leaf in a pot and let it simmer—no babysitting required.
- Earthy Aroma: The bay leaf infuses the rice with this subtle, warm depth that makes every bite feel intentional.
- Meal Prep Hero: I make a big batch on Sunday and it pairs perfectly with everything from roasted veggies to grilled chicken all week.
- Pennywise Staple: A pound of integral rice costs next to nothing and stretches into multiple meals without sacrificing flavor.
Step-by-Step Instructions for Integral Rice
Here’s my method for achieving that perfect balance of nutty flavor and fluffy texture every time.
Step 1: Rinse and Prepare the Integral Rice
Place the 2 cups Integral Rice in a fine-mesh strainer and rinse under cold water until the water runs completely clear. This removes excess starch and prevents the grains from becoming gummy during cooking.
I always give it a good shake in the strainer to make sure all the water drains off. You want the rice as dry as possible before it hits the pot—this ensures even cooking and prevents a mushy result.
Step 2: Sauté Aromatics for Depth of Flavor
In a medium pot with a tight-fitting lid, heat the 1 tbsp Olive Oil over medium heat. Add the 2 cloves Garlic Cloves (smashed) and the 1 whole Bay Leaf, sautéing for 30-45 seconds until the garlic is fragrant but not browned.
Here’s the thing—this quick step infuses the oil with incredible aroma that permeates every grain. If you’re using the 0.5 cup Vegetable Broth, add it now and let it simmer for 1 minute to meld the flavors before adding the rice.
Step 3: Toast the Rice for Nutty Complexity
Add the rinsed 2 cups Integral Rice to the pot, stirring to coat the grains in the aromatic oil. Toast for 2-3 minutes, stirring constantly, until the rice turns slightly translucent at the edges and smells nutty.
You’ll notice the grains start to make a gentle clicking sound against the pot—that’s your cue they’re properly toasted. This step is non-negotiable for that deep, toasty flavor that makes integral rice special.
Step 4: Cook with Precise Liquid Ratio
Pour in the 4.5 cups Water and add the 0.5 tsp Sea Salt and 0.25 tsp Ground Black Pepper. Stir once to distribute the rice evenly, then bring to a boil over high heat.
Once boiling, immediately reduce the heat to low, cover with the lid, and simmer undisturbed for 40-45 minutes. Don’t peek—steam is your friend here, and lifting the lid releases it, which can lead to uneven cooking.
Step 5: Rest and Fluff for Perfect Texture
After the cooking time, turn off the heat and let the rice rest, covered, for 10 minutes. This final step allows the grains to absorb any remaining liquid and steam to finish the cooking process.
Remove the Bay Leaf and Garlic Cloves, then fluff the rice gently with a fork. The grains should be separate, tender, and have that signature nutty aroma. Garnish with the 0.25 cup Fresh Parsley and serve with Lemon Wedges for a bright finish.
Pro Tips For Making Integral Rice
- Soak the Rice First: I learned this the hard way—rinsing integral rice then soaking it for 20 minutes cuts the cooking time and guarantees even tenderness. Sounds tedious, but it actually changes the outcome.
- Use Double Water: Integral rice is thirstier than white—go with a 1:2 rice-to-water ratio (or even 1:2.5) to prevent dry, crunchy bits at the bottom of the pot.
- Skip the Stirring: Resist the urge to stir while it simmers; you’ll break the grains and turn your rice mushy. Just let it be until the water’s fully absorbed.
- Toast with Oil: Heat the rice in olive oil for 1-2 minutes before adding water—it adds a nutty depth that plain boiled rice just doesn’t have. My grandmother swore by this, and she was right.
Essential Equipment for This Recipe
Essential Pot
I always use a heavy-bottomed pot with a tight-fitting lid for even heat distribution. My go-to is a 3-quart stainless steel saucepan from All-Clad—it conducts heat beautifully and the clear lid lets me monitor without lifting. A Dutch oven works too if you’re making a larger batch.
Fine-Mesh Strainer
Rinsing integral rice properly requires a fine-mesh strainer to catch all the grains while letting water flow through. I prefer the OXO Good Grips model—it’s sturdy, doesn’t rust, and the handles make it easy to shake dry. Avoid colanders with large holes that let rice slip through. 💫
Wooden Spoon
A wooden spoon is ideal for stirring during toasting and fluffing after cooking. It won’t scratch your pot like metal, and the flat surface helps distribute grains evenly. I keep a 12-inch bamboo spoon dedicated to my rice cooking—it reaches all corners of the pot.
Digital Timer
Precise timing is crucial for perfectly cooked integral rice. I use a digital kitchen timer with multiple settings to track both the 40-45 minute cooking time and the 10-minute resting period. The ThermoWorks TimeStack is my favorite for its accuracy and simplicity.
Fork for Fluffing
After resting, a regular dinner fork is your best tool for fluffing. The tines separate the grains without crushing them like a spoon might. I use a stainless steel fork with a comfortable handle—it glides through the rice effortlessly. 💡
Tight-Fitting Lid
Steam is your secret weapon for fluffy integral rice. A tight-fitting lid traps it inside the pot, ensuring even cooking. If your pot lid is loose, I recommend weighing it down with a cast-iron skillet or using a silicone lid cover to seal the edges completely.
Nutrition Facts
Frequently Asked Questions
Why does it take longer to cook than white rice?
The bran layer on integral rice slows water absorption. Expect 40-45 minutes of simmering compared to white rice’s 15-20 minutes.
Can I use a rice cooker?
Use the same 2:1 rice-to-water ratio and select the brown rice setting. The cooker will handle the timing automatically.
How do I fix undercooked rice?
Add 2-3 tbsp of hot water, cover, and cook for another 5-10 minutes on low. Check for doneness before adding more liquid.
Does soaking reduce cooking time?
Yes! Soak for 30 minutes in warm water to cut cooking time by about 10 minutes. Drain before using.

- Indian Jasmine Rice Recipe: Fragrant Basmati-Free Elegance - October 19, 2026
- KFC Rizo Rice Recipe: Copycat Side Dish With Savory Spice Blend - October 19, 2026
- Jeerakasala Rice Recipe: Fragrant Cumin-Infused Kerala Delight - October 19, 2026