
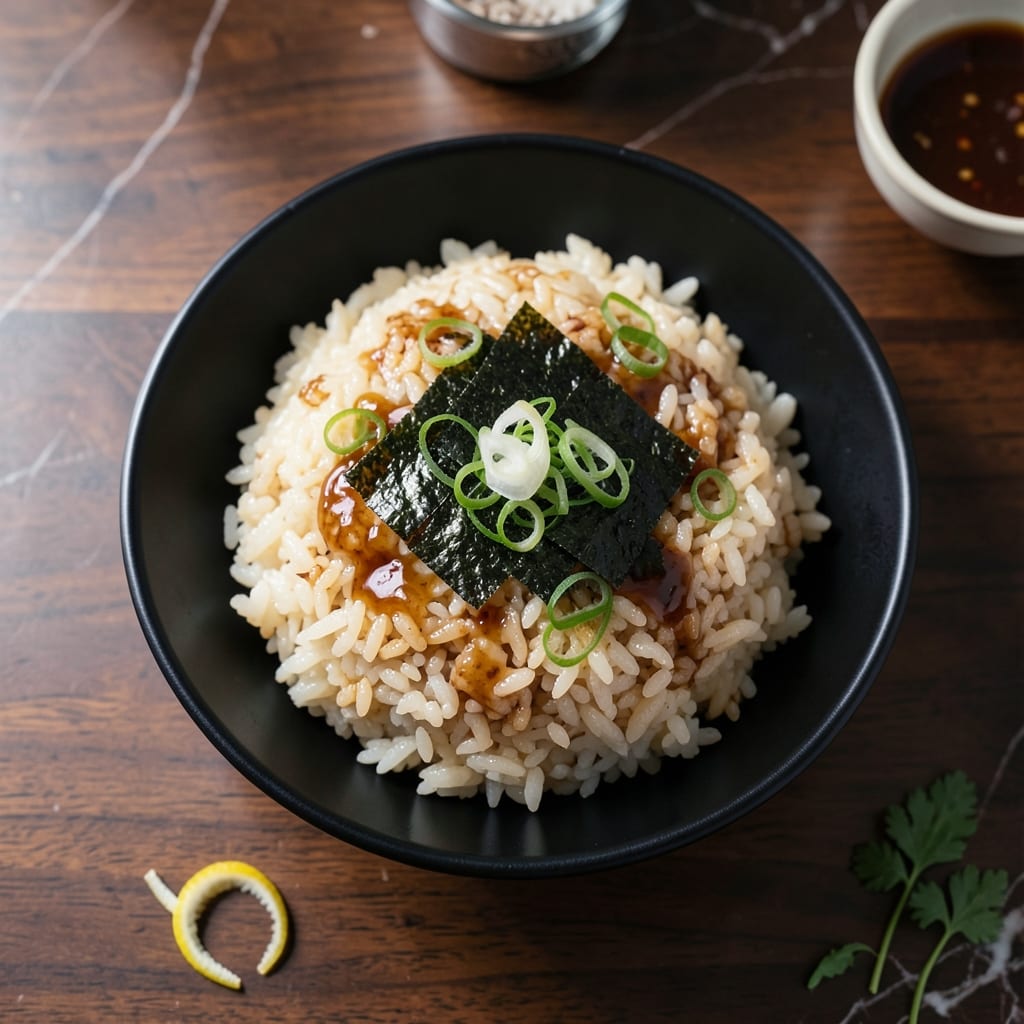
This Japanese baked rice delivers a crispy golden top layer with tender, flavorful grains underneath. The oven method transforms simple ingredients into a savory, textured masterpiece.
I developed this technique to achieve restaurant-quality results at home without special equipment. The key is proper rice preparation and precise baking temperature control for even cooking.
What emerges is a dish with contrasting textures: the bottom stays moist and fragrant, while the top develops a satisfying crunch. Each bite offers layered flavors from the seasoned rice and toppings.
The process is straightforward yet yields impressive results. Perfect for a comforting meal that feels both familiar and special.
Ingredients for Japanese Baked Rice
Transform simple rice and pantry staples into this oven-baked Japanese masterpiece with contrasting textures.
| Ingredient | Amount | Notes |
|---|---|---|
| Japanese Short-Grain Rice 🍚 | 2 cups | Rinsed until water runs clear |
| Dashi Stock 🍜 | 2 ½ cups | Homemade or instant granules |
| Soy Sauce 🥢 | 2 tbsp | Low-sodium preferred for balance |
| Mirin 🍶 | 2 tbsp | Sweet rice wine essential |
| Sake 🍶 | 1 tbsp | Dry variety recommended |
| Neutral Oil 🫒 | 1 tbsp | Vegetable or canola oil |
| Green Onions 🧅 | 4 whole | Thinly sliced for topping |
| Bonito Flakes 🐟 | 1 tbsp | Optional for umami depth |
| Sesame Seeds 🌰 | 1 tsp | Toasted for garnish |
| Nori Sheets 🍱 | 1 sheet | Cut into thin strips |
| Salt 🧂 | ½ tsp | Adjust to taste carefully |
| Sugar 🍚 | ½ tsp | Balances savory flavors |
For authentic flavor, Japanese short-grain rice is non-negotiable—Koshihikari or Nishiki brands deliver the right stickiness. Dashi stock forms the base, so use homemade if possible, though Hondashi granules (available at Asian markets or Amazon) work in a pinch. The mirin and sake should be real fermented versions, not cooking wine substitutes, for proper depth of flavor.
No mirin? Substitute 1 tbsp sugar + 1 tbsp water per tablespoon, though flavor will be less complex. Dry sherry can replace sake if needed. For vegetarian dashi, use kombu-only (simmered seaweed). The bonito flakes are optional but add smoky depth—omit for strict vegetarians. Low-sodium soy sauce prevents oversalting, as the dish reduces significantly.
Store uncooked rice in an airtight container for up to 6 months. Prepared dish keeps 3-4 days refrigerated, though the crispy top softens. Reheat in a dry skillet to restore texture, or microwave with a damp paper towel to prevent drying. Freeze portions for up to 1 month.
Why You’ll Love This Recipe
- One Pan Wonder: I just toss the rice, dashi, soy sauce, mirin, and sake into a dish and let the oven do the work—no stirring, no fuss.
- Umami Bomb: The dashi and soy sauce blend creates this deep, savory flavor that makes every bite ridiculously satisfying.
- Feeds a Crowd: I make a big batch on Sunday and we’re set for easy lunches all week—it reheats like a dream.
- Budget Stretcher: Honestly, a bag of short-grain rice and a few pantry staples turn into a filling meal that doesn’t break the bank.
Step-by-Step Instructions for Japanese Baked Rice
This method ensures a perfectly crisp top while maintaining tender, flavorful grains throughout.
Step 1: Prepare and Rinse the Rice
Begin by placing the 2 cups Japanese Short-Grain Rice in a fine-mesh strainer. Rinse under cold running water, gently swirling with your hand, until the water runs completely clear. This removes excess starch, which is crucial for achieving the right texture.
Drain the rice thoroughly, then let it sit in the strainer for 10 minutes to remove any residual water. Proper rinsing and draining prevents a gummy final product and ensures each grain remains distinct and fluffy.
Step 2: Combine Liquids and Seasonings
In a large bowl, whisk together the 2.5 cups Dashi Stock, 2 tbsp Soy Sauce, 2 tbsp Mirin, 1 tbsp Sake, 0.5 tsp Salt, and 0.5 tsp Sugar until the sugar and salt fully dissolve. The Dashi Stock provides a deep umami base, while the Mirin and Sake balance sweetness and acidity.
Pour the drained rice into the bowl and stir gently to coat every grain evenly with the liquid mixture. Let it soak for 20 minutes to allow the rice to absorb some of the flavors before baking.
Step 3: Transfer to Baking Dish and Add Oil
Preheat your oven to 375°F. Lightly grease a 9×13-inch baking dish or similar oven-safe dish with 1 tbsp Neutral Oil, ensuring the bottom and sides are well coated. This prevents sticking and helps create a crispy bottom layer.
Transfer the rice and liquid mixture to the baking dish, spreading it out into an even layer. Press down gently with a spatula to submerge any grains floating on the surface. This ensures even cooking and a uniform texture.
Step 4: Bake Until Crisp and Golden
Place the dish in the preheated oven on the middle rack and bake uncovered for 40 minutes. Then, increase the oven temperature to 425°F and bake for an additional 10-15 minutes until the top is golden brown and crisp.
Watch closely during the final minutes to prevent burning. The rice is done when the liquid has been fully absorbed and the top layer forms a delicate, crackly crust.
Step 5: Add Garnishes and Serve
Remove the dish from the oven and let it rest for 5 minutes. Thinly slice the 4 whole Green Onions and sprinkle them over the top along with the 1 tbsp Bonito Flakes, 1 tsp Sesame Seeds, and thin strips of 1 sheet Nori Sheets.
Use a spatula to serve, ensuring each portion includes some of the crispy top. The contrast between the tender rice and the crunchy, savory topping is what makes this dish exceptional.
Pro Tips For Making Japanese Baked Rice
- Soak the Rice: Rinse your short-grain rice until the water runs clear, then soak it in cold water for 30 minutes—this removes excess starch and guarantees that perfect sticky texture baked rice needs.
- Warm the Dashi: Use dashi that’s warm, not cold, when mixing with the rice; cold stock slows down the absorption and can leave the grains unevenly cooked.
- Cover Tightly: Seal the baking dish with foil before baking to trap steam—otherwise, the top dries out while the bottom stays soggy.
- Rest Before Serving: Let the baked rice sit covered for 10 minutes after it comes out of the oven; it finishes absorbing the flavors and firms up just enough to hold its shape.
Flavor Customization for This Recipe
Umami Boost Options
Swap 1 tbsp bonito flakes for 1 tbsp dried shiitake mushroom powder for a vegetarian umami punch. The mushrooms add depth without fish. I also love adding 1 tsp grated ginger to the liquid mix before baking for warmth. 💡
Spicy Twist
Mix 1 tsp sriracha or ½ tsp gochujang into the liquid before baking for subtle heat. Top with ½ tsp chili oil after baking for extra kick. The sweetness of mirin balances the spice beautifully.
Vegetable Add-Ins
Fold in ½ cup diced carrots or ¼ cup peas after the 20-minute soak. For heartiness, add ½ cup cubed tofu or ¼ cup corn kernels. These mix-ins bake right into the rice.
Cheesy Variation
Sprinkle ½ cup shredded mozzarella over the top during the final 10-15 minutes of baking for a golden melt. This fusion style creates a comforting, kid-friendly version while keeping the crispy texture.
Herb Infusions
Add 1 tsp furikake seasoning to the garnish mix for extra flavor. Or, stir 1 tbsp chopped cilantro into the green onions before topping. Fresh herbs brighten each bite of the savory rice. ✨
Savory Protein Toppings
After baking, top with a soft-boiled egg or ¼ cup cooked ground chicken. For seafood lovers, 2 tbsp cooked salmon flakes add luxury. These toppings turn the dish into a full meal.
Nutrition Facts
Frequently Asked Questions
Can I use long-grain rice instead?
No, Japanese short-grain rice is essential for the right sticky texture. Long-grain varieties won’t achieve the same chewy consistency.
Why is my top not crispy?
Bake uncovered at 425°F for the final 10-15 minutes. If your oven runs cool, extend this time slightly. Also, ensure the rice is spread evenly in the dish.
Can I make this in a rice cooker?
Not for the crispy top effect. A rice cooker will produce tender rice but won’t create the signature golden crust. The oven’s dry heat is key.
How do I store leftovers?
Keep in an airtight container for 3-4 days. To revive, reheat in a dry skillet to restore the crispy texture.

- Mujadara Rice and Lentils Recipe: Earthy Spiced Lentils With Caramelized Onions - November 1, 2026
- Naija Fried Rice Recipe: Street-Style Spice With Veggie Crunch - November 1, 2026
- Mushy Rice Recipe: Fluffy Grains Transformed in Minutes - November 1, 2026