
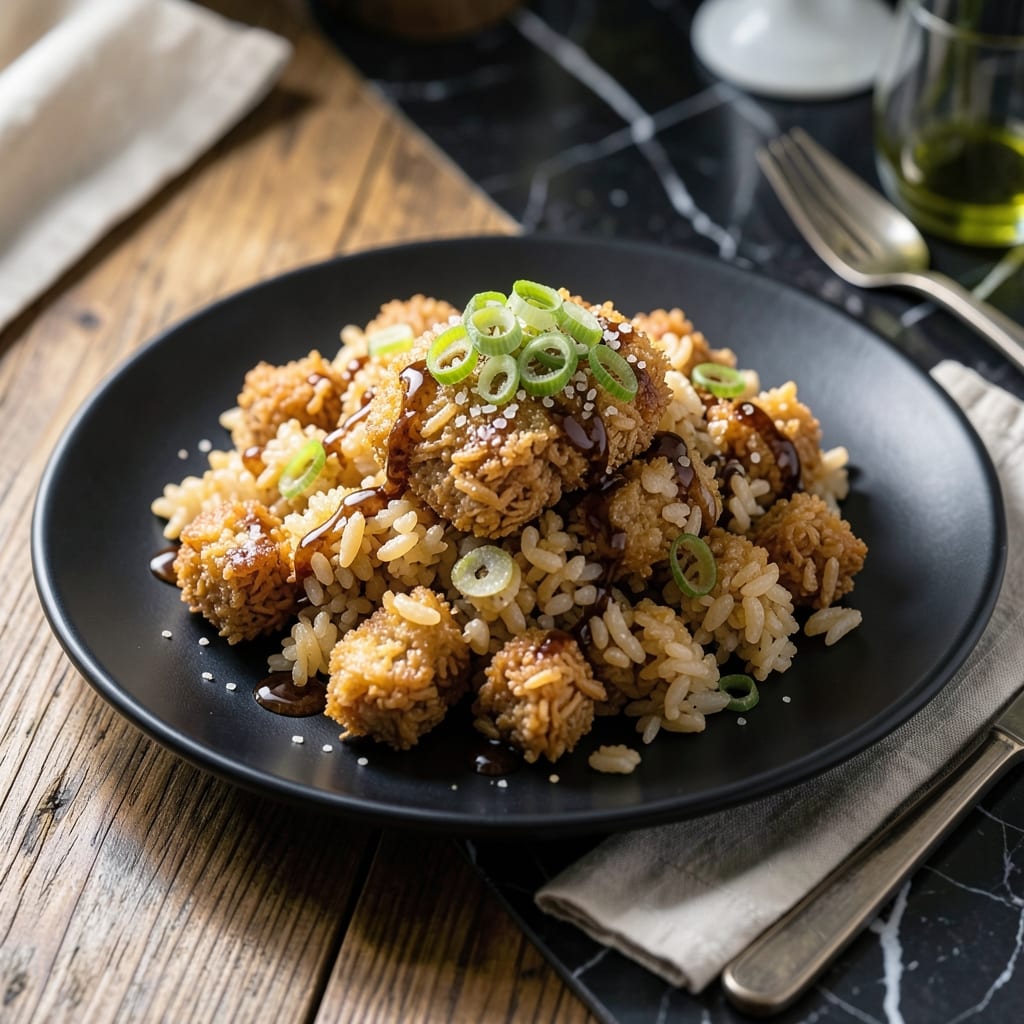
There’s something magical about achieving that perfect golden crust on Japanese-style crispy rice, a texture that transforms simple ingredients into something extraordinary. This method delivers consistent results every time.
The secret lies in using day-old rice and pressing it firmly before cooking. This creates the ideal surface for achieving that coveted crispness without burning. The technique is simple but requires attention to detail.
What emerges is a dish with a shatteringly crispy exterior and a warm, slightly chewy center. The nutty depth comes from the rice’s natural starches caramelizing during cooking.
Serve as a base for proteins or vegetables, or enjoy it plain with a drizzle of soy sauce. The possibilities are endless with this versatile technique.
Ingredients for Japanese Crispy Rice
Day-old rice and a handful of pantry staples create this crispy, nutty Japanese classic.
| Ingredient | Amount | Notes |
|---|---|---|
| Day-Old Cooked White Rice 🍚 | 4 cups | Short-grain preferred for stickiness |
| Neutral Oil 🛢️ | 2 tbsp | High smoke point like vegetable or canola |
| Soy Sauce 🫒 | 2 tbsp | Low-sodium for controlled seasoning |
| Sesame Oil 🫒 | 1 tsp | Toasted variety for depth |
| Rice Vinegar 🍯 | 1 tbsp | Seasoned or unseasoned |
| Granulated Sugar 🍚 | 1 tsp | Balances soy sauce saltiness |
| Green Onions 🧅 | 3 whole | Thinly sliced for garnish |
| Sesame Seeds 🌰 | 1 tbsp | Toasted for garnish |
| Nori Sheets 🍣 | 2 sheets | Cut into thin strips |
| Bonito Flakes 🐟 | ¼ cup | Optional for umami garnish |
| Mayonnaise 🥚 | 2 tbsp | For serving, Kewpie preferred |
| Sriracha 🌶️ | 1 tbsp | For serving, adjust to taste |
The rice is everything here. Short-grain white rice like Koshihikari or Calrose delivers the ideal sticky texture for pressing and crisping. Day-old is non-negotiable—fresh rice won’t hold its shape. Whole Foods and Asian markets carry the best short-grain varieties. Press firmly into the pan to create even contact for that golden crust.
No short-grain rice? Sushi rice works perfectly. Out of soy sauce? Tamari at a 1:1 ratio is a great substitute. The sesame oil adds depth but can be skipped in a pinch (toasted vegetable oil works). For garnish, fresh cilantro can replace green onions if you prefer that herb’s bright flavor.
Press and cook the rice mixture within 24 hours of making for best texture. Leftovers? Store in an airtight container for up to 3 days—re-crisp in a hot pan. The garnishes keep separately: nori stays fresh for 1 week sealed, bonito flakes last 6 months in the pantry.
Why You’ll Love This Recipe
- One Pan Wonder: I just toss day-old rice with a splash of oil and let the pan do the work—no fancy techniques.
- Umami Bomb: That hit of soy sauce and sesame oil makes every bite ridiculously good.
- Weeknight Hero: I’ve served this as a side, a base for bowls, even a snack straight from the pan.
- Zero Waste: Between us, it’s my favorite way to use up leftover rice before it goes to waste.
Step-by-Step Instructions for Japanese Crispy Rice
This method transforms leftover rice into golden, nutty clusters with perfect texture every time.
Step 1: Prepare the Rice Base for Maximum Crispiness
Begin by breaking up the 4 cups Day-Old Cooked White Rice with your hands or a fork to separate the grains. Day-old rice works best because it’s drier, which ensures it crisps rather than steams in the pan. I always use short-grain rice for its sticky quality, which helps the clusters hold together.
Heat 2 tbsp Neutral Oil in a large non-stick skillet over medium-high heat. The oil should shimmer but not smoke. Add the rice, pressing it down firmly with a spatula to create an even layer. This contact is crucial for developing that coveted golden crust.
Step 2: Create the Crispy Crust with Strategic Seasoning
Drizzle the 2 tbsp Soy Sauce, 1 tsp Sesame Oil, 1 tbsp Rice Vinegar, and 1 tsp Granulated Sugar evenly over the rice. The vinegar and sugar balance the saltiness of the soy sauce while adding subtle sweetness. Avoid stirring—this would disrupt the crisping process.
Cook undisturbed for 8-10 minutes until the bottom develops a deep golden brown crust. You’ll hear a gentle sizzle and smell a nutty aroma when it’s ready. Resist the urge to peek too early; the crust needs time to form properly.
Step 3: Flip and Finish for Even Crispiness
Carefully flip sections of the rice using a thin spatula, allowing the uncrisped side to contact the hot pan. Press down gently with the spatula to ensure even browning. Cook for another 5-7 minutes until this side is equally golden and crisp.
If any pieces seem undercooked, leave them in the pan a bit longer. The goal is uniform crispiness throughout, with each grain coated in the savory-sweet glaze from the seasonings.
Step 4: Garnish and Serve with Authentic Toppings
Transfer the crispy rice to a serving platter. Immediately garnish with the 3 whole Green Onions (thinly sliced), 1 tbsp Sesame Seeds, and 2 sheets Nori Sheets (cut into thin strips). The residual heat will lightly toast the sesame seeds and nori, enhancing their flavors.
For serving, offer the 0.25 cup Bonito Flakes, 2 tbsp Mayonnaise, and 1 tbsp Sriracha on the side. I prefer to mix the mayonnaise and sriracha together for a creamy, spicy drizzle that complements the nutty rice perfectly.
Pro Tips For Making Japanese Crispy Rice
- Use Cold Rice: I learned this the hard way—fresh rice turns to mush. Day-old, refrigerated white rice has the right dry texture to get that golden, crispy crust.
- High Heat First: Crank the pan to medium-high before adding the oil, then keep it hot. The rice needs that initial sear to crisp up properly.
- Press It Down: Once the rice is in the pan, press it firmly with a spatula and resist the urge to stir for at least 3-4 minutes. This guarantees an even, crunchy layer.
- Finish with Vinegar: A quick drizzle of rice vinegar at the end brightens all the flavors—sounds simple, but it actually changes the outcome.
Flavor Customization for This japanese crispy rice
Sweet & Tangy Glaze
Swap the rice vinegar for mirin and add 1 tbsp honey to the soy mixture for a sweeter, glossier finish. The mirin adds depth while the honey enhances caramelization. I love how this version pairs with grilled proteins. 💛
Spicy Sriracha Kick
Mix 1 tbsp sriracha directly into the soy sauce before drizzling over the rice. This creates a spicy-savory crust that’s irresistible. For extra heat, sprinkle ½ tsp red pepper flakes while cooking.
Umami Bomb Boost
Add 1 tsp miso paste to the soy sauce and sesame oil mixture for a deeper umami flavor. White miso blends in smoothly, while red miso adds a bolder, funkier note. Stir well to dissolve completely before drizzling.
Citrus Zing Twist
Finish with a squeeze of lime juice and a sprinkle of zest after cooking. The citrus brightens the rich, nutty flavors and cuts through the oil. About 1 lime provides the perfect balance for 4 cups rice. ✨
Herb Freshness
Swap green onions for cilantro or Thai basil for a fresh, aromatic garnish. Cilantro adds a citrusy note, while Thai basil brings an anise-like flavor. Chop finely and sprinkle just before serving.
Creamy Drizzle
Combine 2 tbsp Kewpie mayonnaise with ½ tsp garlic powder for a garlicky drizzle. Thin with a splash of rice vinegar if needed. Drizzle over the crispy rice just before serving for a rich, tangy contrast.
Nutrition Facts
Frequently Asked Questions
Can I use fresh rice instead of day-old?
Fresh rice contains too much moisture and will steam rather than crisp. For best results, use rice that’s been refrigerated overnight. In a pinch, spread freshly cooked rice on a tray and refrigerate for 2-3 hours to dry it out.
What’s the best pan for crispy rice?
A heavy-bottomed non-stick or cast iron skillet works best. These distribute heat evenly and prevent sticking. Avoid thin pans—they can cause uneven browning.
How do I prevent the rice from sticking?
Use enough oil to coat the pan well and press the rice firmly into an even layer. Wait until you see a golden crust forming before attempting to flip. Premature flipping is the most common cause of sticking.

- Mujadara Rice and Lentils Recipe: Earthy Spiced Lentils With Caramelized Onions - November 1, 2026
- Naija Fried Rice Recipe: Street-Style Spice With Veggie Crunch - November 1, 2026
- Mushy Rice Recipe: Fluffy Grains Transformed in Minutes - November 1, 2026