
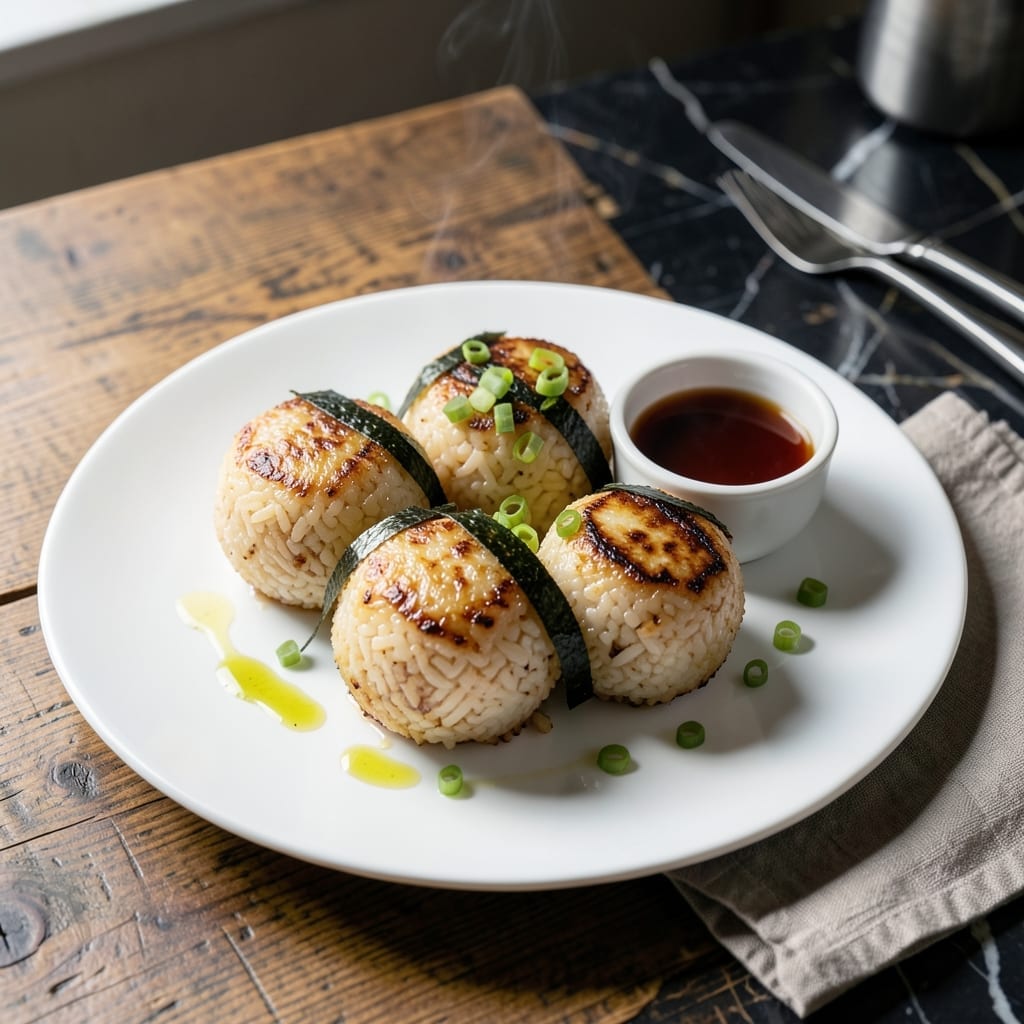
I first encountered these at a coastal cooking class, where the instructor demonstrated how simple rice could transform with fire. The contrast of crispy exterior and soft interior is what makes this dish unforgettable.
This method uses short-grain rice shaped into balls, then grilled until golden. The key is keeping the rice moist while achieving that signature char. Traditional versions often include a salted filling, though modern twists work beautifully too.
What emerges from the grill is a perfect balance: the outside develops a satisfying crunch while the center remains tender and slightly sticky. The smoky aroma from the fire adds depth you can’t replicate indoors.
Serve these warm, straight from the grill, for the full experience. The technique is straightforward, but timing is everything.
Ingredients for Japanese Grilled Rice Balls
Simple pantry staples transform into these smoky, crispy-edged delights with a tender center.
| Ingredient | Amount | Notes |
|---|---|---|
| Short-Grain Rice 🍚 | 2 cups | Rinsed until water runs clear |
| Water 💧 | 2 ½ cups | For cooking rice |
| Kosher Salt 🧂 | 1 tsp | Divided for rice and filling |
| Rice Vinegar 🍶 | 1 tbsp | For seasoning rice |
| Neutral Oil 🫒 | 1 tbsp | For coating hands and grill |
| Soy Sauce 🥢 | 1 tbsp | For brushing finished balls |
| Sesame Seeds 🌰 | 2 tsp | Toasted, for garnish |
| Nori Sheets 🍱 | 2 sheets | Cut into strips for filling |
| Scallions 🧅 | 2 whole | Thinly sliced, for filling |
| Pickled Plum (Umeboshi) 🍑 | 2 pieces | Pitted, for traditional filling |
| Mirin 🍯 | 1 tsp | Optional for sweetness |
| Dashi Powder 🍲 | ½ tsp | Optional for umami depth |
The rice is everything here. Short-grain Japanese rice like Koshihikari or Calrose gives you that signature sticky texture essential for holding shape on the grill. Find it at Asian markets or the international aisle of Whole Foods. Rinse until the water runs clear—this removes excess starch and prevents gummy rice. For the filling, umeboshi (pickled plum) adds that authentic salty-sour punch, but it’s often sold in small jars.
No umeboshi? Pickled ginger or a pinch of salted lemon zest works in a pinch. Swap scallions for chives or green onion greens. Skip the nori if unavailable—the salted filling still shines. For extra richness, mix a little miso paste into the rice. The mirin and dashi are optional but add depth. If using, Mitsukan mirin and Hondashi powder are reliable brands.
Cooked rice keeps 2-3 days refrigerated, but shape and grill fresh for best texture. Assembled balls can wait 1 hour before grilling (cover with damp towel). Leftovers? Reheat on a dry skillet to revive the crisp. Always use medium heat—too hot and they’ll burn before cooking through.
Why You’ll Love This Recipe
- One Pan Wonder: I just mix the short-grain rice with water, shape, and grill—no fancy equipment, no mess.
- Crave-Worthy Crisp: That salty-sweet kick from rice vinegar and kosher salt with the charred edges? I could eat three in a row.
- Lunchbox MVP: Honestly, these stay perfect for days, so I pack them for picnics, work lunches, or even a quick snack.
Step-by-Step Instructions for Japanese Grilled Rice Balls
Here’s the method. Straightforward, tested, works every time.
Step 1: Cook and Season the Rice
Rinse the 2 cups Short-Grain Rice under cold water until the water runs clear, about 4-5 rinses. This removes excess starch and ensures the grains stay separate. Drain well in a fine-mesh strainer for 10 minutes.
Combine the drained rice with 2.5 cups Water in a rice cooker or heavy pot. Add ½ tsp Kosher Salt, then cook according to your rice cooker’s instructions or simmer covered for 15-20 minutes until the water is absorbed. Let it steam, covered, for another 10 minutes.
Transfer the hot rice to a wide bowl. Gently fold in the 1 tbsp Rice Vinegar, remaining ½ tsp Kosher Salt, 1 tsp Mirin, and 0.5 tsp Dashi Powder with a rice paddle. The rice should be sticky but not mushy, with a subtle gloss from the seasonings.
Step 2: Shape the Rice Balls with Filling
Wet your hands with water and rub with a bit of the 1 tbsp Neutral Oil to prevent sticking. Take about ½ cup of the warm rice and flatten it in your palm, creating a shallow well in the center.
Place a piece of Pickled Plum (Umeboshi) in the well, then add a few strips of the Nori Sheets and a pinch of thinly sliced Scallions. Fold the rice edges over the filling, enclosing it completely. Press gently to form a triangle or ball shape—don’t compact too tightly, or the filling will burst out.
Repeat with the remaining rice and fillings to make 8 rice balls. If the rice starts to stick, re-wet and re-oil your hands as needed.
Step 3: Grill to Crispy Perfection
Heat a grill pan or outdoor grill over medium-high heat. Brush lightly with some of the Neutral Oil. Place the rice balls on the grill, leaving space between each. Cook undisturbed for 3-4 minutes until the bottoms are golden brown and crispy.
Carefully flip the rice balls using a spatula—they’ll be delicate. Brush the grilled side with 1 tbsp Soy Sauce and continue grilling for another 3-4 minutes until the second side is equally crispy and deep golden. The soy sauce will caramelize slightly, adding a savory depth.
Transfer the rice balls to a serving plate. The exterior should have a satisfying crunch that gives way to soft, slightly chewy rice inside.
Step 4: Garnish and Serve
Sprinkle the 2 tsp Sesame Seeds over the grilled rice balls while they’re still hot. The seeds will toast slightly from the residual heat, enhancing their nutty aroma.
Serve immediately while the contrast between the crispy exterior and tender interior is at its peak. The pickled plum filling should provide a tangy burst that balances the smoky, savory notes from the grill. These are best enjoyed fresh off the heat.
Pro Tips For Making Japanese Grilled Rice Balls
- Use Day-Old Rice: Fresh rice is too moist and sticky—it’ll fall apart on the grill. I learned this the hard way after my first three batches turned into a mushy disaster.
- Oil Your Hands: Coat your palms with a little neutral oil before shaping the rice balls. It keeps the rice from sticking and makes the whole process way less frustrating.
- High Heat, Fast Grill: Get your grill or pan screaming hot before adding the rice balls. This gives you that crispy, golden crust without drying them out.
- Salt the Rice First: Mix the kosher salt into the cooked rice while it’s still warm, not after shaping. It distributes evenly and actually changes the flavor for the better.
Best Sauces and Condiments for This japanese grilled rice balls
Classic Soy Glaze
Brush the finished rice balls with a mix of 2 tbsp soy sauce and 1 tsp mirin for that authentic umami shine. I heat this in a small saucepan for 30 seconds to intensify the flavors. It adds a glossy sheen that’s impossible to resist. 🌟
Spicy Mayo Drizzle
Combine ¼ cup mayonnaise with 1 tbsp sriracha and 1 tsp rice vinegar. The creaminess balances the crispy exterior beautifully. I use Kewpie mayo for extra richness. Drizzle lightly—too much overpowers the rice.
Miso Butter Magic
Mix 2 tbsp softened butter with 1 tbsp white miso paste. A small dollop melts into the hot rice balls, creating pockets of savory bliss. I discovered this at a coastal food stall—it changed my grilling game forever.
Citrus Ponzu
Whisk together 3 tbsp ponzu sauce with 1 tsp yuzu juice or lime zest. The acidity cuts through the richness while brightening the smoky flavors. Serve in a small bowl for dipping.
Sweet and Spicy
Simmer 2 tbsp honey with 1 tsp chili flakes and 1 tsp soy sauce for 2 minutes. This sticky glaze adds a beautiful contrast to the salty filling. I always keep a batch in my fridge for grilling days.
Herb Garnish
A sprinkle of chopped scallions and toasted sesame seeds adds freshness and crunch. The green color pops against the golden rice balls. Always use fresh herbs for the best aroma.
Nutrition Facts
Frequently Asked Questions
Can I use leftover rice for this?
Fresh, warm rice works best for shaping and sticking together. Cold rice is too dry. If using leftovers, sprinkle with 1-2 tbsp water and microwave briefly to restore moisture.
What if the rice balls fall apart on the grill?
Press the rice more firmly when shaping and chill shaped balls for 15 minutes before grilling. Also, ensure your grill is well-oiled and at medium-high heat to prevent sticking.
Can I bake these instead of grilling?
Yes! Bake at 400°F for 15-20 minutes, flipping halfway. Brush with soy sauce after baking for similar flavor, though the texture won’t be as crispy.

- Mujadara Rice and Lentils Recipe: Earthy Spiced Lentils With Caramelized Onions - November 1, 2026
- Naija Fried Rice Recipe: Street-Style Spice With Veggie Crunch - November 1, 2026
- Mushy Rice Recipe: Fluffy Grains Transformed in Minutes - November 1, 2026