
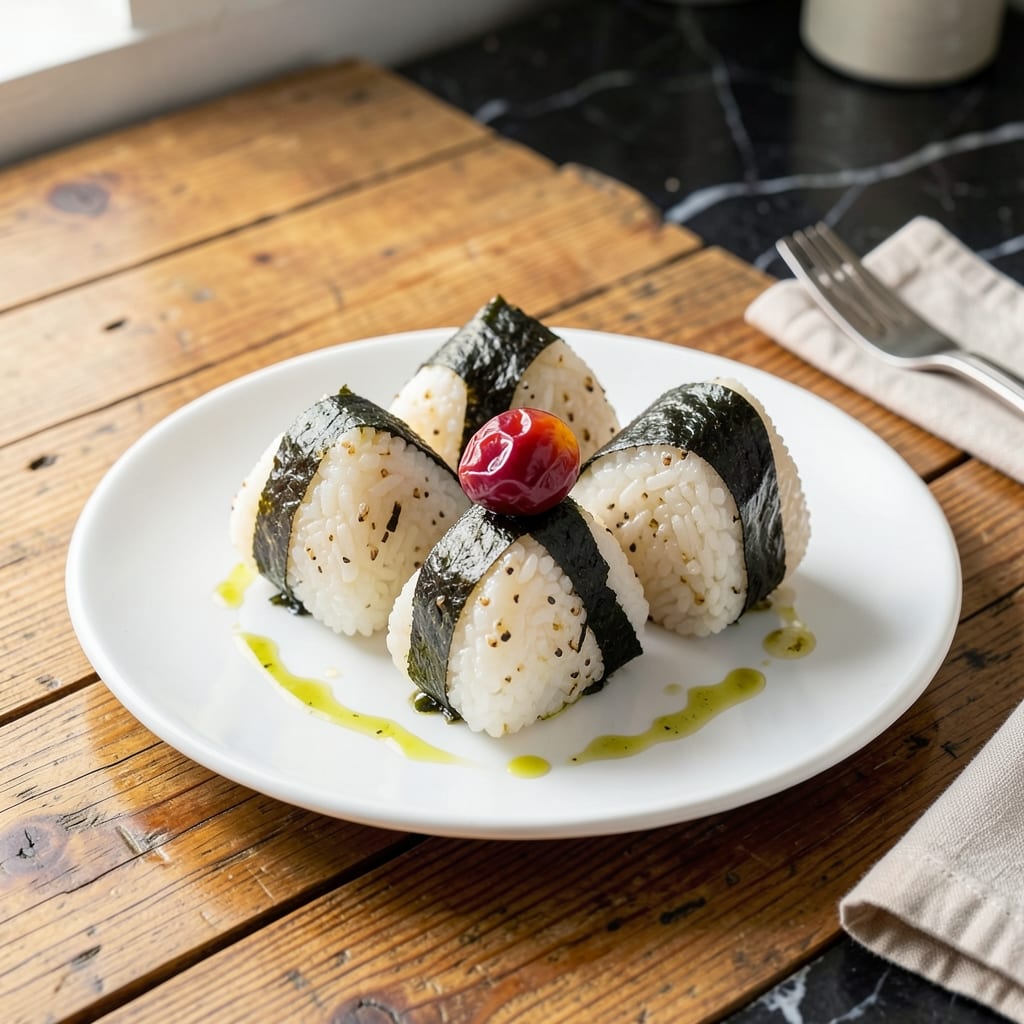
Mastering onigiri begins with perfect sushi rice, seasoned just right with rice vinegar, sugar, and salt. The texture should be sticky enough to hold its shape yet tender when bitten into.
Shaping these triangle bites takes practice but becomes second nature. Wet your hands with salted water to prevent sticking while forming the rice into its classic triangular form.
Traditional fillings like pickled plum or salted salmon elevate the flavor, but these work beautifully plain as well. The rice itself carries enough subtle seasoning to satisfy.
This method delivers authentic results every time. Serve warm or at room temperature for a portable, satisfying snack that captures Japanese culinary tradition.
Ingredients for Japanese Onigiri Rice
Perfect sushi rice plus subtle seasonings create these authentic Japanese triangle bites.
| Ingredient | Amount | Notes |
|---|---|---|
| Sushi Rice 🍚 | 2 cups | Rinsed until water runs clear |
| Water 💧 | 2 ½ cups | For cooking rice |
| Rice Vinegar 🍶 | 3 tbsp | For seasoning rice |
| Granulated Sugar 🍚 | 1 ½ tsp | Dissolved in vinegar |
| Salt 🧂 | 1 tsp | For seasoning rice |
| Pickled Plum 🟣 | 4 pieces | Pitted, for filling |
| Nori Seaweed Sheets 🌊 | 2 sheets | Cut into strips |
| Salt 🧂 | 1 tbsp | For salted water |
| Water 💧 | ½ cup | For wetting hands |
The rice is non-negotiable here. Short-grain sushi rice like Koshihikari or Nishiki (found at Asian markets or Whole Foods) gives you that essential stickiness. Rinse it thoroughly until the water runs clear—this removes excess starch and prevents mushiness. The rice vinegar should be seasoned rice vinegar (mild, slightly sweet) rather than plain vinegar, which can be too harsh.
No pickled plum? Salted salmon (for non-veg) or umeboshi paste works too. Tuna-mayo is a crowd-pleasing swap—just mix canned tuna with Japanese mayo. Want it vegan? Try pickled radish or cucumber for a fresh crunch. The nori strips can be skipped, but they add that classic salty contrast. If you’re using pre-cut nori strips, look for the roasted variety.
Cooked rice is best used immediately for shaping—once it cools, it loses stickiness. Store leftover rice (unseasoned) in the fridge for 2-3 days. Onigiri keep 1 day at room temp or 3 days refrigerated, wrapped tightly. Reheat by microwaving for 15-20 seconds.
Why You’ll Love This Recipe
- Five Ingredient Magic: I love that I only need sushi rice, water, vinegar, sugar, and salt to make something this satisfying.
- Sticky Perfection: The rice vinegar gives it that signature tangy kick that makes each bite just right.
- Meal Prep Hero: I pack these for lunches all week—they hold their shape and taste fresh for days.
- Pocket Change Friendly: A bag of sushi rice and pantry staples stretch into multiple meals without breaking the bank.
Step-by-Step Instructions for Japanese Onigiri
Master these techniques to create perfectly shaped, flavorful rice triangles with a satisfying texture.
Step 1: Prepare and Cook the Sushi Rice
Rinse the 2 cups Sushi Rice in a fine-mesh strainer under cold water until the water runs completely clear. This removes excess starch and prevents gummy rice. Drain thoroughly in the strainer for 10 minutes.
Combine the drained rice with the 2.5 cups Water in a rice cooker or heavy pot. Cook according to your rice cooker’s instructions or bring to a boil, then reduce to a simmer, cover, and cook for 15 minutes. Let it steam covered for an additional 10 minutes.
Step 2: Season the Cooked Rice
While the rice cooks, prepare the seasoning by combining the 3 tbsp Rice Vinegar, 1.5 tsp Granulated Sugar, and 1 tsp Salt in a small bowl. Stir until the sugar and salt fully dissolve—this creates a balanced sweet-salty flavor.
Transfer the hot rice to a large wooden or glass bowl. Gently fold in the vinegar mixture using a rice paddle or spatula with a cutting motion. Fan the rice while mixing to cool it quickly to room temperature. The rice should be shiny and slightly sticky with no dry spots.
Step 3: Shape the Onigiri with Fillings
Wet your hands with the 0.5 cup Water and rub a pinch of the 1 tbsp Salt between your palms. This prevents sticking and adds subtle flavor. Take a handful of rice (about ½ cup) and press it into a flat disc in your palm.
Place a piece of the 4 pieces Pickled Plum in the center of the rice. Fold the rice edges up and over the filling, enclosing it completely. Gently shape into a triangle, pressing firmly but not too tightly—you want the rice to hold its shape but remain slightly soft.
Step 4: Wrap with Nori Strips
Cut the 2 sheets Nori Seaweed Sheets into thin strips, about ½ inch wide and 4 inches long. Wrap a strip around the base of each onigiri, pressing lightly to adhere. The nori should stick to the slightly moist rice surface without additional adhesive.
Arrange the finished onigiri on a serving plate with the nori side down to maintain crispness. The triangles should hold their shape without crumbling, and the nori should wrap snugly around the base. Serve immediately or cover with a damp towel to prevent drying.
Pro Tips For Making Japanese Onigiri Rice
- Rinse the Rice: Wash the sushi rice under cold water until the water runs clear—this removes excess starch so your onigiri hold their shape instead of turning mushy.
- Heat the Vinegar Mix: Warm the rice vinegar, sugar, and salt in a small saucepan just until dissolved, then fold into the rice while it’s still hot. It distributes better and gives that classic glossy finish.
- Use Wet Hands: Keep a bowl of salted water nearby to wet your hands while shaping—prevents sticking and seasons the outside of each onigiri as you work.
- Rest Before Shaping: Let the seasoned rice sit covered for 10 minutes after mixing in the vinegar. I learned this the hard way—it firms up just enough to shape without falling apart.
Essential Equipment for japanese onigiri rice
Rice Cooker Essentials
A reliable rice cooker is non-negotiable for perfect onigiri rice. I swear by my Zojirushi 5.5-cup model—it consistently delivers fluffy, evenly cooked grains. Look for one with a keep-warm function to maintain ideal temperature while you prep other components. 💡
Wooden Tools
Use a wooden rice paddle (called a shamoji) for mixing vinegar seasoning into hot rice. The flat surface gently folds without crushing grains. I also keep a wooden bowl handy—it absorbs excess moisture and helps cool the rice faster during mixing.
Fine-Mesh Strainer
Rinsing rice properly requires a fine-mesh strainer. I use an OXO Good Grips version that fits perfectly in my sink. The fine holes prevent rice from slipping through while allowing thorough rinsing until water runs absolutely clear.
Sharp Knife & Board
For cutting nori sheets into strips, a sharp chef’s knife is essential. I recommend Shun Premier for precision. Pair it with a bamboo cutting board to prevent dulling the blade while creating clean, ½-inch wide strips.
Plastic Wrap Alternative
If you struggle with sticky hands, keep a bowl of salted water nearby and use plastic wrap to shape the rice. This method works well for beginners. Just wet the wrap, add rice and filling, then twist and press into triangles.
Serving Trays
Present your finished onigiri on a bamboo serving tray or simple white platter. The natural wood complements the traditional aesthetic. I also keep a small spray bottle of water nearby to refresh the nori strips if they dry out before serving.
Nutrition Facts
Frequently Asked Questions
What type of rice works best?
Use short-grain sushi rice like Koshihikari or Nishiki for proper stickiness. Avoid long-grain varieties as they lack the necessary cohesion to hold shape.
How do I keep rice from sticking to my hands?
Wet hands with salted water before shaping each piece. The salt prevents sticking while adding subtle flavor to the exterior.
Can I make these ahead of time?
Yes! Store unfilled rice in the fridge for 2-3 days. Shape and fill just before serving for best texture. Wrapped onigiri keep 1 day at room temp.
What if my triangles keep falling apart?
Your rice may be too dry or not sticky enough. Ensure you’re using proper sushi rice and that it’s warm when shaping. Press firmly but gently.

- Mujadara Rice and Lentils Recipe: Earthy Spiced Lentils With Caramelized Onions - November 1, 2026
- Naija Fried Rice Recipe: Street-Style Spice With Veggie Crunch - November 1, 2026
- Mushy Rice Recipe: Fluffy Grains Transformed in Minutes - November 1, 2026