
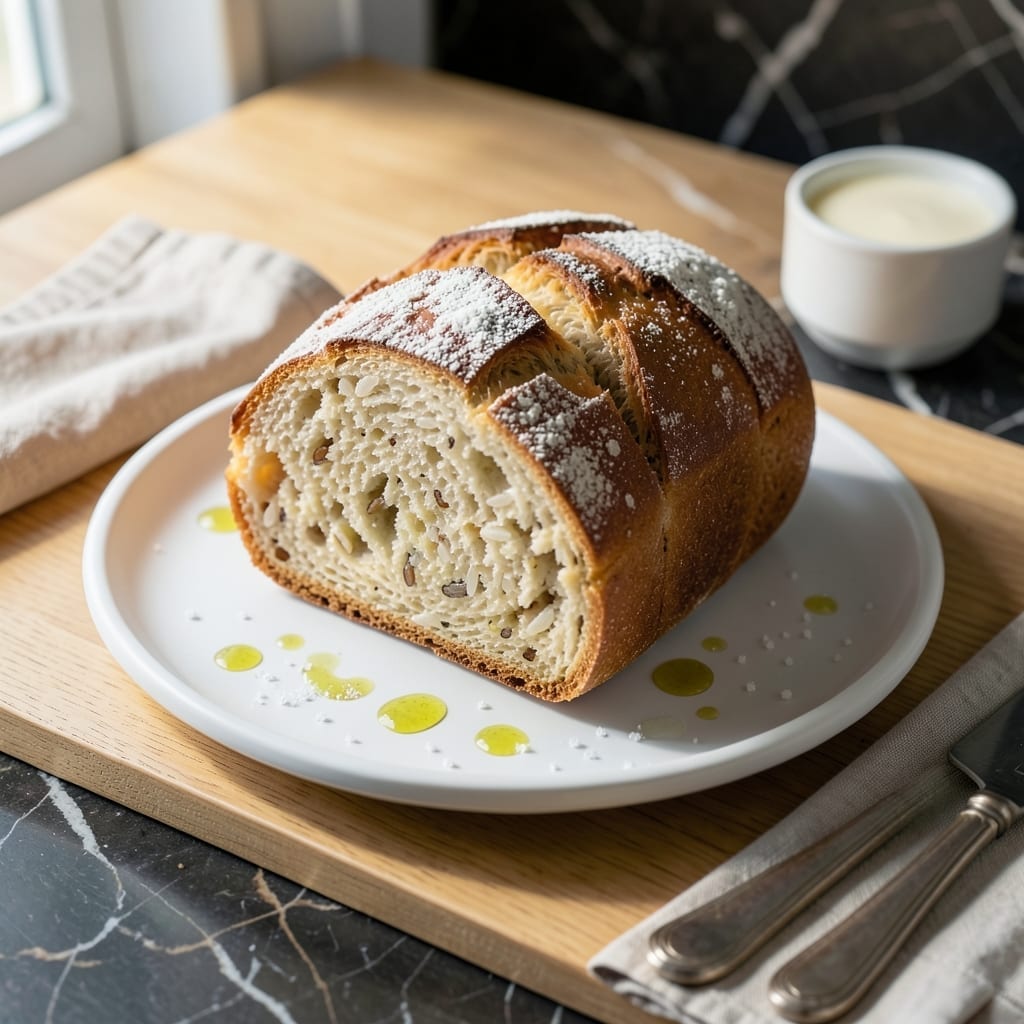
I discovered the secret to achieving that signature Japanese bread texture—soft, pillowy, and slightly sweet—by incorporating cooked rice into the dough. The result is a loaf that stays fresh for days, with a delicate crumb that melts in your mouth.
This technique transforms ordinary bread into something extraordinary, using simple ingredients and a straightforward process. The rice adds moisture and a subtle chew that sets this apart from standard sandwich bread.
What you’ll get is a golden, fluffy loaf with a tender interior and a lightly crisp crust. It’s perfect for toast, sandwiches, or simply enjoying warm with butter.
The best part? It requires no special equipment, just a little patience for the dough to rise. Here’s how to make it at home.
Ingredients for Japanese Rice Bread
Simple ingredients transform into a golden, fluffy loaf with a delicate crumb.
| Ingredient | Amount | Notes |
|---|---|---|
| Bread Flour 🌾 | 4 cups | High protein content preferred |
| Cooked White Rice 🍚 | ½ cup | Cooled to room temperature |
| Granulated Sugar 🍚 | ¼ cup | For subtle sweetness |
| Active Dry Yeast 🍞 | 2 ¼ tsp | One packet plus extra |
| Warm Water 💧 | 1 cup | 110-115°F for yeast activation |
| Whole Milk 🥛 | ¼ cup | Warmed for dough softness |
| Unsalted Butter 🧈 | 2 tbsp | Softened for richness |
| Salt 🧂 | 1 tsp | Fine sea salt preferred |
| Large Egg 🥚 | 1 whole | Room temperature for binding |
| Honey 🍯 | 1 tbsp | Optional for added sweetness |
| Neutral Oil 🫒 | 1 tsp | For greasing the bowl |
The bread flour is non-negotiable here—King Arthur or Bob’s Red Mill are my go-tos for that perfect chew. The cooked rice should be leftover white rice (the good stuff, not instant) and completely cooled. Most grocery stores carry bread flour in the baking aisle, but Whole Foods always has it in stock. Use a thermometer for the water—too hot kills the yeast, too cold won’t activate it.
No bread flour? All-purpose plus vital wheat gluten (1 tbsp per cup) gets you close. Swap milk for warm water with a splash of cream. No eggs? 1 tbsp ground flaxseed plus 3 tbsp water binds just fine. Honey can be maple syrup (but the flavor changes slightly). The butter adds richness, but coconut oil works in a pinch (don’t expect the same taste).
Dough rises best in a warm spot—turn your oven light on for a cozy proofing environment. Leftovers? Slice and freeze for up to 3 months. The rice keeps the loaf moist for days, but for maximum freshness, eat within 3-4 days.
Why You’ll Love This Recipe
- No-Fuss Mixing: The cooked white rice blends right into the dough—no fancy techniques, just stir and rise.
- Soft and Sweet: That touch of sugar and the rice give it this pillowy texture with a subtle, comforting sweetness.
- Breakfast or Snack: I make a batch Sunday and we grab slices all week, toasted or plain.
- Stretches the Groceries: Bread flour and leftover rice? Turns scraps into something my family fights over.
Step-by-Step Instructions for Japanese Rice Bread
Here’s my tested method for achieving that signature pillowy texture at home.
Step 1: Activate the Yeast and Create the Tangzhong
In a small saucepan, combine the 0.5 cup Cooked White Rice with the 1 cup Warm Water and 0.25 cup Whole Milk. Heat over medium-low heat for 3-4 minutes, stirring constantly, until the mixture reaches 149°F and thickens to the consistency of pudding.
Transfer this tangzhong to a large mixing bowl. Sprinkle the 2.25 tsp Active Dry Yeast over the surface and add the 0.25 cup Granulated Sugar, 1 tbsp Honey, and 1 whole Large Egg. Let sit for 5 minutes until the yeast becomes frothy—this confirms it’s active and ready to work its magic.
Step 2: Develop the Dough Structure
Add the 4 cups Bread Flour and 1 tsp Salt to the tangzhong mixture. Using a dough hook attachment, mix on low speed for 2 minutes until the ingredients come together into a shaggy mass. The dough will look rough and slightly sticky at this stage.
Increase the speed to medium and knead for 8-10 minutes until the dough becomes smooth and elastic. You’re looking for it to pull away from the sides of the bowl and pass the windowpane test—stretch a small piece thinly and it should be translucent without tearing.
Step 3: Incorporate the Fat and First Rise
Add the 2 tbsp Unsalted Butter, softened, one tablespoon at a time, allowing each addition to fully incorporate before adding more. Knead for another 2-3 minutes until the butter is completely worked in and the dough is silky smooth.
Shape the dough into a ball and place it in a lightly oiled bowl (use the 1 tsp Neutral Oil). Cover with a damp towel and let rise in a warm place for 1 to 1.5 hours or until doubled in volume. I like to turn my oven on to its lowest setting, then turn it off before placing the dough inside—this creates the perfect proofing environment.
Step 4: Shape and Second Rise
Gently deflate the risen dough and divide it into 4 equal portions (since this makes 4 servings). Shape each portion into a smooth ball and place them in a greased loaf pan or on a baking sheet lined with parchment. Cover again and let rise for 45-60 minutes until puffy and nearly doubled.
Preheat your oven to 350°F during the last 15 minutes of the second rise. The dough is ready when it springs back slowly when gently pressed with a finger, leaving a slight indentation.
Step 5: Bake to Golden Perfection
Bake for 25-30 minutes until the loaves are golden brown and sound hollow when tapped on the bottom. If the tops are browning too quickly, tent loosely with aluminum foil.
Remove from the oven and let cool in the pan for 5 minutes before transferring to a wire rack. Brush the tops with a little extra honey diluted in water for a beautiful shine, if desired. The bread should be soft and fluffy with a slightly sweet, milky flavor that makes it irresistible fresh from the oven.
Pro Tips For Making Japanese Rice Bread
- Check Yeast First: Always proof your active dry yeast in warm water with a pinch of sugar for 5-10 minutes until frothy—I learned this the hard way after wasting a batch when my yeast was dead.
- Cool the Rice: Use day-old or fully cooled cooked white rice, as hot rice can kill the yeast and throw off the dough’s rise.
- Knead Longer: This dough is sticky, but resist the urge to add extra flour; knead for at least 10 minutes until smooth for that signature soft texture.
- Skip Cold Water: Warm water at about 110°F activates the yeast properly—cold water slows fermentation, and too hot will kill it. A quick wrist test works: it should feel warm, not scalding.
Common Mistakes When Making japanese rice bread
Overproofing the Dough
Letting the dough rise for too long is a common pitfall. The first rise should take 1 to 1.5 hours, and the second 45-60 minutes. If your kitchen is warm, check it earlier. Overproofed dough collapses when baked, resulting in dense bread. 💡
Skipping the Tangzhong
The cooked rice and liquid mixture (tangzhong) is essential for that signature soft texture. Skipping this step or not heating it to 149°F means you’ll miss out on the moisture and tenderness that define this bread.
Using the Wrong Flour
Bread flour’s higher protein content develops the gluten needed for structure. Substituting all-purpose flour without adding vital wheat gluten (1 tbsp per cup) will yield a flatter, less chewy loaf. Stick with King Arthur or Bob’s Red Mill for best results.
Improper Yeast Activation
Water that’s too hot (above 115°F) kills the yeast, while water that’s too cold won’t activate it. Use a thermometer to ensure the water is between 110-115°F. If the yeast doesn’t foam within 5 minutes, start over with fresh yeast.
Under-kneading the Dough
Kneading for at least 8-10 minutes on medium speed is crucial. Stop too soon, and the gluten won’t develop properly, leading to a dense, tough crumb. The dough should pass the windowpane test before moving to the next step.
Baking at Wrong Temperature
Baking at 350°F ensures even cooking without burning. A hotter oven can brown the crust too quickly, leaving the inside underdone. Tent with foil if the top browns before the 25-30 minutes are up. 🔥
Nutrition Facts
Frequently Asked Questions
Can I use leftover rice from the fridge?
Yes, cold rice works perfectly! Just warm it slightly to room temperature before mixing. This actually helps create a smoother tangzhong.
Why does my bread turn out dense?
This usually means the dough didn’t rise enough. Check your yeast freshness and ensure your kitchen is warm enough for proper proofing. 1-1.5 hours is ideal for the first rise.
How do I store this bread to keep it fresh?
Store in an airtight container at room temperature for up to 4 days. For longer storage, slice and freeze for up to 3 months.
Can I make this without a stand mixer?
Knead by hand for 12-15 minutes until smooth and elastic. The windowpane test still applies – the dough should stretch thin without tearing.

- Mujadara Rice and Lentils Recipe: Earthy Spiced Lentils With Caramelized Onions - November 1, 2026
- Naija Fried Rice Recipe: Street-Style Spice With Veggie Crunch - November 1, 2026
- Mushy Rice Recipe: Fluffy Grains Transformed in Minutes - November 1, 2026