
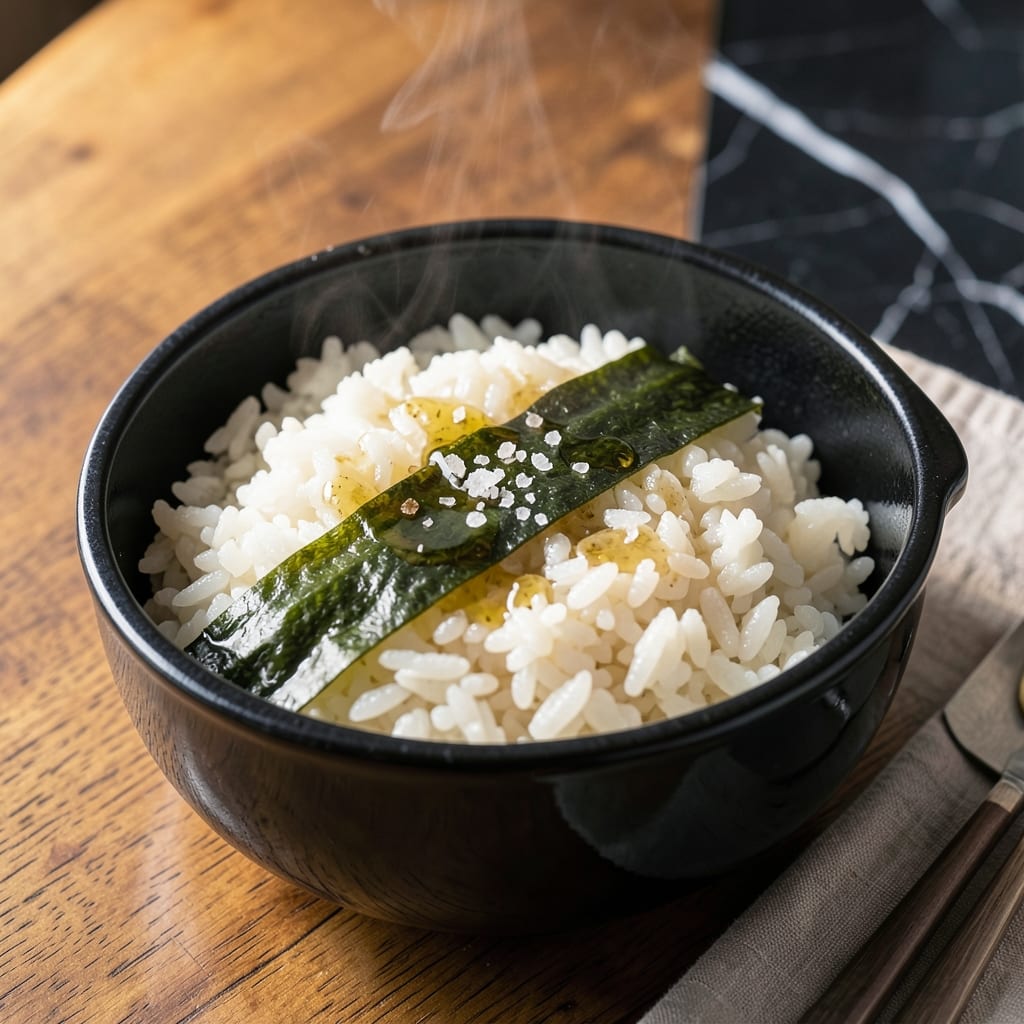
There’s an art to making perfect Japanese rice that transforms simple ingredients into something extraordinary. This traditional one-pot method delivers steamy, fragrant results every time, using just a pot, rice, and water.
The key lies in the ratio, soaking time, and precise steaming. I’ve refined this technique to achieve the ideal balance of tender, sticky grains with a subtle sweetness that defines authentic Japanese rice. No special equipment is needed—just patience and attention to detail.
What emerges is a pot of rice with a delicate texture and aroma that elevates any meal. The grains cling together just enough to pick up with chopsticks, releasing a gentle, nutty flavor with every bite. It’s the foundation of countless dishes.
Serve it alongside miso soup, grilled fish, or enjoy it plain. This method guarantees consistency, whether you’re cooking for one or a crowd.
Ingredients for Japanese Rice Pot
Minimal ingredients yield extraordinary results with this traditional one-pot method.
| Ingredient | Amount | Notes |
|---|---|---|
| Japanese Short-Grain Rice 🍚 | 2 cups | Rinsed until water runs clear |
| Water 💧 | 2 ½ cups | Filtered for best results |
| Kombu Strip 🌿 | 1 piece | 2-inch square, optional for umami |
| Sake 🍶 | 1 tbsp | Optional for enhanced aroma |
| Rice Vinegar 🍚 | 1 tsp | Optional for serving |
| Sea Salt 🧂 | ½ tsp | Fine grain, optional for serving |
| Toasted Sesame Seeds 🌰 | 1 tbsp | For garnish, optional |
| Nori Strip 🌿 | 1 sheet | Thinly sliced, for garnish |
The rice quality is non-negotiable. Japanese short-grain rice (Koshihikari or Nishiki brands) delivers the authentic sticky texture. Find these at Asian markets or the international aisle of Whole Foods. Avoid jasmine or basmati—they lack the necessary starch content. For the kombu, look for dried sheets at Japanese grocery stores (Mitsua or Marukai are reliable).
No sake? Dry white wine at half the amount works in a pinch. Skip the rice vinegar if unavailable—it’s purely for serving adjustment. The sesame seeds can be swapped for furikake seasoning (found at Trader Joe’s). For a nutty variation, toast the seeds in a dry pan before garnishing. Water quantity is critical—use exactly 1.25 cups per cup of rice.
Store uncooked rice in an airtight container in a cool, dark place for up to 6 months. Cooked rice keeps 3 days in the fridge or 1 month frozen. Reheat with a splash of water to restore moisture. Rinsing the rice before cooking removes excess starch—don’t skip this step (worth the extra minute).
Why You’ll Love This Recipe
- Set It and Forget: I toss in rice, water, and a strip of kombu, then let my rice cooker do the work—no stirring, no fuss.
- Umami Bomb: The kombu and sake infuse every grain with a deep, savory richness that plain rice just can’t match.
- Pairs With Anything: Honestly, it’s my blank canvas for everything from teriyaki chicken to a simple fried egg on top.
- Budget Stretch: A pound of short-grain rice and a few pantry staples feed my family for days, and leftovers reheat beautifully.
Step-by-Step Instructions for Japanese Rice Pot
Master this traditional method for consistently perfect, fragrant rice with minimal effort.
Step 1: Prepare the Japanese Short-Grain Rice
Place the 2 cups Japanese Short-Grain Rice in a fine-mesh strainer and rinse under cold running water. Rub the grains together gently with your fingers, changing the water 3-4 times until it runs completely clear. This removes excess starch that could make the rice gummy.
Drain thoroughly in the strainer for 10 minutes, shaking occasionally to remove all water. Properly rinsed and drained rice ensures each grain remains distinct and absorbs the cooking liquid evenly. This step is non-negotiable for authentic texture.
Step 2: Set Up the Rice Pot with Aromatics
Transfer the drained rice to a heavy pot with a tight-fitting lid. Add the 2.5 cups Water and the 1 piece Kombu Strip. The kombu adds subtle umami depth to the cooking liquid. If using, add the 1 tbsp Sake at this stage for enhanced aroma.
Let the rice soak in the water for 20-30 minutes before cooking. This soaking period allows the grains to absorb moisture gradually, ensuring even cooking. You’ll notice the grains plump slightly and the water becomes slightly cloudy—this is normal.
Step 3: Cook the Rice to Perfection
Cover the pot with the lid and bring to a boil over medium-high heat. Once boiling, reduce the heat to low and simmer for 12-15 minutes. Resist the urge to lift the lid—steam is crucial for proper cooking.
After 15 minutes, turn off the heat and let the rice steam, covered, for an additional 10 minutes. The grains should be tender with a slight bite, and the surface will have a glossy sheen. Remove the kombu strip before serving.
Step 4: Serve with Traditional Garnishes
Gently fluff the rice with a rice paddle or wooden spoon, folding from the bottom to distribute moisture evenly. For serving, drizzle with 1 tsp Rice Vinegar and sprinkle with 0.5 tsp Sea Salt if desired. These optional seasonings enhance the natural sweetness of the rice.
Garnish with 1 tbsp Toasted Sesame Seeds and thinly sliced 1 sheet Nori Strip for authentic presentation. The sesame adds nutty crunch while the nori contributes a subtle oceanic note. Serve immediately in the pot for a traditional one-pot experience.
Pro Tips For Making Japanese Rice Pot
- Soak the Rice: Give the short-grain rice a 30-minute soak before cooking—it guarantees even hydration and that sticky, tender texture you want.
- Wipe the Kombu: Quickly wipe the kombu strip with a damp cloth before adding it to remove any grit, but skip rinsing or you’ll wash away flavor.
- Skip the Peek: Resist the urge to lift the lid while the rice steams—every time you do, you lose precious heat and risk uneven cooking.
- Add Sake Last: Stir the sake into the water just before cooking, not earlier, to preserve its bright, aromatic kick in the finished rice.
Serving Suggestions for This Dish
Family-Style Presentation
Serve directly from the pot at the center of the table. I love the communal feel of everyone digging in with their own serving spoon. The tight-fitting lid keeps it warm for 30-45 minutes, perfect for relaxed family meals.
Traditional Garnishes
Just before serving, sprinkle with 1 tbsp toasted sesame seeds and thinly sliced nori. A drizzle of 1 tsp rice vinegar adds brightness. These simple touches elevate the dish to restaurant quality. 💛
Protein Pairings
Grilled salmon or teriyaki chicken complement the rice beautifully. I often add miso-glazed eggplant for a vegetarian option. The rice’s mild flavor lets the main protein shine while providing a satisfying base.
Breakfast Twist
Use leftovers for a Japanese-style breakfast. Top with a soft-boiled egg, soy sauce, and pickled vegetables. The rice absorbs all the delicious flavors while maintaining its perfect texture.
Soup Accompaniment
Serve alongside a steaming bowl of miso soup. The combination is classic and comforting. I like to add a few cubes of soft tofu and wakame seaweed to the soup for extra texture.
Portable Bento
Pack cooled rice in a bento box with other components. It holds its shape well for 4-6 hours at room temperature. Add a damp paper towel on top to prevent drying out until lunchtime. 🌟
Nutrition Facts
Frequently Asked Questions
What type of pot works best?
A heavy pot with a tight-fitting lid is ideal. A donabe (Japanese clay pot) is traditional, but any heavy-bottomed pot works. Avoid thin pots that can scorch.
Can I skip the soaking step?
No, soaking for 20-30 minutes ensures even cooking. Skipping it may result in uneven texture or raw centers. This step is crucial for perfect grains.
Why does my rice turn out mushy?
Over-rinsing or using too much water can cause mushiness. Stick to the 1.25:1 water-to-rice ratio and rinse only until water runs clear, not longer.
How do I add extra flavor?
Include a 2-inch kombu strip while cooking or add 1 tbsp sake to the water. These boost umami without overpowering the rice’s natural taste.

- Mujadara Rice and Lentils Recipe: Earthy Spiced Lentils With Caramelized Onions - November 1, 2026
- Naija Fried Rice Recipe: Street-Style Spice With Veggie Crunch - November 1, 2026
- Mushy Rice Recipe: Fluffy Grains Transformed in Minutes - November 1, 2026