
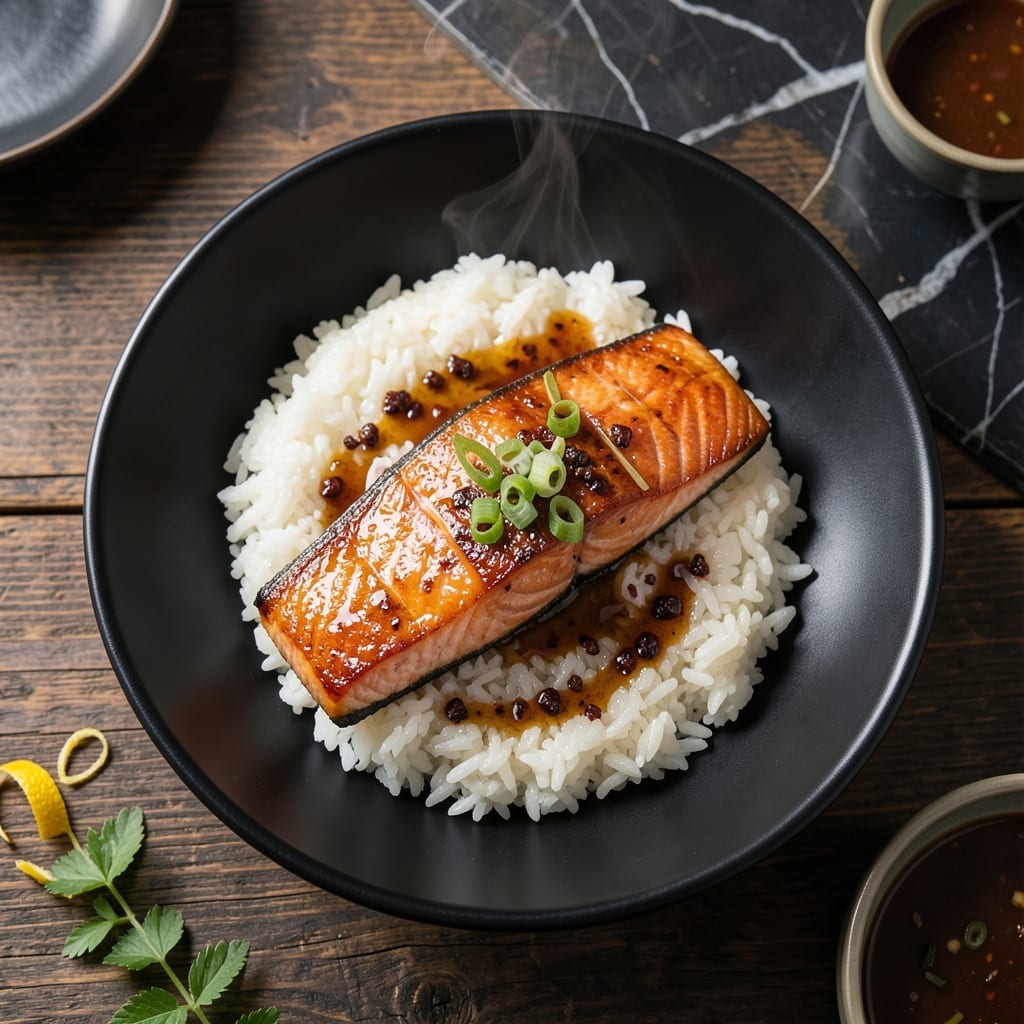
This Japanese-inspired dish brings restaurant-quality results to your home kitchen with minimal effort.
The wok-searing technique creates a crispy skin on the salmon while keeping the inside tender and flaky. Meanwhile, perfectly cooked rice serves as the ideal canvas for those rich, umami flavors. The combination of soy, mirin, and sake creates an authentic taste profile that’s both simple and sophisticated.
What makes this recipe special is its balance of textures and flavors—savory salmon, fluffy rice, and a glossy glaze that ties it all together. The method ensures the fish stays moist while developing a beautiful caramelized crust.
Serve the salmon over steaming rice with a drizzle of the pan sauce for a complete, satisfying meal. The presentation is as impressive as the taste.
Ingredients for Japanese Salmon and Rice
High-quality salmon, short-grain rice, and umami-rich sauces create this elegant Japanese-inspired dish at home.
| Ingredient | Amount | Notes |
|---|---|---|
| Salmon Fillets 🐟 | 1 ½ lb | Skin-on, skin scored lightly |
| Japonica Rice 🍚 | 2 cups | Short-grain, rinsed until clear |
| Soy Sauce 🫙 | ⅓ cup | Low-sodium preferred for balance |
| Mirin 🍶 | ¼ cup | Sweet rice wine, authentic choice |
| Sake 🍶 | ¼ cup | Dry Japanese rice wine |
| Brown Sugar 🧈 | 2 tbsp | For caramelized glaze formation |
| Fresh Ginger 🌿 | 1 tbsp | Peeled and grated finely |
| Garlic Cloves 🧄 | 3 cloves | Minced for aromatic base |
| Green Onions 🧅 | 4 whole | Thinly sliced for garnish |
| Vegetable Oil 🫒 | 2 tbsp | High smoke point for searing |
| Sesame Seeds 🌰 | 1 tbsp | Toasted for garnish texture |
| Dashi Stock 🍲 | ½ cup | Optional for enhanced umami depth |
The salmon is the centerpiece—opt for wild-caught, sushi-grade fillets from Whole Foods or a trusted fishmonger with a vibrant coral hue and no fishy odor. Skin-on is essential for that crispy texture. For rice, Koshihikari or Nishiki brands at Asian markets deliver authentic stickiness and sweetness. Mirin and sake are non-negotiable for that true Japanese flavor profile.
No sake? Dry sherry at half the amount works in a pinch. Mirin can be replicated with 1 tbsp sugar + 1 tbsp water per 2 tbsp rice vinegar. For a gluten-free version, tamari instead of soy sauce. The brown sugar can be swapped for honey, though it’ll alter the color slightly. Fresh ginger is ideal, but ground ginger at one-quarter the amount (plus a pinch of fresh) gets you close.
The cooked salmon keeps for 2-3 days refrigerated, though it’s best served fresh. Rice stays fluffy for 4-5 days if stored properly. The glaze can be made ahead and reheated gently—it’ll thicken slightly but regains its gloss with a splash of water. Always bring rice to room temperature before reheating to maintain texture.
Why You’ll Love This Recipe
- One Pan Meal: I love that the salmon and rice cook together in the same pot, so I’m not juggling multiple dishes.
- Sweet-Savory Glaze: The mirin and soy sauce create this sticky, caramelized coating on the salmon that’s honestly irresistible.
- Weeknight Lifesaver: Between us, this is my go-to for busy evenings—ready before the rice timer dings.
- Leftovers Hold Up: The flavors actually deepen overnight, so lunch the next day tastes even better.
Step-by-Step Instructions for Japanese Salmon and Rice
Master the technique for perfectly seared salmon with fragrant rice using this precise method.
Step 1: Prepare the Japonica Rice
Rinse the 2 cups Japonica Rice under cold water until the water runs clear, removing excess starch. This prevents gumminess and ensures fluffy, separate grains. Drain thoroughly in a fine-mesh sieve.
Combine the rinsed rice with 0.5 cup Dashi Stock and enough water to reach a 1:1.25 rice-to-liquid ratio in a saucepan. Bring to a boil, then reduce to low heat, cover, and simmer for 15-18 minutes until the liquid is absorbed and the surface appears dimpled.
Step 2: Create the Umami Glaze
In a small bowl, whisk together the 0.33 cup Soy Sauce, 0.25 cup Mirin, 0.25 cup Sake, 2 tbsp Brown Sugar, 1 tbsp Fresh Ginger, and the 3 cloves Garlic Cloves minced finely. Simmer this mixture in a saucepan over medium heat for 5-7 minutes until it reduces by a third and develop a glossy, syrupy consistency.
The glaze should coat the back of a spoon with a rich, caramel-like sheen. Watch carefully—it burns easily once the sugar concentrates. Remove from heat and set aside to thicken slightly as it cools.
Step 3: Sear the Salmon Fillets
Pat the 1.5 lb Salmon Fillets completely dry with paper towels. Heat the 2 tbsp Vegetable Oil in a wok or heavy skillet over medium-high heat until shimmering. Place the salmon skin-side down and press gently with a spatula for 10 seconds to prevent curling.
Sear undisturbed for 4-5 minutes until the skin is crisp and golden brown and the edges appear opaque. Flip carefully and cook for another 2-3 minutes until the center is just opaque but still moist. The flesh should flake easily with a fork.
Step 4: Glaze and Garnish
Brush the reduced glaze generously over the seared salmon, allowing it to caramelize slightly from the residual heat. Let the fillets rest for 2 minutes to absorb the flavors while you thinly slice the 4 whole Green Onions.
Sprinkle the salmon with the sliced green onions and 1 tbsp Sesame Seeds for added texture and visual appeal. Serve immediately over the prepared Japonica rice, spooning any remaining glaze from the pan over the top for maximum flavor impact.
Pro Tips For Making Japanese Salmon And Rice
- Skin Side Down First: Start cooking the salmon skin-side down in a hot pan with a little oil—this guarantees crispy skin and keeps the flesh tender. I learned this the hard way after flipping too early and losing that perfect texture.
- Rinse the Rice: Wash your Japonica rice thoroughly until the water runs clear to remove excess starch. My grandmother swore by this, and it prevents gummy rice every time.
- Skip Boiling the Glaze: Resist the urge to boil your soy sauce, mirin, and sake mixture—simmer it gently to avoid burning the sugars and keep the flavor balanced.
- Rest the Salmon: Give your salmon a solid 3-4 minutes off the heat before serving to let the juices redistribute. Sounds weird, but it makes the fish noticeably juicier.
Common Mistakes When Making Great japanese salmon and rice
Overcrowding the Pan
Always sear salmon in batches if needed—crowding lowers the oil temperature, causing the fish to steam instead of crisp. I use my 12-inch Lodge wok for perfect spacing. The skin needs direct contact with hot oil to achieve that restaurant-quality texture. 🔥
Skipping the Dry
Pat those fillets completely dry with paper towels before searing. Any moisture creates steam that prevents proper browning. I press each piece between two towels to extract every drop of water.
Rushing the Glaze
Simmer the soy-mirin-sake mixture until it reduces by one-third and coats a spoon. Stopping early results in watery, flavorless sauce. Watch closely—it can burn once the sugar concentrates after 5-7 minutes.
Overcooking the Salmon
The center should be just opaque but still moist when removed from heat. Remember, it continues cooking while resting. I pull mine at 125°F internal temperature for medium doneness.
Rinsing Rice Improperly
Rinse Japonica rice until the water runs completely clear—this removes excess starch that would make your grains gummy. I use a fine-mesh sieve and rinse for 30-45 seconds minimum.
Ignoring Rest Time
Let the seared salmon rest for 2 minutes before glazing. This allows the juices to redistribute throughout the fillet, ensuring every bite stays moist and flavorful.
Nutrition Facts
Frequently Asked Questions
What type of rice works best?
Short-grain Japonica rice like Koshihikari or Nishiki is ideal for its sticky texture. Rinse until water runs clear for fluffy results.
Can I use a different fish?
Yes, try cod or trout, but adjust cooking time. Salmon’s fat content makes it more forgiving for beginners.
How do I prevent the glaze from burning?
Simmer on medium heat and watch closely after 5 minutes. Remove from heat once it coats a spoon.
What if I don’t have mirin?
Substitute with 1 tbsp sugar + 1 tbsp water per 2 tbsp rice vinegar. The flavor will be slightly different but still tasty.

- Mujadara Rice and Lentils Recipe: Earthy Spiced Lentils With Caramelized Onions - November 1, 2026
- Naija Fried Rice Recipe: Street-Style Spice With Veggie Crunch - November 1, 2026
- Mushy Rice Recipe: Fluffy Grains Transformed in Minutes - November 1, 2026