
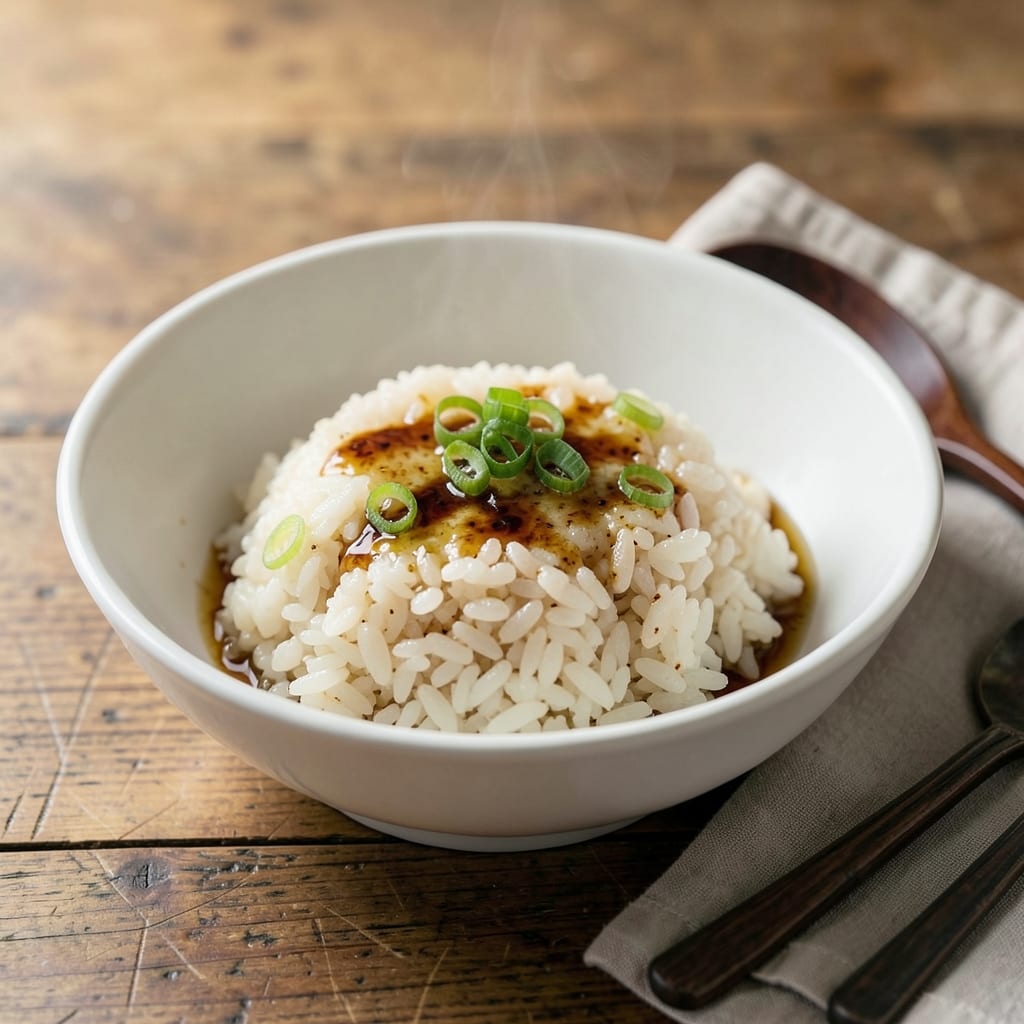
This Japanese seasoned rice delivers umami-packed flavor in every sticky, tender grain. The technique transforms plain white rice into something extraordinary with just a few simple additions.
I developed this method after years of experimenting with different seasonings and ratios. The key is using the right combination of soy sauce, mirin, and dashi to create perfectly balanced flavor without overpowering the rice.
You’ll end up with glossy, slightly sweet grains that cling together beautifully. The aroma alone will transport you to a Tokyo kitchen, while the taste proves great rice doesn’t need to be complicated.
Serve it alongside grilled fish, teriyaki chicken, or enjoy it plain with a sprinkle of sesame seeds.
Ingredients for Japanese Seasoned Rice
Simple ingredients transform plain rice into glossy, umami-rich perfection with every bite.
| Ingredient | Amount | Notes |
|---|---|---|
| Japanese Short-Grain White Rice 🍚 | 2 cups | Rinsed until water runs clear |
| Water 💧 | 2 ½ cups | For cooking rice |
| Soy Sauce 🫒 | 2 tbsp | Low-sodium preferred |
| Mirin 🍶 | 2 tbsp | Sweet cooking rice wine |
| Dashi Stock 🍲 | ½ cup | Homemade or instant granules |
| Rice Vinegar 🍚 | 1 tbsp | For balance and brightness |
| Granulated Sugar 🍚 | 1 tsp | Dissolved in seasoning liquid |
| Kosher Salt 🧂 | ½ tsp | Diamond Crystal preferred |
| Toasted Sesame Seeds 🌰 | 1 tbsp | For garnish and texture |
| Green Onions 🧅 | 2 whole | Thinly sliced for garnish |
| Nori Sheets 🍣 | 1 sheet | Optional, cut into strips |
The rice is everything here. Japanese short-grain (like Koshihikari or Nishiki) gives you that sticky, tender texture—long-grain won’t cling the same way. Asian markets or the international aisle at Whole Foods will have the good stuff. For dashi, instant granules (like Honda brand) are a pantry lifesaver, but homemade katsuobushi-based stock adds depth if you’ve got time.
No mirin? Substitute 1 tbsp sugar + 1 tbsp rice vinegar per tablespoon. Out of dashi? Use chicken or vegetable stock with a pinch of MSG for umami. The soy sauce can be tamari for gluten-free. If you’re skipping the nori, a drizzle of toasted sesame oil at the end adds that missing savory note. Don’t skip the rinsing—it removes excess starch for fluffier grains.
Cooked rice stays fresh for 2-3 days in the fridge (store in airtight container). Freezes beautifully for 1 month—reheat with a splash of water. The seasoning liquid can be prepped ahead and kept for 1 week refrigerated. Sesame seeds toast best right before serving.
Why You’ll Love This Recipe
- One Pot Wonder: I just dump rice, water, and the seasonings in my rice cooker and walk away. No stirring, no fuss.
- Umami Bomb: The dashi and soy sauce combo hits that perfect savory-sweet spot every time.
- Meal Prep Hero: I make a big batch Sunday and it pairs with proteins or veggies all week long.
- Budget Stretcher: A pound of rice and a few pantry staples feeds my family for days. Honestly, it’s cheaper than takeout.
Step-by-Step Instructions for Japanese Seasoned Rice
Master this technique and you’ll have perfectly sticky, flavorful rice that pairs beautifully with any dish.
Step 1: Rinse and Prepare the Rice
Place the 2 cups Japanese Short-Grain White Rice in a fine-mesh strainer and rinse under cold water, swirling with your hand. Continue rinsing until the water runs completely clear—this removes excess starch and prevents gummy rice. I typically rinse 4-5 times to get it right.
Once rinsed, let the rice drain for 10 minutes. Meanwhile, combine the 2 tbsp Soy Sauce, 2 tbsp Mirin, 0.5 cup Dashi Stock, 1 tbsp Rice Vinegar, 1 tsp Granulated Sugar, and 0.5 tsp Kosher Salt in a small saucepan. Heat over medium-low heat just until the sugar dissolves—don’t let it boil.
Step 2: Cook the Rice to Perfection
Add the drained rice to your rice cooker or heavy pot and pour in the 2.5 cups Water. If using a rice cooker, simply start it and let it do its work. For stovetop cooking, bring to a boil over high heat, then reduce to low, cover, and simmer for 15 minutes.
After cooking, let the rice steam covered for an additional 10 minutes. You’ll know it’s done when all the water is absorbed and the grains are tender yet distinct. Don’t peek during cooking—this releases steam and can affect the texture. The rice should be glossy and slightly sticky when done.
Step 3: Incorporate the Seasoning Liquid
Transfer the cooked rice to a large, shallow bowl. Gently fold in the warm seasoning liquid using a rice paddle or silicone spatula. I use a cutting motion to distribute the liquid evenly without mashing the grains. The rice should glisten with the umami-rich liquid.
Let the rice sit for 5 minutes to absorb the flavors fully. You’ll see the grains plump slightly as they soak up the seasoning. This resting period ensures every bite is infused with the balanced savory-sweet taste that makes this dish special.
Step 4: Garnish and Serve
Thinly slice the 2 whole Green Onions on a diagonal for elegant presentation. Sprinkle the 1 tbsp Toasted Sesame Seeds and sliced green onions over the rice. For an extra touch, cut the 1 sheet Nori Sheets into thin strips and scatter them on top.
Serve immediately while warm. The rice should hold its shape when scooped but have a slight stickiness that clings to your chopsticks. Each grain should be coated with the glossy seasoning, offering a perfect balance of umami, sweetness, and acidity in every mouthful.
Pro Tips For Making Japanese Seasoned Rice
- Soak the Rice: Give the short-grain rice a good 30-minute soak before cooking—I learned this the hard way after ending up with dry, unevenly cooked grains.
- Use Fresh Dashi: Skip the instant dashi powder if you can; a quick 5-minute kombu and bonito flake brew makes a real difference in depth of flavor.
- Season After Cooking: Mix in the soy sauce and mirin only after the rice is cooked to prevent the grains from turning mushy or unevenly colored.
- Rest Before Serving: Let the rice sit covered for 10 minutes off the heat—this guarantees the seasoning distributes evenly and the texture stays fluffy.
Storing and Reheating This Dish
Refrigerator Storage
Let your rice cool completely before transferring to an airtight container. Store in the fridge at 40°F or below for up to 3 days. The flavors will meld and deepen overnight, making leftovers even more delicious. ❄️
Freezer Storage
Portion cooled rice into freezer-safe bags or containers, leaving 1 inch headspace for expansion. Freeze for up to 1 month without significant quality loss. I prefer flat bags for efficient stacking and faster thawing.
Stovetop Reheating
Add rice to a pot with 2 tbsp water or dashi per cup of rice. Heat over medium-low for 5-7 minutes, stirring occasionally. Cover and let steam for 2 minutes to restore moisture and stickiness.
Microwave Reheating
Place rice in a microwave-safe dish with 1 tbsp water per cup. Cover with a damp paper towel and heat on 50% power for 2 minutes, stir, then repeat until reaching 165°F. 🔥
Revivifying Dry Rice
If your rice seems dry after storage, sprinkle 1-2 tsp water over each portion before reheating. The steam will help restore its original texture. I also add a splash of mirin for extra gloss and flavor.
Nutrition Facts
Frequently Asked Questions
What kind of rice works best?
Use Japanese short-grain white rice like Koshihikari or Nishiki for the perfect sticky texture. Long-grain varieties won’t cling together the same way and will lack that authentic consistency.
Can I make this without a rice cooker?
Use a heavy pot with a tight-fitting lid. Bring to a boil, then reduce to low heat and simmer for 15 minutes. Let it steam covered for an additional 10 minutes off the heat.
How do I fix over-seasoned rice?
If the seasoning is too strong, cook an extra batch of plain rice and mix it in to balance the flavors. You can also add a touch more water and reheat to dilute the taste slightly.
Can I add vegetables to this?
Yes! Stir in cooked vegetables like carrots, shiitake mushrooms, or peas when folding in the seasoning liquid. Use about 1 cup total for every 2 cups of uncooked rice.

- Mujadara Rice and Lentils Recipe: Earthy Spiced Lentils With Caramelized Onions - November 1, 2026
- Naija Fried Rice Recipe: Street-Style Spice With Veggie Crunch - November 1, 2026
- Mushy Rice Recipe: Fluffy Grains Transformed in Minutes - November 1, 2026