
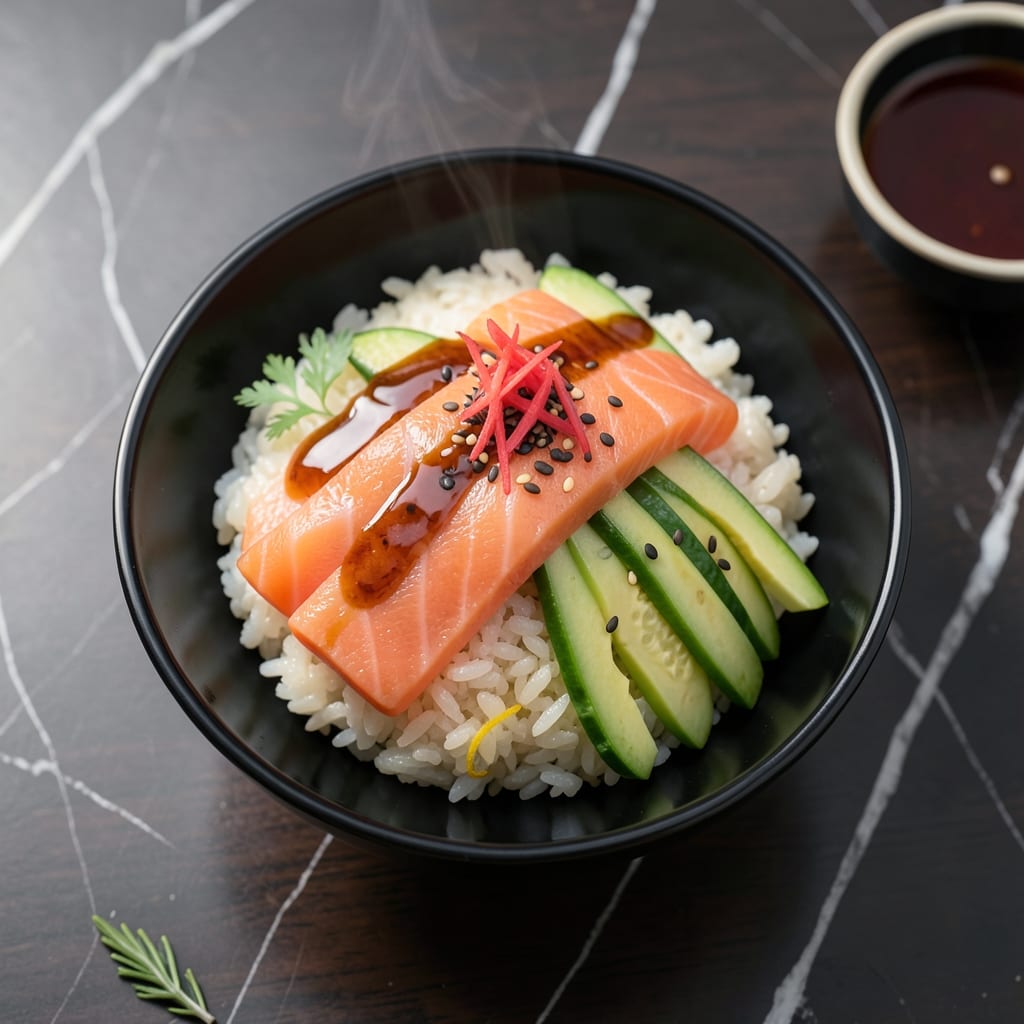
Achieving perfect sushi rice is the foundation of any great rice bowl. This method delivers the ideal balance of sticky texture and subtle vinegar sweetness that defines authentic Japanese flavor.
The process starts with rinsing the rice thoroughly to remove excess starch, then cooking it with precise water ratios. A custom vinegar blend infuses each grain with bright, tangy notes without overpowering the natural taste.
What results is glossy, slightly chewy rice that holds its shape yet melts in your mouth. It serves as the ideal base for fresh fish, vegetables, or any combination of toppings you prefer.
Master this technique, and you’ll have the core element for countless Japanese-inspired meals at your fingertips.
Ingredients for Japanese Sushi Rice Bowl
Pantry staples plus fresh fish come together for this authentic Japanese-inspired bowl.
| Ingredient | Amount | Notes |
|---|---|---|
| Sushi Rice 🍚 | 2 cups | Short-grain white rice preferred |
| Water 💧 | 2 ½ cups | For rinsing and cooking |
| Rice Vinegar 🍶 | ½ cup | Unseasoned for authentic flavor |
| Granulated Sugar 🍬 | 2 tbsp | Dissolves into vinegar blend |
| Kosher Salt 🧂 | 1 tsp | Fine grain for even distribution |
| Fresh Salmon Fillet 🐟 | 1 lb | Sushi-grade, skin removed |
| Soy Sauce 🫙 | ¼ cup | Low-sodium for dipping |
| Pickled Ginger 🌿 | ¼ cup | Sliced thin for garnish |
| Wasabi Paste 🌶️ | 2 tsp | Adjust to heat preference |
| Nori Seaweed Sheets 🌊 | 2 sheets | Cut into strips for garnish |
| Cucumber 🥒 | 1 whole | Julienned for freshness |
| Avocado 🥑 | 1 whole | Sliced for creaminess |
| Sesame Seeds 🌰 | 1 tbsp | Toasted for garnish |
The rice is everything here. Short-grain sushi rice from Koshihikari or Nishiki brands at Asian markets or Whole Foods gives you that perfect sticky texture. Avoid long-grain or jasmine—they won’t hold the vinegar blend the same way. For the salmon, sushi-grade is non-negotiable (look for labels at Costco or ask your fishmonger). Don’t skip the rinse—it’s the difference between gummy and glossy.
No rice vinegar? Apple cider vinegar plus a pinch of sugar works in a pinch. Short on salmon? Tuna or yellowtail are great swaps (just keep it sushi-grade). The soy sauce can be tamari for gluten-free. Fresh out of wasabi? Horseradish mixed with a drop of green food coloring gets you close. And if cucumbers aren’t your thing, shredded carrots or radishes add the same crunch.
Cooked rice stays fresh in the fridge for 2 days (store in a bowl with a damp towel on top). The salmon’s best used right away, but the veggies and garnishes keep for 3-4 days. Leftovers? Roll them into sushi rolls the next day—waste nothing.
Why You’ll Love This Recipe
- No-Fuss Cooking: I just dump the rice in the pot, let it simmer, then mix in the vinegar, sugar, and salt—honestly, it’s almost too simple.
- Sticky Sweet Tang: That first bite of vinegared rice with its perfect balance of sweet and salty? I crave it weekly.
- Endless Toppings: I’ve done everything from leftover salmon to quick-pickled veggies on top, and it works every time.
- Budget Stretcher: A bag of sushi rice and pantry staples feed my family for days—I’ll be real, it’s my wallet’s favorite meal.
Step-by-Step Instructions for Japanese Sushi Rice Bowl
Here’s the method for achieving that signature sticky texture and balanced flavor in every bite.
Step 1: Rinse and Cook the Sushi Rice
Place the 2 cups Sushi Rice in a fine-mesh strainer and rinse under cold water until the water runs clear. This removes excess starch and prevents gummy rice. I always do this in a large bowl of water first, swirling gently with my hand, then switch to running water.
Combine the rinsed rice with the 2.5 cups Water in a rice cooker or pot. Cook according to your appliance’s instructions or bring to a boil, then reduce to a simmer, cover, and cook for 15-18 minutes until the water is absorbed. Don’t lift the lid during cooking—steam is essential for even texture.
Step 2: Prepare the Vinegar Seasoning
While the rice cooks, combine the 0.5 cup Rice Vinegar, 2 tbsp Granulated Sugar, and 1 tsp Kosher Salt in a small saucepan. Heat over medium-low until the sugar and salt dissolve completely, about 2-3 minutes. Don’t let it boil—just warm enough to dissolve.
This sweet-salty-tangy mixture is what transforms plain rice into sushi rice. I stir it constantly to ensure everything dissolves evenly. Remove from heat once combined and let it cool slightly while the rice finishes cooking. The mixture should be clear with no visible sugar or salt crystals.
Step 3: Season the Rice and Prepare Toppings
Transfer the cooked rice to a large wooden or glass bowl. Drizzle the vinegar mixture evenly over the hot rice. Using a rice paddle or silicone spatula, gently fold the seasoning into the rice with a slicing motion. Be careful not to mash the grains—this keeps them separate and fluffy.
Fan the rice while folding to help it cool and give it that characteristic glossy appearance. The rice should be sticky but not mushy, with each grain distinct. Meanwhile, slice the 1 lb Fresh Salmon Fillet into thin strips, julienne the 1 whole Cucumber, and slice the 1 whole Avocado.
Step 4: Assemble the Sushi Rice Bowl
Divide the seasoned rice among four bowls. Arrange the salmon, cucumber, and avocado on top of the rice in an appealing pattern. I like to place the salmon in the center with the vegetables fanning out, but feel free to get creative with your presentation.
Cut the 2 sheets Nori Seaweed Sheets into thin strips and sprinkle over the bowls along with the 1 tbsp Sesame Seeds. The nori adds a subtle oceanic flavor and a nice textural contrast. Serve immediately with 0.25 cup Soy Sauce, 0.25 cup Pickled Ginger, and 2 tsp Wasabi Paste on the side for dipping and garnish.
Pro Tips For Making Japanese Sushi Rice Bowl
- Rinse the Rice: Wash the sushi rice in a fine-mesh strainer under cold water until the water runs clear—this removes excess starch and prevents gummy rice. I learned this the hard way after my first few batches turned into a sticky mess.
- Warm the Vinegar: Gently heat the rice vinegar, sugar, and salt mixture just until the sugar dissolves. Sounds weird, but it works: cold vinegar can make the rice taste unevenly seasoned.
- Skip the Peeking: Once the rice is cooking, resist the urge to lift the lid—even once. Steaming is what makes sushi rice tender, and every peek lets heat escape.
- Fan While Mixing: While folding the vinegar mixture into the cooked rice, use a hand fan or piece of cardboard to cool it down. This gives the rice that glossy finish and prevents it from turning mushy. My grandmother swore by this, and she was right.
Essential Equipment for japanese sushi rice bowl
Rice Cooker
A quality rice cooker is non-negotiable for perfect sushi rice. I swear by my Zojirushi Neuro Fuzzy—it maintains precise temperature control and has a sushi rice setting. Even budget models like Black+Decker work well if they have a sticky rice function. 🔥
Wooden Bowl
Invest in a hangiri (wooden sushi rice tub) for authentic results. The wood absorbs excess moisture while you fan the rice, giving it that signature gloss. A large glass mixing bowl works in a pinch, but the hangiri makes a noticeable difference in texture.
Rice Paddle
Use a shamoji (wooden rice paddle) to gently fold vinegar into the rice without crushing grains. Its flat surface and slight curve are designed specifically for this. I keep mine soaked in water to prevent sticking. Avoid metal utensils—they can react with the vinegar.
Fine-Mesh Strainer
Rinsing rice properly requires a fine-mesh strainer. The OXO Good Grips version fits perfectly over my sink. This step removes excess starch that would otherwise make your rice gummy. I rinse until the water runs completely clear.
Sharp Knife
A 8-inch chef’s knife is essential for clean fish slices. I use my Shun Premier for sushi-grade salmon—it glides through without tearing. Keep it razor-sharp to maintain the integrity of delicate toppings like avocado and cucumber.
Bamboo Mat
While not essential for bowls, a bamboo rolling mat helps if you want to shape rice into mounds. It’s also useful for pressing rice into molds. I use mine for both rolling sushi and creating perfect rice bases for my bowls. ✨
Nutrition Facts
Frequently Asked Questions
What rice should I use if I can’t find sushi rice?
Short-grain white rice is the closest substitute. Avoid jasmine or basmati as they won’t achieve the same sticky texture. Look for Calrose or arborio rice as alternatives.
How do I know when the rice is properly cooked?
The rice is done when all water is absorbed and the grains are tender but still hold their shape. Check at 15 minutes—if it’s still firm, cook 2-3 minutes longer.
Can I make this ahead of time?
Cooked rice stays fresh for 2 days in the fridge in an airtight container. Slice toppings just before serving for best texture. Reheat rice with a damp towel on top to retain moisture.
What’s the best way to slice the salmon?
Use a sharp knife and slice against the grain into 1/4-inch thick strips. Wipe the blade between cuts for clean slices. Always use sushi-grade fish for safety.

- Mujadara Rice and Lentils Recipe: Earthy Spiced Lentils With Caramelized Onions - November 1, 2026
- Naija Fried Rice Recipe: Street-Style Spice With Veggie Crunch - November 1, 2026
- Mushy Rice Recipe: Fluffy Grains Transformed in Minutes - November 1, 2026