
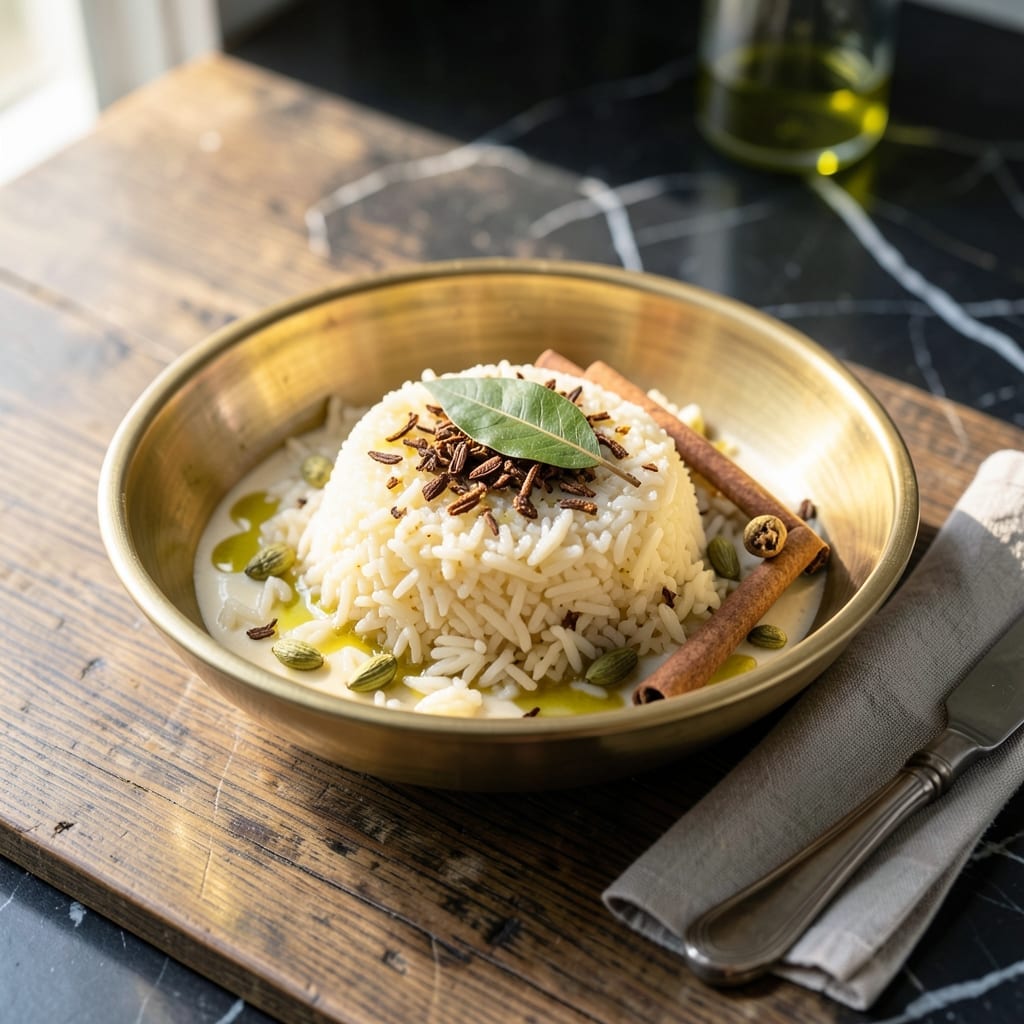
There’s something special about the delicate aroma of kalijira rice that fills the kitchen as it cooks. This tiny grain packs a nutty depth that elevates any meal.
The secret lies in the perfect water ratio and gentle cooking method, which brings out its natural fragrance. These grains stay separate and fluffy, never mushy or clumped together.
With just a few simple steps, you’ll achieve perfectly cooked rice that pairs beautifully with curries, meats, or vegetables. The subtle flavor makes it versatile for many cuisines.
Once you taste this, you’ll understand why it’s a staple in so many kitchens. Here’s how to make it right every time.
Ingredients for Kalijira Rice
Simple, fragrant ingredients for rice that smells as good as it tastes.
| Ingredient | Amount | Notes |
|---|---|---|
| Kalijira Rice 🌾 | 1 ½ cups | Rinsed until water runs clear |
| Water 💧 | 3 cups | Filtered for best results |
| Ghee 🧈 | 1 tbsp | Use vegan ghee substitute |
| Bay Leaf 🍃 | 1 whole | Dried or fresh |
| Green Cardamom Pods 🌿 | 2 whole | Lightly crushed |
| Cinnamon Stick 🌰 | 1 piece | 2-inch piece |
| Cloves 🌶️ | 2 whole | Optional for depth |
| Salt 🧂 | 1 tsp | Fine sea salt preferred |
| Sugar 🍚 | ½ tsp | Balances the spices |
| Vegetable Oil 🫒 | 1 tsp | For light toasting |
Kalijira rice is the star here—Indian or Bangladeshi grocery stores usually carry it. Look for tiny, round grains that smell nutty and fresh. If you can’t find it, basmati rice works in a pinch (just don’t expect the same aroma). The whole spices like cardamom and cinnamon? Check the bulk section at Whole Foods for the freshest stock.
No ghee? Vegan butter or coconut oil keeps it plant-based. Missing a spice? Skip the cloves if you’re out—they’re subtle but not essential. The bay leaf and cardamom are non-negotiable though—they’re doing the heavy lifting for that signature scent. If your salt is iodized, use a pinch less since it’s saltier.
Store kalijira rice in an airtight container in a cool, dark place—it’ll keep for 6-12 months. The cooked rice stays fresh for 3-4 days in the fridge. Reheat with a splash of water to fluff it back up (don’t microwave dry).
Why You’ll Love This Recipe
- One Pot Wonder: I just rinse the rice, toast it in ghee with bay leaf and cardamom, then let it simmer—hardly any active work.
- Aromatic Heaven: The ghee and cardamom make the kitchen smell incredible, and the rice soaks up every bit of that rich, warm flavor.
- Guest-Ready Side: I serve this with curries or roasted veggies, and it feels fancy enough for company without the stress.
- Budget Stretch: A small bag of kalijira rice goes a long way, and it’s way cheaper than takeout for the same satisfying result.
Step-by-Step Instructions for Kalijira Rice
Here’s the method. Simple, fragrant, and foolproof every time.
Step 1: Rinse and Soak the Kalijira Rice
Place the 1.5 cups Kalijira Rice in a fine-mesh strainer and rinse under cold running water until the water runs completely clear. This removes excess starch and prevents gummy rice. I always rub the grains gently between my fingers to help release any lingering starch.
After rinsing, transfer the rice to a bowl and cover with fresh cold water. Let it soak for 15-20 minutes. This step softens the grains slightly, ensuring they cook evenly and absorb the aromatic spices we’ll add later. Drain thoroughly before cooking—you want the grains damp but not waterlogged.
Step 2: Toast the Whole Spices in Ghee
Heat a heavy-bottomed pot over medium heat and add the 1 tbsp Ghee and 1 tsp Vegetable Oil. Once the ghee melts and becomes fragrant, add the 1 whole Bay Leaf, 2 whole Green Cardamom Pods (lightly crushed), 1 piece Cinnamon Stick, and 2 whole Cloves.
Toast the spices for 30-45 seconds until they release their aroma and the bay leaf starts to sizzle. Be careful not to burn them—burnt spices will make your rice bitter. You’ll know they’re ready when the kitchen fills with that warm, inviting scent that makes everyone ask what you’re cooking.
Step 3: Cook the Rice with Spices and Water
Add the drained rice to the pot and stir gently to coat the grains with the ghee and spices. Cook for 1-2 minutes, stirring constantly, until the rice becomes slightly translucent at the edges. This light toasting enhances the nutty flavor kalijira rice is known for.
Pour in the 3 cups Water, then add the 1 tsp Salt and 0.5 tsp Sugar. Stir once to distribute the seasonings, then bring the water to a rolling boil. Once boiling, reduce the heat to low, cover the pot tightly with a lid, and let it simmer undisturbed.
Step 4: Simmer and Steam to Perfection
Cook the rice on low heat for 12-15 minutes. Resist the urge to lift the lid and check on it—releasing steam disrupts the cooking process and can lead to unevenly cooked rice. The rice is ready when all the water has been absorbed and the grains are tender but still distinct.
Turn off the heat and let the rice sit covered for an additional 5-10 minutes. This final steaming step allows the grains to absorb any remaining moisture and ensures they’re perfectly fluffy. The whole spices will have infused their flavors throughout, giving you that signature aromatic experience in every bite.
Step 5: Fluff and Serve
Gently fluff the rice with a fork to separate the grains and distribute the whole spices. You’ll see the beautiful, tiny kalijira grains glistening with just a hint of the golden ghee. Remove the bay leaf, cinnamon stick, cardamom pods, and cloves before serving, or leave them in for a rustic presentation.
Serve warm as a side dish or as a base for curries. The rice should be light, fragrant, and slightly nutty, with each grain distinct yet perfectly cooked. This simple technique lets the natural flavors of kalijira rice shine while the spices add just the right amount of warmth and complexity.
Pro Tips For Making Kalijira Rice
- Rinse the Rice: Soak kalijira rice for 10 minutes in cold water, then rinse until the water runs clear—this removes excess starch and prevents a gummy texture.
- Heat the Ghee: Melt the ghee on medium-low heat until it’s just shimmering, not smoking, before adding whole spices to bloom their flavor without burning them.
- Skip the Stir: Once the rice and water are in the pot, resist stirring—it breaks the delicate grains and turns the dish mushy.
- Rest Covered: After cooking, let the rice sit covered for 5-7 minutes off the heat—this lets the grains firm up and absorb any lingering moisture.
Flavor Customization for kalijira rice
Spice Variations
For a warmer profile, add 1 star anise pod and 1 tsp fennel seeds when toasting. This creates a more complex aroma that pairs beautifully with lamb dishes. I love this combination for special occasions. ✨
Herb Infusions
Stir in 2 tbsp fresh mint leaves or 1 tbsp dried rose petals after cooking for a floral twist. The mint adds a refreshing note that works wonderfully with yogurt-based curries.
Citrus Zest Boost
Add 1 tsp lemon zest or 1 strip of orange peel while cooking for a bright, citrusy lift. This variation cuts through rich gravies and adds a vibrant touch to the dish.
Savory Additions
For extra depth, sauté ¼ cup chopped onions in the ghee before adding spices. This creates a subtle sweetness that complements the nutty rice perfectly. I often do this when serving with vegetable curries.
Sweet Touches
Increase the sugar to 1 tsp and add 2 tbsp coconut flakes for a lightly sweet version. This works especially well for breakfast rice or pairing with mild coconut-based dishes.
Heat Options
Add 1 dried red chili or ½ tsp black peppercorns for a spicy kick. The heat balances the natural sweetness of the rice and adds an extra layer of complexity. 🌶️
Nutrition Facts
Frequently Asked Questions
Why do I need to soak the grains first?
Soaking for 15-20 minutes softens the grains and ensures even cooking. It also helps remove excess starch, which keeps the rice fluffy rather than sticky.
Can I skip the whole spices?
You can, but they add signature depth. At minimum, keep the cardamom and bay leaf for authentic flavor. Omitting all spices will make the rice taste plainer.
How do I know when it’s done?
After 12-15 minutes of simmering, all water should be absorbed. Let it steam 5-10 minutes off heat for perfect texture. No peeking while cooking!
What if my rice turns out mushy?
Mushy rice usually means too much water or stirring. Use exactly 2:1 water-to-rice ratio and avoid lifting the lid during cooking.

- Mujadara Rice and Lentils Recipe: Earthy Spiced Lentils With Caramelized Onions - November 1, 2026
- Naija Fried Rice Recipe: Street-Style Spice With Veggie Crunch - November 1, 2026
- Mushy Rice Recipe: Fluffy Grains Transformed in Minutes - November 1, 2026