
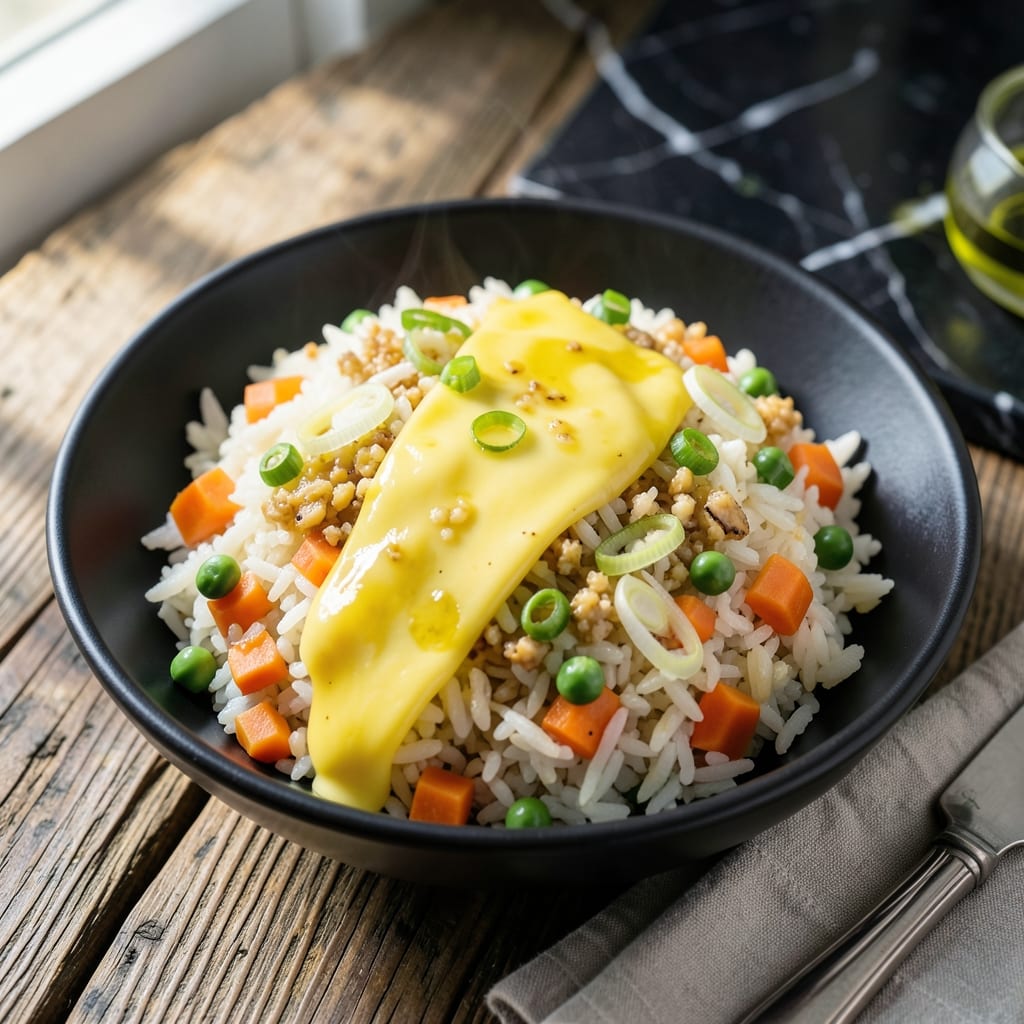
This Japanese-inspired fried rice transforms leftovers into a restaurant-quality meal with minimal effort. A perfect balance of umami and freshness comes from simple ingredients and proper technique.
The key is using day-old rice and high heat to achieve that signature wok-seared texture. Garden vegetables add color and crunch, while soy sauce and mirin create depth of flavor without overpowering.
What emerges is a dish with distinct layers: tender rice grains, crisp vegetables, and a subtle sheen from the sauce. Each bite delivers that authentic kanpai experience you’d expect from a Tokyo street vendor.
Serve hot with a sprinkle of nori for added authenticity. This recipe proves that exceptional fried rice is within reach of any home cook.
Ingredients for Kanpai Fried Rice
Transform leftovers into a vibrant dish with these carefully selected ingredients for authentic Japanese flavor.
| Ingredient | Amount | Notes |
|---|---|---|
| Day-Old Cooked White Rice 🍚 | 4 cups | Cold, preferably overnight |
| Vegetable Oil 🫒 | 2 tbsp | High smoke point neutral oil |
| Carrots 🥕 | 2 whole | Medium, finely diced |
| Green Onions 🧅 | 4 whole | Thinly sliced, whites and greens separated |
| Frozen Green Peas 🌱 | 1 cup | Thawed under running water |
| Large Eggs 🥚 | 3 whole | Lightly beaten |
| Garlic Cloves 🧄 | 3 cloves | Minced finely |
| Fresh Ginger 🌿 | 1 tbsp | Peeled and minced |
| Soy Sauce 💧 | 3 tbsp | Low-sodium preferred |
| Mirin 🍶 | 2 tbsp | Sweet Japanese rice wine |
| Sesame Oil 🫒 | 1 tsp | Toasted, for finishing |
| Nori Sheets 🍣 | 1 sheet | Thinly sliced into strips |
| Salt 🧂 | ½ tsp | Or to taste |
| Black Pepper 🌶️ | ¼ tsp | Freshly ground |
The rice is non-negotiable—day-old, cold, and dry is what gives you that distinct wok-seared texture. Use jasmine or short-grain rice for authenticity. For vegetables, fresh, crisp produce is ideal; I source mine from local Asian markets where the turnover is high. The ginger and garlic should be freshly minced—pre-minced lacks the zing you need for that restaurant-quality depth.
No mirin? Dry sherry or white wine with ½ tsp sugar per tablespoon gets you close. Swap carrots for bell peppers or zucchini if that’s what’s on hand. Want extra umami? Add 1 tbsp of oyster sauce (vegetarian if needed). The nori can be swapped for furikake for a similar seaweed kick. Always use high-smoke-point oil—peanut or avocado oil works too.
This keeps well for 3-4 days in the fridge, though it’s best eaten fresh. Store in an airtight container and reheat quickly over high heat to maintain texture. The nori strips are best added just before serving to keep them crisp. For meal prep, keep the nori separate until ready to eat.
Why You’ll Love This Recipe
- One Pan Wonder: I love that everything cooks together in a single pan—no extra dishes, just crispy rice, sweet carrots, and bright green onions.
- Unexpected Crunch: The day-old rice fries up perfectly crispy, while the peas add a little pop of sweetness in every bite.
- Weeknight Hero: Honestly, it’s my go-to for busy evenings when I need something fast, filling, and better than takeout.
- Budget Stretcher: Frozen peas and leftover rice keep costs low, and it easily feeds four for the price of one restaurant meal.
Step-by-Step Instructions for Japanese-Inspired Fried Rice
Master the technique for perfectly textured rice with balanced umami and garden-fresh elements.
Step 1: Prepare the Aromatics and Vegetables
Finely dice the 2 whole carrots into uniform ¼-inch pieces to ensure even cooking. Thinly slice the 4 whole green onions, keeping the white and green parts separate for layered flavor. Mince the 3 cloves garlic cloves and 1 tbsp fresh ginger together—their combined paste forms the aromatic base.
Thaw the 1 cup frozen green peas under running water and drain thoroughly. This prevents excess moisture from steaming the rice. Thinly slice the 1 sheet nori sheets into thin strips for garnish. Proper prep ensures each ingredient cooks evenly and releases maximum flavor.
Step 2: Scramble the Eggs and Toast the Rice
Heat 1 tbsp vegetable oil in a large wok or skillet over medium-high heat until shimmering. Add the 3 whole large eggs and scramble quickly until just set but still slightly runny. Remove and set aside—they’ll finish cooking when combined with the hot rice.
Add the remaining 1 tbsp vegetable oil to the pan, then add the 4 cups day-old cooked white rice. Break up any clumps with a spatula and press the rice into the pan. Let it toast for 2-3 minutes until the grains are separate and slightly crisp at the edges.
Step 3: Build Flavor with Aromatics and Vegetables
Push the rice to one side of the pan and add the minced garlic and ginger to the empty space. Stir constantly for 30 seconds until fragrant but not browned—burnt garlic imparts bitterness. Immediately add the diced carrots and white parts of the green onions.
Stir-fry for 3-4 minutes until the carrots begin to soften. Add the thawed green peas and cook for another 1-2 minutes until all vegetables are tender-crisp. The rice should now be uniformly coated with the aromatic oils.
Step 4: Season and Finish with Signature Touches
Return the scrambled eggs to the pan. Drizzle the 3 tbsp soy sauce and 2 tbsp mirin evenly over the mixture. Stir-fry for 2-3 minutes until the liquid is absorbed and the rice takes on a glossy sheen. Season with 0.5 tsp salt and 0.25 tsp black pepper.
Remove from heat and stir in the 1 tsp sesame oil. The heat will bloom its nutty aroma. Taste and adjust seasoning if needed—the soy and mirin should provide a balanced savory-sweet profile without overpowering.
Step 5: Garnish and Serve Immediately
Transfer the fried rice to a serving platter. Top with the reserved green onion greens and the nori strips. The nori adds a subtle oceanic depth, while the green onions provide a bright, fresh contrast.
Serve immediately while hot. The texture should feature distinct grains of rice, tender vegetables, and silky egg ribbons throughout. The dish should glow with the sheen of the soy-mirin glaze, signaling perfect execution.
Pro Tips For Making Kanpai Fried Rice
- Use Cold Rice: Day-old rice from the fridge is non-negotiable—it fries up dry and separate, while fresh rice turns to mush. I learned this the hard way after ruining two batches with sticky, wet grains.
- High Heat Only: Crank the burner to max and keep the wok or pan screaming hot. After burning three batches, I finally figured out that lukewarm oil just steams the veggies instead of searing them.
- Thaw Peas First: Toss frozen peas into the wok straight from the bag and they’ll turn soggy. Rinse them under warm water for 30 seconds to take the chill off—sounds weird, but it works.
- Cut Small, Cook Fast: Dice carrots and green onions into tiny, even pieces so everything cooks through in 2-3 minutes. My grandmother swore by this, and she was right: big chunks stay raw while the rice burns.
Dietary Considerations for This Dish
Gluten-Free Options
For gluten-free diners, swap the traditional soy sauce for tamari—it’s made without wheat and delivers the same umami depth. I always check labels to confirm 100% gluten-free certification, as some tamari blends still contain trace amounts. 💪
Vegetarian Adaptations
Omit the eggs and add extra firm tofu cubes for protein. Press and drain the tofu first to prevent excess moisture. Another great option is shiitake mushrooms, which add meaty texture and rich umami without altering the dish’s character.
Vegan Variations
Replace eggs with scrambled tofu or simply skip them. Use vegan oyster sauce or an extra 1 tbsp soy sauce for depth. The mirin is typically vegan, but double-check for fish-derived additives in some brands.
Low-Sodium Adjustments
Cut the soy sauce to 2 tbsp and boost flavor with 1 tbsp coconut aminos instead. I also add extra minced garlic and ginger to compensate for reduced saltiness without overpowering the dish’s balance. 🌱
Nut-Free Considerations
Skip the sesame oil or replace it with toasted sunflower oil for a similar aroma. Ensure all sauces are nut-free, as some mirin or soy sauce blends may contain trace amounts from processing.
Allergen Notes
This recipe is naturally free of dairy, nuts, and shellfish. However, always verify the labels on your soy sauce and mirin for hidden allergens like wheat or fish, especially if serving guests with sensitivities.
Nutrition Facts
Frequently Asked Questions
Why use day-old rice?
Day-old rice is drier, preventing mushiness when stir-fried. Fresh rice contains too much moisture, resulting in clumpy, soggy grains instead of the desired separate, slightly crisp texture.
Can I add protein like chicken or shrimp?
Cook 1 lb of small, bite-sized pieces first, then set aside. Add them back with the eggs at the end to warm through. This keeps the protein tender and properly integrated.
What if I don’t have mirin?
Substitute with 2 tbsp dry sherry or white wine plus ½ tsp sugar. This mimics mirin’s sweet-savory balance. Avoid skipping it entirely, as it’s key to authentic flavor.
How do I prevent soggy fried rice?
Use high heat and avoid overcrowding the pan. Cook in batches if needed, and ensure all ingredients are dry before adding. This maintains the ideal texture.

- Mujadara Rice and Lentils Recipe: Earthy Spiced Lentils With Caramelized Onions - November 1, 2026
- Naija Fried Rice Recipe: Street-Style Spice With Veggie Crunch - November 1, 2026
- Mushy Rice Recipe: Fluffy Grains Transformed in Minutes - November 1, 2026