
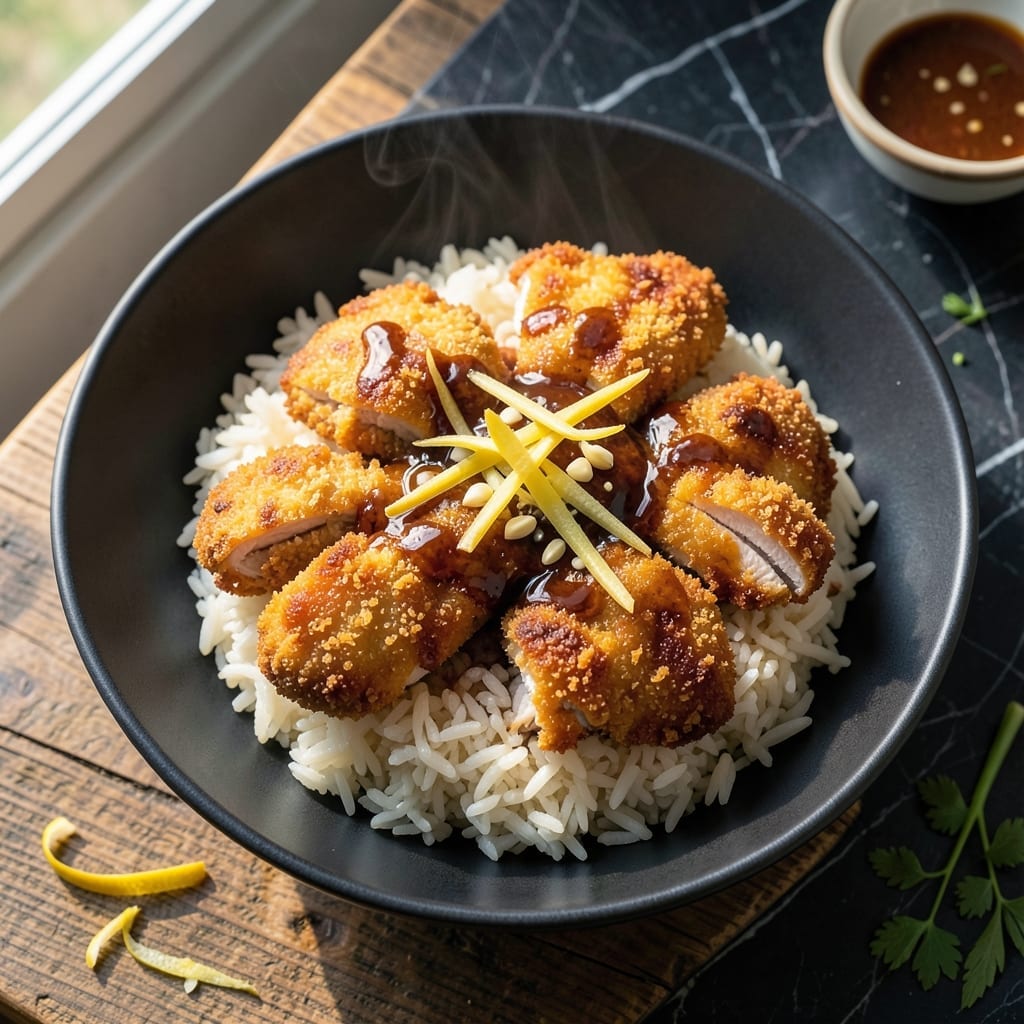
This Japanese karaage rice bowl delivers crispy, juicy chicken over steamed rice with minimal effort. The secret lies in a simple marinade and double-frying technique that guarantees a perfectly golden exterior every time.
I developed this method after testing countless variations, settling on a soy-ginger-garlic base that infuses the chicken with authentic flavor. The rice serves as a neutral canvas, soaking up the savory drippings from the freshly fried pieces.
Each bite offers a satisfying contrast between the tender chicken and the soft, warm rice. The result is a dish that feels special but comes together quickly for a weeknight meal.
Serve with pickled vegetables or a drizzle of spicy mayo for added depth. Here’s how to make this restaurant-quality bowl at home.
Ingredients for Karaage Rice Bowl
Crispy chicken, fluffy rice, and bold Japanese flavors come together effortlessly here.
| Ingredient | Amount | Notes |
|---|---|---|
| Boneless Chicken Thighs 🍗 | 1 ½ lb | Skin-on for extra crispiness |
| Soy Sauce 🫒 | ¼ cup | Low-sodium preferred for balance |
| Fresh Ginger Root 🌿 | 1 whole | Peeled and grated |
| Garlic Cloves 🧄 | 4 cloves | Minced for marinade |
| Sake 💧 | 2 tbsp | Dry variety for tenderizing |
| Cornstarch 🌾 | ½ cup | For ultra-crispy coating |
| Neutral Oil 🛢️ | 2 cups | For frying, like vegetable or canola |
| Steamed White Rice 🍚 | 4 cups | Cooked, short-grain preferred |
| Green Onions 🧅 | 3 whole | Thinly sliced for garnish |
| Mayonnaise 🥚 | ¼ cup | For spicy mayo drizzle |
| Sriracha Sauce 🌶️ | 2 tbsp | Adjust to heat preference |
| Sesame Seeds 🌰 | 1 tbsp | Toasted for garnish |
| Lime 🍈 | 1 whole | Cut into wedges for serving |
The chicken thighs are non-negotiable for karaage—boneless, skin-on gives that perfect crispy-skin texture. Asian markets often carry pre-cut pieces, but any grocery store works. Look for thighs with good fat marbling (not lean). The soy sauce should be Japanese-style (like Kikkoman), not Chinese dark soy. Fresh ginger and garlic are essential—no powdered substitutes here.
No sake? Dry white wine or even mirin (sweeter, so reduce by half) works. Swap cornstarch for potato starch if that’s what you have—similar crispiness. For the mayo drizzle, Kewpie mayonnaise is traditional (found at H Mart or Amazon). Sriracha can be replaced with gochujang for deeper flavor. Skip the lime if you prefer, but it cuts through the richness beautifully.
Fry the chicken in batches and keep warm in a 200°F oven while finishing. Leftovers? Not ideal—best eaten fresh, but will keep 2-3 days in the fridge. Reheat in an air fryer or oven to recapture some crispiness. Rice is best made fresh, but day-old works in a pinch (sprinkle with water and microwave).
Why You’ll Love This Recipe
- One Pan Wonder: I just toss the chicken with soy sauce, ginger, and garlic, then bake—no fancy techniques, no mess.
- Addictively Crispy: That sake in the marinade gives the karaage a golden, crackly crust with juicy meat inside.
- Lunchbox Hero: Honestly, it tastes even better cold the next day over rice—my kids beg for leftovers.
- Budget’s Best Friend: Boneless thighs are cheap, and a little ginger and garlic stretch the flavor a long way.
Step-by-Step Instructions for Karaage Rice Bowl
Here’s the method. Straightforward, tested, works every time.
Step 1: Marinate the Chicken for Maximum Flavor
In a bowl, combine the 1.5 lb boneless chicken thighs with 0.25 cup soy sauce, grated fresh ginger root, minced 4 cloves garlic cloves, and 2 tbsp sake. I massage this mixture into the meat thoroughly to ensure every piece is well coated.
Cover and refrigerate for at least 1 hour (overnight for deeper flavor). The sake tenderizes while the soy sauce and aromatics infuse the chicken. You’ll notice the meat becomes slightly paler as it absorbs the marinade.
Step 2: Create the Ultra-Crispy Coating
Remove the chicken from the marinade (discard excess liquid) and pat dry with paper towels. This is critical—moisture prevents crispiness. Dredge each piece in the 0.5 cup cornstarch, pressing gently to adhere. The starch creates that signature karaage crunch.
Let the coated pieces rest for 10 minutes while you heat the 2 cups neutral oil to 350°F in a deep pot. You’ll see the oil shimmer when ready. Resting helps the coating set, preventing it from sliding off during frying.
Step 3: Fry to Golden Perfection
Carefully lower the chicken into the hot oil in batches to avoid crowding. Fry for 6-8 minutes, turning occasionally, until deep golden brown and the internal temperature reaches 165°F. The pieces should sizzle steadily—if the oil stops bubbling, it’s done.
Transfer to a wire rack (not paper towels) to drain. This maintains crispiness by allowing air circulation. I always test one piece first to adjust timing if needed—your oil temperature may drop when adding cold chicken.
Step 4: Assemble the Bowl with Spicy Mayo
Divide the 4 cups steamed white rice among shallow bowls. Arrange the crispy chicken on top. In a small bowl, whisk together the 0.25 cup mayonnaise and 2 tbsp sriracha sauce until smooth. Drizzle this over the chicken.
Garnish with thinly sliced 3 whole green onions, 1 tbsp sesame seeds, and serve with lime wedges for squeezing. The acidity cuts through the richness beautifully. Serve immediately while the chicken is still hot and crispy.
Pro Tips For Making Karaage Rice Bowl
- Double Fry for Crisp: Fry the chicken once at 320°F for 3 minutes, then again at 375°F for 2 minutes. I learned this the hard way—single frying leaves the coating soggy by the time you assemble the bowl.
- Grate the Ginger: Use a microplane for the ginger root instead of mincing. It blends into the marinade better and you won’t get those fibrous bits stuck in your teeth.
- Pat Dry the Thighs: After cutting the chicken, blot each piece with paper towels until it’s bone-dry. Skip this and the coating slides right off into the oil.
- Warm the Sake: Microwave the sake for 15 seconds before adding to the marinade. Sounds weird, but it works: the alcohol cooks off faster, so the chicken absorbs the flavor instead of the booze.
Creative Variations of These Flavors
Spicy Miso Twist
Add 1 tbsp white miso paste and 1 tsp gochujang to your marinade for deeper umami heat. This Korean-Japanese fusion creates a caramelized, slightly sticky coating that clings to the chicken. I love how the miso adds complexity without overpowering the ginger-garlic base. 🌶️
Lemon-Garlic Version
Replace the 2 tbsp sake with 2 tbsp lemon juice and add 1 extra minced garlic clove for a brighter, Mediterranean-inspired take. The acidity helps tenderize the meat while adding a refreshing zing that pairs beautifully with the rice.
Double-Crunch Coating
Mix ¼ cup panko breadcrumbs with your 0.5 cup cornstarch for an extra-shatter coating. The panko adds airy crunch while the cornstarch ensures that signature karaage texture. Press the mixture firmly onto each piece before frying.
Honey-Soy Glaze
After frying, toss the hot chicken in a mix of 2 tbsp honey and 1 tbsp soy sauce for a sweet-savory glaze. This creates a sticky, glossy coating that’s especially popular with kids. Sprinkle with extra sesame seeds for visual appeal. ✨
Teriyaki Style
Simmer ¼ cup teriyaki sauce (store-bought or homemade) until thickened, then drizzle over the assembled bowl. I recommend Kikkoman brand for authentic flavor. This variation transforms your karaage into a teriyaki chicken rice bowl favorite.
Veggie-Packed Bowl
Add 1 cup steamed broccoli florets or ½ cup shredded cabbage to your rice bowl for freshness and crunch. The vegetables soak up the spicy mayo beautifully and add a nutritional boost. Serve with extra lime wedges for brightness.
Nutrition Facts
Frequently Asked Questions
Can I use chicken breast instead of thighs?
You can, but thighs stay juicier. Breast dries out faster and lacks the fat for crispiness. If using, reduce frying time to 5-6 minutes to prevent overcooking.
What oil is best for frying?
Use a neutral oil with a high smoke point like vegetable, canola, or peanut. Avoid olive oil—it burns at 350°F. Peanut oil adds a subtle nutty flavor that complements the dish.
How do I keep the chicken crispy longer?
Fry in small batches to avoid oil temperature drops. Drain on a wire rack, not paper towels. Keep warm in a 200°F oven for up to 15 minutes before serving.
Can I bake instead of frying?
Yes, but texture differs. Toss coated chicken in 1 tbsp oil, bake at 400°F for 20-25 minutes, flipping halfway. It won’t be as crispy but still flavorful.

- Mujadara Rice and Lentils Recipe: Earthy Spiced Lentils With Caramelized Onions - November 1, 2026
- Naija Fried Rice Recipe: Street-Style Spice With Veggie Crunch - November 1, 2026
- Mushy Rice Recipe: Fluffy Grains Transformed in Minutes - November 1, 2026