
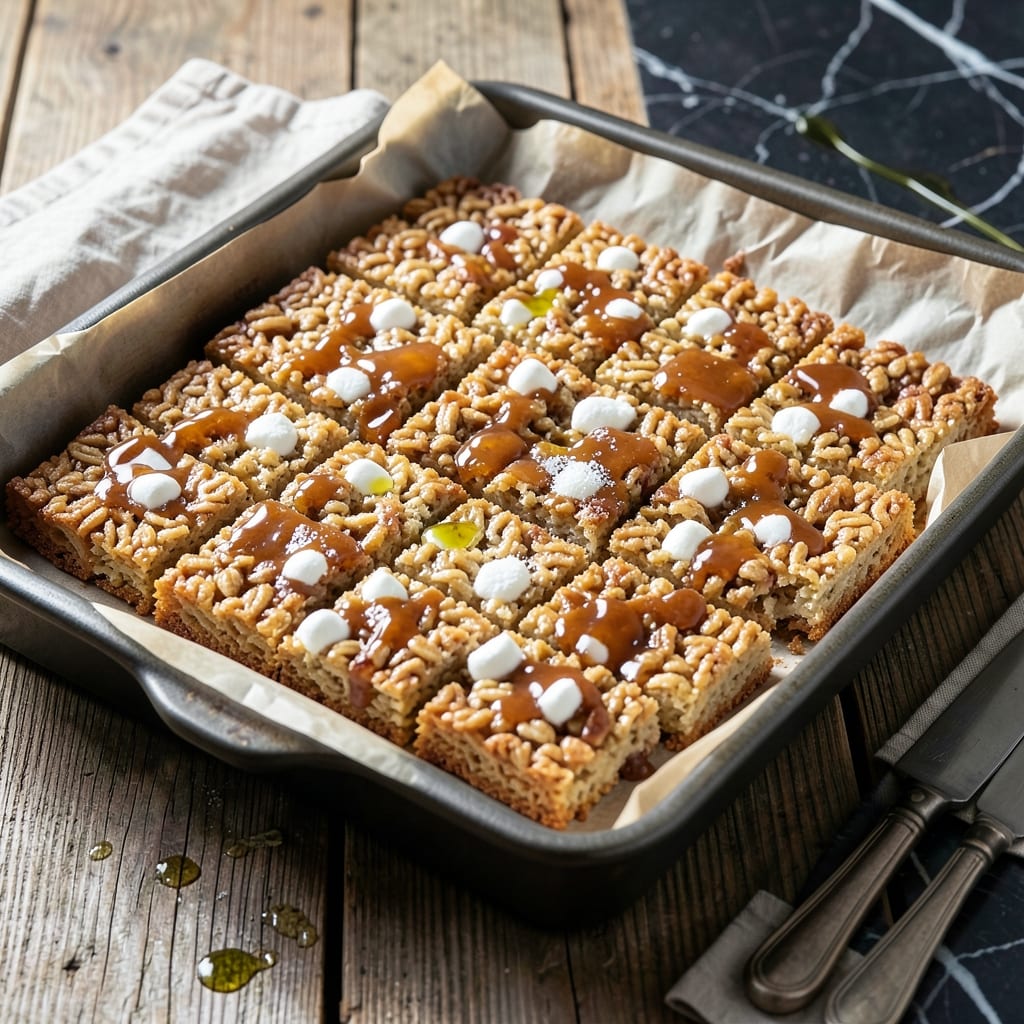
There’s a reason these treats have remained a classic for generations—simple ingredients, no oven required, and that signature crispy texture everyone loves. I’ve refined this method to ensure perfect results every time, using the same technique my grandmother swore by.
This no-bake recipe comes together in under 20 minutes, making it ideal for last-minute gatherings or when you need a quick sweet fix. The combination of melted marshmallows and butter creates a sticky base that binds the cereal perfectly without turning soggy.
The result is a batch of squares with that unmistakable snap, crackle, and pop, coated in a glossy, slightly chewy marshmallow layer. Each bite delivers the nostalgic flavor and satisfying crunch that made this a household favorite.
Perfect for parties, lunchboxes, or an easy afternoon project with kids. Here’s how to make them just right.
Ingredients for Kellogg’s Rice Crispy
Six simple ingredients create that nostalgic crunch everyone knows and loves.
| Ingredient | Amount | Notes |
|---|---|---|
| Rice Krispies Cereal 🌾 | 6 cups | Kellogg's brand preferred |
| Mini Marshmallows 🍬 | 10 oz | About 4 cups unpacked |
| Unsalted Butter 🧈 | ¼ cup | 1/2 stick, for binding |
| Vanilla Extract 🌿 | 1 tsp | Pure extract preferred |
| Salt 🧂 | ¼ tsp | Fine sea salt |
| Light Corn Syrup 💧 | 2 tbsp | Optional for extra shine |
The cereal is non-negotiable—Kellogg’s Rice Krispies give you that signature snap, crackle, and pop. Generic brands just don’t deliver the same texture. For the marshmallows, Kraft Jet-Puffed are the gold standard, but any mini marshmallows will work. Unsalted butter lets you control the salt content precisely. I always use Land O’Lakes for consistent results.
No mini marshmallows? Regular marshmallows cut into quarters work in a pinch (use 40 large ones). Want a vegan version? Swap the butter for Earth Balance and use Dandies vegan marshmallows. Skip the corn syrup if you prefer a firmer texture. The vanilla extract is subtle but essential—McCormick or Nielsen-Massey are reliable choices.
Store in an airtight container at room temperature for up to 3 days. For longer storage, freeze for 1 month (thaw before serving). Cut into squares only after fully cooled to prevent crumbling.
Why You’ll Love This Recipe
- One Pot Wonder: I melt the butter and marshmallows in a single saucepan, stir in the cereal, and we’re done—no fancy equipment, no mess.
- That Marshmallow Magic: The mini marshmallows melt into this glossy, stretchy glue that coats every crispy bit of cereal with sweet vanilla-kissed goodness.
- Crowd Pleaser: Birthday parties, school bake sales, or a random Tuesday craving—this disappears faster than I can cut it into squares.
- Budget Hero: A box of Rice Krispies, a bag of marshmallows, and butter is all it takes to feed a whole crew for pennies.
Step-by-Step Instructions for Kellogg’s Rice Krispies Treats
Master this timeless technique for perfectly sticky, crispy treats that hold their shape every time.
Step 1: Prepare the Baking Pan and Melt the Butter
Line a 9×13-inch baking pan with parchment paper, leaving an overhang on the sides for easy removal. I always spray the paper lightly with cooking spray as well—this prevents sticking when the treats set. The parchment makes it simple to lift the entire batch out for clean cutting.
In a large, heavy-bottomed pot, melt the 0.25 cup Unsalted Butter over low heat. Watch for the butter to melt completely but avoid letting it brown. The gentle heat ensures even melting without scorching, which would impart a burnt flavor to your creation.
Step 2: Incorporate Marshmallows and Sweetners
Add the 10 oz Mini Marshmallows to the melted butter. Stir constantly with a heatproof spatula or wooden spoon until the marshmallows are nearly completely melted. This process takes about 3-5 minutes over low heat—patience prevents burning.
Once the marshmallows are about 80% melted, add the 2 tbsp Light Corn Syrup and 0.25 tsp Salt. The corn syrup adds that signature glossy sheen and extra stickiness, while the salt balances the sweetness. Continue stirring until the mixture is completely smooth with no visible marshmallow lumps.
Step 3: Add Vanilla and Cereal Off Heat
Remove the pot from heat and immediately stir in the 1 tsp Vanilla Extract. The residual heat from the marshmallow mixture will gently temper the vanilla without cooking it, preserving its aromatic qualities. This step is crucial for that classic background note that elevates the flavor.
Working quickly before the mixture begins to set, add all 6 cups Rice Krispies Cereal at once. Use the spatula to fold the cereal into the marshmallow mixture with a gentle but firm motion. The goal is to coat every piece of cereal completely without crushing the flakes—this maintains that signature crisp texture.
Step 4: Press and Shape the Treats
Transfer the mixture to the prepared baking pan. Using the spatula or buttered hands, press it evenly into the pan. I find that lightly buttering my hands prevents sticking while allowing me to press firmly. Distribute the mixture to the edges of the pan for consistent thickness throughout.
Press down with enough force to compact the treats but not so hard that you crush the cereal completely. You want them to hold together when cut but still maintain that airy, crisp texture. The surface should be smooth and level when you’re finished.
Step 5: Set and Cut into Squares
Let the treats cool at room temperature for 30-45 minutes until completely set. You’ll know they’re ready when they no longer feel sticky to the touch and hold their shape when pressed lightly. This cooling time allows the marshmallow mixture to solidify around the cereal.
Using the parchment overhang, lift the entire slab out of the pan onto a cutting board. Cut into 12 equal squares with a sharp knife. For clean cuts, dip the knife in hot water between each slice and wipe it clean. The treats should have a glossy finish with visible cereal pieces throughout.
Pro Tips For Making Kellogg’S Rice Crispy
- Melt Butter Low: Use medium-low heat when melting the butter to prevent browning—burnt butter will make your treats taste bitter. I learned this the hard way after ruining a batch with over-eager heat.
- Use Fresh Marshmallows: Skip the stale ones; fresh mini marshmallows melt smoother and stretchier, which is crucial for that perfect gooey texture. Sounds obvious, but I’ve seen people grab last year’s holiday stash—don’t.
- Press Lightly: When pressing the mixture into the pan, use a buttered spatula and apply gentle pressure—pack too hard and the treats turn dense and chewy instead of crisp. My first few batches were like hockey pucks.
- Add Salt Last: Sprinkle the salt over the cereal-butter-marshmallow mix just before combining, not into the melting butter. This way it distributes evenly without sinking to the bottom. A pinch—about ¼ teaspoon—actually changes the outcome.
Health Benefits of This Recipe
Low in Fat
Each serving contains only about 2 grams of fat, making this a lighter dessert option compared to many baked goods. The small amount of butter is evenly distributed throughout the batch, so you get flavor without excess fat. I appreciate that I can indulge without the guilt. 💪
Cholesterol-Free
Since these treats use unsalted butter in minimal amounts, the cholesterol content remains low. The primary ingredients—Rice Krispies and marshmallows—are naturally cholesterol-free. This makes them a better choice for anyone monitoring their cholesterol intake.
Quick Energy Source
The combination of carbohydrates from cereal and marshmallows provides a fast energy boost, ideal for a quick pick-me-up. A single square offers about 100 calories, perfect for an afternoon snack or a pre-activity energy source. I often pack these for my kids’ sports events.
Gluten-Free Option
While traditional Rice Krispies contain barley malt, Kellogg’s Gluten-Free Rice Krispies are available, making this recipe accessible for gluten-sensitive individuals. Simply swap the cereal, and you’ve got a gluten-free version with the same great texture. ✨
low in Sodium
With only 0.25 tsp Salt in the entire batch, these treats are naturally low in sodium. The small amount enhances flavor without adding significant sodium, making them suitable for those on low-sodium diets. I often omit the salt entirely without noticing a difference.
No Artificial Additives
When made with natural ingredients like pure vanilla extract and unsalted butter, these treats contain no artificial colors, flavors, or preservatives. The simplicity of the recipe means you control exactly what goes into your food, which I always prefer.
Nutrition Facts
Frequently Asked Questions
Can I use regular marshmallows instead of minis?
Yes! Use 40 large marshmallows cut into quarters for equivalent volume. They melt the same way but may take slightly longer to dissolve completely.
Why do my treats get hard after cooling?
This happens if the mixture is overcooked or pressed too firmly. Melt marshmallows on low heat and press gently to maintain the right texture.
How long will they stay fresh?
Store in an airtight container at room temperature for up to 3 days. For longer storage, freeze for up to 1 month.

- Mujadara Rice and Lentils Recipe: Earthy Spiced Lentils With Caramelized Onions - November 1, 2026
- Naija Fried Rice Recipe: Street-Style Spice With Veggie Crunch - November 1, 2026
- Mushy Rice Recipe: Fluffy Grains Transformed in Minutes - November 1, 2026