
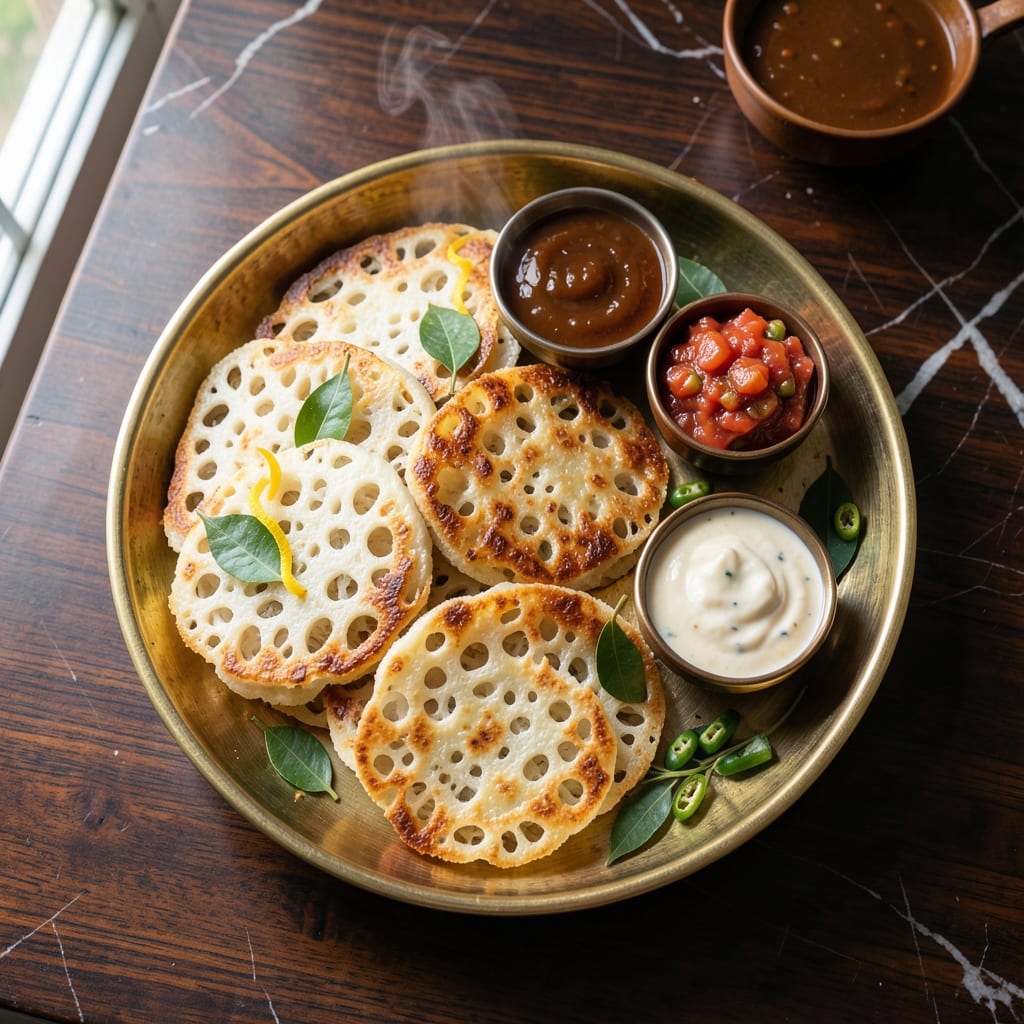
This traditional Kerala appam recipe transforms simple rice flour into delicate, lacy bowls perfect for soaking up rich stews.
The batter rests overnight, allowing natural fermentation to develop that signature slightly tangy flavor and airy texture. Cooking in a special appam pan creates those characteristic thin, crisp edges with soft, fluffy centers.
I’ve perfected this method to ensure consistent results every time, with a texture that’s tender yet strong enough to hold hearty curries. The process requires patience but rewards with authentic taste.
Serve warm with vegetable or meat stews for a meal that feels like a warm embrace. This is comfort food at its most elegant.
Ingredients for Kerala Appam Recipe with Rice Flour
Simple ingredients transform into delicate, lacy appam perfect for soaking up stews.
| Ingredient | Amount | Notes |
|---|---|---|
| Raw Rice 🌾 | 2 cups | Short-grain preferred for texture |
| Rice Flour 🌾 | ½ cup | For extra crispness |
| Cooked White Rice 🍚 | ½ cup | Day-old works best |
| Coconut Milk 🥥 | ½ cup | Full-fat for richness |
| Sugar 🍚 | 2 tbsp | For fermentation activation |
| Active Dry Yeast 🍞 | ¼ tsp | Or 1 tsp fresh yeast |
| Salt 🧂 | ½ tsp | Adjust to taste |
| Coconut Water 🥥 | ½ cup | For thin batter consistency |
| Shallots 🧅 | 3 whole | Finely chopped (optional) |
| Grated Coconut 🥥 | ¼ cup | Fresh or frozen |
| Cardamom Pods 🌿 | 4 whole | Lightly crushed |
| Water 💧 | 1 ½ cups | As needed for batter |
The raw rice is non-negotiable—short-grain varieties like sona masoori or jeerakasala give you that authentic texture. Indian grocery stores carry these, or order online from Patel Brothers. The rice flour adds crispness, but don’t confuse it with rice powder. Cooked rice in the batter is the secret for that tender, airy crumb. Use day-old to avoid gumminess.
No coconut milk? Canned works better than carton for richness. Thai Kitchen or Native Forest are reliable brands. Skip the yeast if you’re traditional—fermentation happens naturally, just give it more time. Cardamom is subtle but essential; if you don’t have pods, ground cardamom at half the amount works. The shallots add sweetness but can be omitted for a neutral flavor.
Batter ferments best at room temperature—cover with a cloth, not plastic. Use within 24 hours for peak flavor. Leftover appam can be refrigerated for 2 days but are best fresh. Reheat in a steamer to restore softness.
Why You’ll Love This Recipe
- No Soaking Needed: I skip the overnight soak entirely—just blend raw rice, rice flour, and cooked rice with coconut milk for the same fluffy texture.
- Soft and Slightly Sweet: That hint of sugar and rich coconut milk gives these appams a delicate sweetness that pairs perfectly with spicy curries.
- Breakfast to Dinner: We’ve served these for lazy weekend brunches and quick weeknight dinners with stew. They work every time.
- Budget Stretch: A bag of rice flour and a can of coconut milk make a dozen appams for pennies. Honestly, it’s my cheapest crowd-pleaser.
Step-by-Step Instructions for Kerala Appam With Rice Flour
Here’s the method. Straightforward, tested, works every time.
Step 1: Soak and Grind the Rice Batter
Rinse the 2 cups raw rice thoroughly until the water runs clear, then soak in 1.5 cups water for at least 4 hours. This softens the grains and ensures a smooth batter. Drain the rice completely before grinding—excess water will make the batter too thin.
In a blender, combine the soaked rice with the 0.5 cup cooked white rice, 0.5 cup rice flour, 0.5 cup coconut milk, and 0.5 cup coconut water. Grind into a smooth, pourable batter. The texture should resemble heavy cream—thick enough to coat the back of a spoon but still fluid.
Step 2: Ferment the Batter with Yeast and Sugar
Transfer the batter to a large bowl and stir in the 2 tbsp sugar, 0.25 tsp active dry yeast, and 0.5 tsp salt. Cover with a clean kitchen towel and let it ferment in a warm place for 6-8 hours. I place mine near the oven with the light on to maintain consistent warmth.
You’ll know it’s ready when the batter rises slightly and develops tiny bubbles throughout. This fermentation step is crucial—it creates the airy texture and slightly tangy flavor that defines appam. If your kitchen is cool, the process may take up to 12 hours.
Step 3: Prepare the Flavorings and Appam Pan
While the batter ferments, finely chop the 3 whole shallots and lightly crush the 4 whole cardamom pods to release their aroma. These will be added to the batter just before cooking for maximum freshness. Stir in the 0.25 cup grated coconut along with the shallots and cardamom right before making the first appam.
Heat an appam pan (or a small non-stick skillet with sloped sides) over medium heat. Lightly grease it with coconut oil if needed, though a well-seasoned pan shouldn’t require it. The pan is ready when a drop of water sizzles and evaporates immediately upon contact.
Step 4: Cook the Appam to Lacy Perfection
Pour a ladleful of batter into the center of the hot pan. Immediately swirl the pan in a circular motion to coat the bottom and sides thinly—this creates the signature lacy edges. The center will be slightly thicker, which is exactly what you want.
Cover the pan and cook for 2-3 minutes until the edges turn golden brown and crisp, while the center remains soft and slightly spongy. Don’t flip it—the appam cooks only on one side. The top should look set with no wet batter visible when you remove the lid.
Step 5: Serve Warm with Your Favorite Stew
Carefully remove the appam from the pan using a spatula. The edges should be delicate and crisp, with a soft, slightly custardy center. Repeat with the remaining batter, stirring it briefly between each appam to maintain even consistency.
Serve immediately while warm. These appam are best enjoyed fresh, with their bowl-like shape perfect for holding rich stews. The contrast between the crispy lace and soft center is what makes them special. Leftovers can be briefly reheated in a dry pan to restore some crispness.
Pro Tips For Making Kerala Appam Recipe With Rice Flour
- Soak the Raw Rice: I learned this the hard way—soak the raw rice for at least 4 hours before grinding, or your appam batter will lack that smooth, lump-free texture.
- Use Warm Coconut Milk: Sounds weird, but it works: warm the coconut milk slightly before mixing it into the batter to help the rice flour dissolve evenly and prevent clumping.
- Skip the Overmixing: After burning three batches, I finally figured out that overmixing the batter develops too much gluten, making the appams dense instead of light and spongy.
- Rest the Batter: My grandmother swore by this, and she was right: let the batter rest for 2-3 hours after mixing to allow the rice flour to fully hydrate and create that perfect, fluffy texture.
Essential Equipment for Perfect Results
Appam Pan Essentials
The traditional appachatti (appam pan) is non-negotiable for authentic lacy edges. I use a cast iron appam pan from Kitchen Craft—its sloped sides and 4-inch diameter create perfect bowls. Season it like cast iron for a naturally non-stick surface.
Blender Requirements
A high-powered blender makes smooth batter effortless. My Vitamix 5200 handles the soaked rice and coconut with ease, but a Ninja Professional works well too. Ensure your blender can process 3 cups of liquid at minimum for this recipe.
Fermentation Setup
Use a large glass or ceramic bowl (at least 2-quart capacity) for fermentation. The batter expands slightly, so avoid metal which can react with acids. I cover mine with a clean cotton towel secured with a rubber band to keep out debris while allowing airflow. 💡
Cooking Tools
A ladle with a ¼-cup capacity ensures consistent batter amounts. I prefer a silicone spatula for swirling—it won’t scratch your pan. Keep a small bowl of coconut oil and a pastry brush nearby for light greasing between batches.
Temperature Control
An infrared thermometer helps monitor pan temperature—aim for 350°F at the center. If you don’t have one, test with a drop of water: it should sizzle and dance. Adjust your heat source to maintain steady temperature throughout cooking.
Serving Accessories
Serve appam on a bamboo steamer tray to maintain warmth and texture. I line mine with parchment paper to prevent sticking. A small dipping bowl for stews completes the presentation—stoneware looks beautiful and retains heat well. 🌟
Nutrition Facts
Frequently Asked Questions
Can I use store-bought rice flour?
Yes, but choose fine-grained rice flour for best results. Coarse varieties create a grainy texture. For authentic flavor, mix 50% homemade (from soaked rice) with store-bought.
Why did my appam turn out dense?
Insufficient fermentation is usually the culprit. Ensure the batter rests for at least 6-8 hours in a warm spot. Also, avoid over-grinding the rice—it should be smooth but not pasty.
How do I make appam without yeast?
Skip the yeast and rely on natural fermentation. Use extra 1 tbsp sugar and let the batter sit for 12-14 hours. The tropical climate of Kerala aids this, so a warm kitchen helps.
What if I don’t have an appam pan?
A small non-stick skillet with sloped sides works as a substitute. Swirl the batter quickly to create thin edges. The shape won’t be perfect, but the taste remains authentic.

- Mujadara Rice and Lentils Recipe: Earthy Spiced Lentils With Caramelized Onions - November 1, 2026
- Naija Fried Rice Recipe: Street-Style Spice With Veggie Crunch - November 1, 2026
- Mushy Rice Recipe: Fluffy Grains Transformed in Minutes - November 1, 2026