
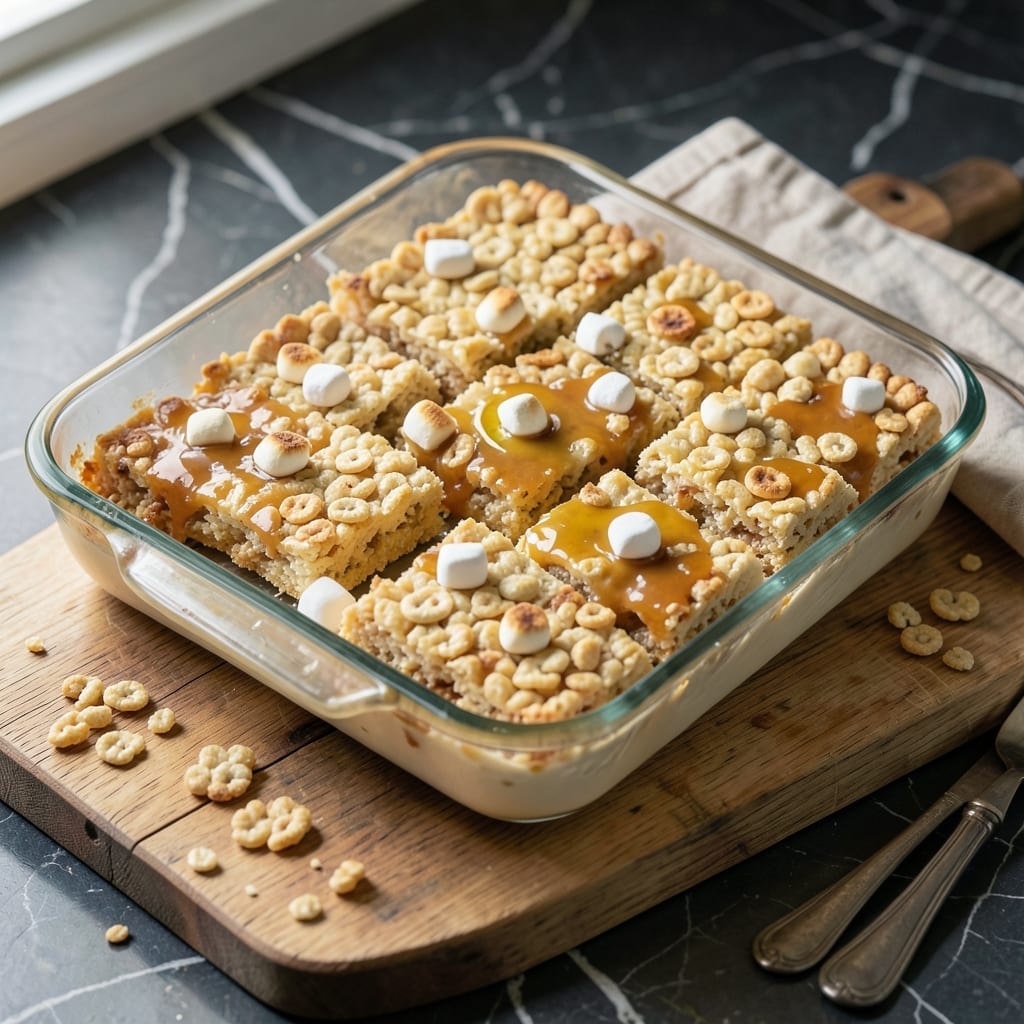
This no-bake treat delivers the classic chewy texture and crispy snap we all remember from childhood. The beauty lies in its simplicity—just a few pantry staples and 15 minutes of your time.
I’ve perfected the ratios to ensure every batch turns out just right: gooey marshmallows binding the cereal without making it soggy. The key is melting the butter and marshmallows together until completely smooth before mixing.
What you get is a pan of golden squares that hold their shape when cut but melt in your mouth. They’re ideal for parties, lunchboxes, or whenever you need a quick sweet fix.
No oven required, and the result is consistently perfect. Here’s how to make them.
Ingredients for Kelloggs Rice Krispie Bars
Just five ingredients for that nostalgic chewy-crispy magic everyone loves.
| Ingredient | Amount | Notes |
|---|---|---|
| Kellogg's Rice Krispies Cereal 🥣 | 6 cups | Fresh for best crispiness |
| Mini Marshmallows 🍬 | 10 oz | Or use 40 regular marshmallows |
| Unsalted Butter 🧈 | ¼ cup | Or 4 tbsp for binding |
| Vanilla Extract 🌿 | ½ tsp | Pure for best flavor |
| Salt 🧂 | ¼ tsp | Enhances sweetness balance |
The marshmallows are non-negotiable here—Jet-Puffed brand melts the smoothest (the store brand is fine too, just avoid stale bags). Kellogg’s Rice Krispies are the gold standard, but generic crispy rice cereal works in a pinch. The butter should be real dairy butter for that classic flavor (vegetarian-friendly since it’s not meat-based). I always use unsalted so I can control the salt level myself.
No mini marshmallows? Regular ones cut in half work, but they take longer to melt. Want extra flavor? Add a pinch of cinnamon or swap vanilla for almond extract. This recipe is naturally vegetarian since it’s egg-free and meat-free. If you’re out of butter, coconut oil works in a 1:1 swap, though the flavor changes slightly.
These keep 2-3 days at room temp in an airtight container (if they last that long). For longer storage, wrap individual squares in plastic and freeze for up to 6 weeks. They’re best the day they’re made, when the crispiness is at its peak.
Why You’ll Love This Recipe
- One Pot Wonder: I melt the butter and marshmallows in a single saucepan, stir in the cereal, and we’re done—no mixing bowls, no fuss.
- That Vanilla Kick: The vanilla extract cuts through the sweetness just enough to make these taste like more than just sugar and crispy rice.
- Party or Snack: I’ve brought them to potlucks and packed them in lunchboxes—they’re just as good at a picnic as they are at 3 p.m. on the couch.
- Budget Stretch: A box of cereal, a bag of marshmallows, and a stick of butter feed a crowd without breaking the bank.
Step-by-Step Instructions for Kellogg’s Rice Krispie Bars
Here’s how to make these nostalgic treats with minimal effort and maximum chewy goodness.
Step 1: Melt Butter and Prepare Marshmallows
In a large saucepan, melt the 0.25 cup Unsalted Butter over low heat. Watch for the edges to start bubbling and the butter to turn completely liquid—this takes about 3-4 minutes.
Once melted, add the 10 oz Mini Marshmallows and stir constantly with a wooden spoon. The marshmallows will soften and start to collapse into the butter. Keep stirring until the mixture is completely smooth with no visible marshmallow pieces—this ensures even distribution in every bite.
Step 2: Add Flavor Enhancers
Remove the saucepan from heat and immediately stir in the 0.5 tsp Vanilla Extract and 0.25 tsp Salt. The vanilla adds a warm depth of flavor, while the salt balances the sweetness perfectly.
Stir for 15-20 seconds until fully combined. You’ll notice the mixture becomes glossy and slightly thickens as it cools. This is the ideal consistency for coating the cereal.
Step 3: Combine with Kellogg’s Rice Krispies Cereal
Working quickly before the marshmallow mixture sets, add all 6 cups Kellogg’s Rice Krispies Cereal to the saucepan. Use a spatula to fold the cereal into the marshmallow mixture gently but thoroughly.
You want every piece of cereal coated evenly—this takes about 45-60 seconds of folding. Be careful not to press too hard or the cereal will lose its crisp texture. The mixture should look glossy with no dry spots.
Step 4: Press and Set in Pan
Transfer the mixture to a greased 9×13-inch pan or line it with parchment paper for easy removal. Use a spatula or your hands (lightly greased with butter) to press the mixture evenly into the pan.
Press firmly but don’t compact it too tightly—you want the bars to hold together but still have that signature light, airy texture. Let the mixture cool at room temperature for 30 minutes until completely set.
You’ll know it’s ready when the top feels firm to the touch and the bars pull away slightly from the edges of the pan.
Step 5: Cut and Serve
Once fully set, use a sharp knife to cut into 12-16 squares. For clean cuts, dip the knife in hot water and wipe it between each slice.
Serve immediately or store in an airtight container at room temperature for up to 3 days. These taste best when fresh but still maintain their chewy texture for a few days. The marshmallow should be stretchy, and the cereal should have a slight crispness with every bite.
Pro Tips For Making Kelloggs Rice Krispie Bars
- Melt Butter Slowly: Use low heat when melting the butter to prevent browning—burnt butter can make your bars taste bitter. I learned this the hard way after ruining a batch with over-eager heat.
- Use Fresh Marshmallows: Stale mini marshmallows won’t melt as smoothly, leaving your bars lumpy. Sounds weird, but it works: squeeze one to check for softness before starting.
- Press While Warm: Press the mixture into the pan immediately after combining—waiting even 5 minutes makes it harder to shape and stick together. My grandmother swore by this, and she was right.
- Butter Your Hands: Lightly grease your hands with butter or oil before pressing the mixture into the pan to avoid sticky fingers and a smoother finish. I was skeptical until I tried it—game changer.
Common Mistakes When Making This Recipe
Over-melting Marshmallows
Never walk away while melting marshmallows—they can go from perfectly smooth to burnt in 30 seconds. I keep the heat on low and stir constantly with a wooden spoon. If they start browning, remove from heat immediately and keep stirring. 🔥
Using Cold Butter
Starting with cold butter causes uneven melting and can leave greasy pockets in your bars. Always use room-temperature butter or melt it first. I cut my ¼ cup butter into small cubes to speed up the melting process.
Skipping the Greased Pan
Without greasing your 9×13-inch pan, the bars will stick and tear when you try to remove them. I use butter for greasing to add extra flavor, but nonstick spray works too. Line with parchment for easiest removal.
Pressing Too Hard
Compacting the mixture too tightly turns your bars into dense bricks instead of light, chewy squares. Use just enough pressure to hold them together—I press with the flat bottom of a measuring cup for even distribution.
Rushing the Cooling
Cutting before the mixture is fully set results in gooey, misshapen pieces. I let mine cool for the full 30 minutes at room temperature. If you’re in a hurry, a 10-minute chill in the fridge helps, but don’t skip it entirely.
Stale Cereal
Old Rice Krispies lose their snap and make your bars soggy. Always check the freshness date and store cereal in an airtight container. I buy a new box specifically for this recipe to guarantee maximum crispiness. ✨
Nutrition Facts
Frequently Asked Questions
Can I use regular marshmallows instead of mini?
Yes, but cut them in half first for faster melting. Regular marshmallows take longer to dissolve and may create uneven texture if left whole.
How do I make these bars extra crispy?
Use fresh cereal and press lightly when shaping. Adding 1 extra cup of crisp rice cereal helps maintain that perfect snap.
Why did my bars turn out hard?
Overcooking the marshmallow mixture or pressing too firmly causes this. Remove from heat as soon as marshmallows melt and press gently.
Can I add mix-ins like chocolate chips?
Stir in up to 1 cup of extras after mixing the cereal. Let the mixture cool slightly first so the chips don’t melt.

- Mujadara Rice and Lentils Recipe: Earthy Spiced Lentils With Caramelized Onions - November 1, 2026
- Naija Fried Rice Recipe: Street-Style Spice With Veggie Crunch - November 1, 2026
- Mushy Rice Recipe: Fluffy Grains Transformed in Minutes - November 1, 2026