
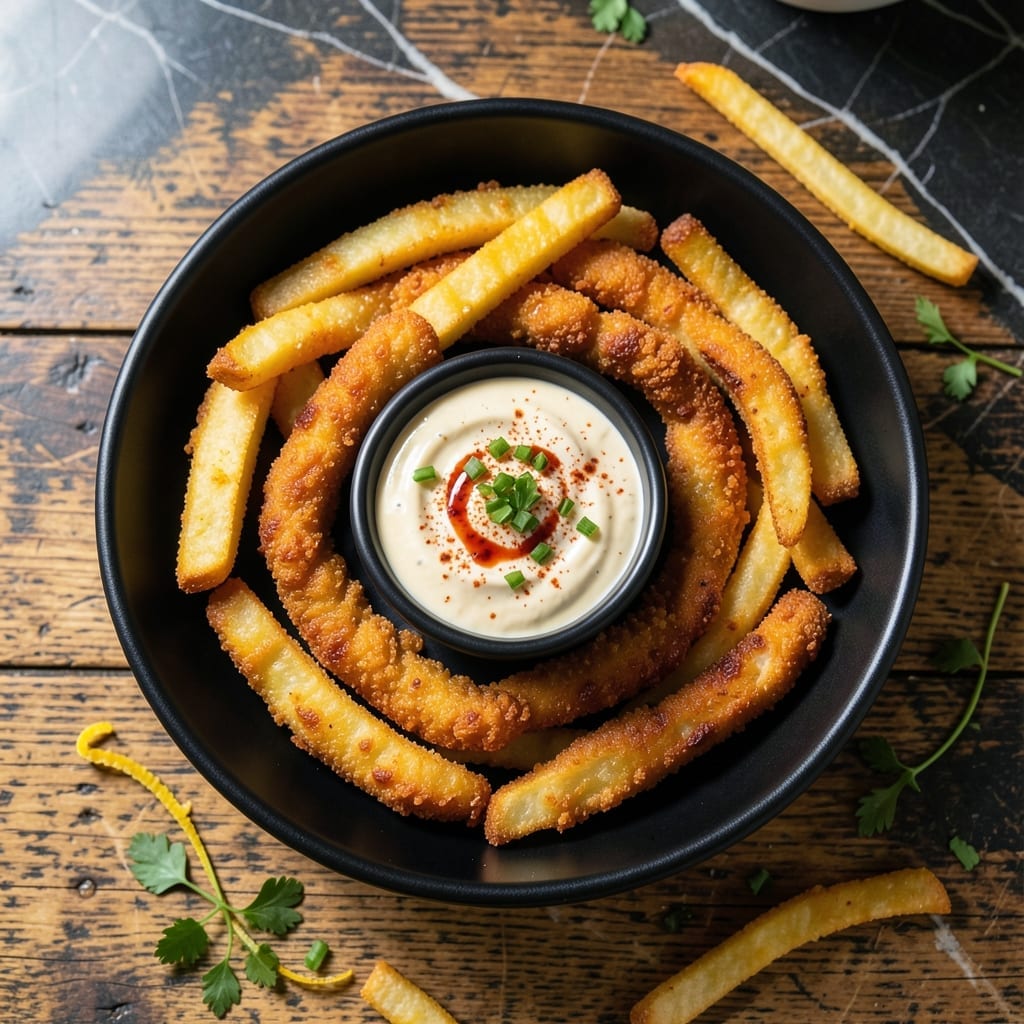
Achieving crispy chicken fries with a juicy center is all about the double-coating technique. I developed this method after countless trials to ensure every bite delivers that perfect contrast of textures.
The secret lies in marinating the strips first, then coating them in seasoned flour before a final dip in egg and breadcrumbs. This creates a shatteringly crispy exterior that locks in moisture for that coveted juicy interior.
Cooking at the right temperature is crucial—too low and they’ll absorb oil, too high and they’ll burn before cooking through. I’ve nailed the sweet spot for golden, crispy results every time.
Serve these immediately for maximum crunch. The technique is simple but the results are anything but.
Ingredients for Kiki’s Chicken Fries
Quality ingredients make these chicken fries perfectly crispy with juicy centers every time.
| Ingredient | Amount | Notes |
|---|---|---|
| Boneless Skinless Chicken Breasts 🍗 | 1 ½ lb | Cut into 1-inch thick strips |
| Buttermilk 🥛 | 1 cup | For marinating chicken |
| Hot Sauce 🌶️ | 1 tbsp | Added to buttermilk marinade |
| All-Purpose Flour 🌾 | 1 ½ cups | For first coating layer |
| Paprika 🌶️ | 1 tbsp | Sweet or smoked variety |
| Garlic Powder 🧄 | 1 tsp | For seasoning flour |
| Onion Powder 🧅 | 1 tsp | For seasoning flour |
| Salt 🧂 | 1 tsp | Divided for marinade and seasoning |
| Black Pepper 🌶️ | ½ tsp | Freshly ground preferred |
| Large Eggs 🥚 | 2 whole | Beaten for egg wash |
| Panko Breadcrumbs 🍞 | 2 cups | For final crispy coating |
| Vegetable Oil 🫒 | 3 cups | For deep frying |
| Cayenne Pepper 🔥 | ¼ tsp | Optional for heat |
The chicken quality is paramount. Air-chilled, free-range breasts from Whole Foods or a reputable butcher yield superior texture. Avoid pre-cut tenders—they dry out faster. For the buttermilk, full-fat provides better adhesion for the coating. The hot sauce adds subtle tang; Crystal or Tabasco work well (or whatever you have open).
No buttermilk? Whole milk with 1 tbsp vinegar or lemon juice stands in perfectly. Swap panko for regular breadcrumbs if needed (crisp factor drops slightly). For extra crunch, crushed cornflakes are a surprising upgrade. The paprika can be omitted, but it adds vibrant color and depth. Always use fresh oil—reused oil burns the coating faster.
Marinate the chicken for at least 4 hours (overnight is ideal). Store raw strips in the fridge for up to 2 days. Cooked fries stay crispy for 10 minutes—keep warm in a 200°F oven if frying in batches. Leftovers? Reheat in the air fryer for near-perfect revival.
Why You’ll Love This Recipe
- Quick Prep: So easy. I mean, just toss chicken in buttermilk and hot sauce, coat in flour, and bake—no fancy steps.
- Bold Kick: That paprika and hot sauce combo gives it a smoky, spicy crunch that’s dangerously addictive.
- Crowd Pleaser: I’ve served these at game nights and weeknight dinners—even the picky eaters come back for seconds.
- Budget Stretch: One batch feeds four, costs less than takeout, and leftovers reheat surprisingly well.
Step-by-Step Instructions for Chicken Fries
Master the technique for achieving maximum crunch while preserving the chicken’s natural juiciness.
Step 1: Marinate the Chicken for Tenderness
Cut the 1.5 lb boneless skinless chicken breasts into 1-inch thick strips and place them in a large bowl. In a separate bowl, whisk together the 1 cup buttermilk, 1 tbsp hot sauce, and ½ tsp salt until the salt dissolves completely.
Pour the buttermilk mixture over the chicken strips, ensuring each piece is fully submerged. Cover and refrigerate for at least 1 hour, or up to 4 hours for maximum tenderness. The acidity in the buttermilk breaks down proteins, guaranteeing the juicy bite promised in the title.
Step 2: Prepare the Seasoned Breading Stations
In a shallow dish, combine the 1.5 cups all-purpose flour, 1 tbsp paprika, 1 tsp garlic powder, 1 tsp onion powder, remaining ½ tsp salt, and ½ tsp black pepper. Mix thoroughly until the spices are evenly distributed. This creates your first coating layer.
In a second shallow dish, beat the 2 whole large eggs until homogeneous. In a third dish, combine the 2 cups panko breadcrumbs with the ¼ tsp cayenne pepper for a subtle kick. Organizing these stations in advance ensures a smooth, mess-free breading process.
Step 3: Execute the Three-Step Breading Process
Remove the chicken from the marinade, allowing excess buttermilk to drip off. Dredge each piece in the seasoned flour, pressing gently to adhere. Shake off any excess flour—this prevents clumping in the final product.
Dip the floured chicken into the beaten eggs, ensuring complete coverage. Let any excess egg drip off for 5 seconds before transferring to the panko breadcrumbs. Press the chicken firmly into the panko, turning to coat all sides completely. Place breaded strips on a wire rack to rest for 10 minutes—this helps the coating set.
Step 4: Fry to Golden Perfection
Heat the 3 cups vegetable oil in a deep, heavy-bottomed pot to 350°F. Use a thermometer for precision—this temperature ensures the exterior crisps before the interior overcooks. Carefully lower 3-4 breaded strips into the oil, avoiding overcrowding which lowers the oil temperature.
Fry for 4-5 minutes per side until deep golden brown and the internal temperature reaches 165°F. The panko will create an audibly crisp crust. Transfer to a wire rack or paper towel-lined plate to drain. The contrast between the crispy coating and juicy interior delivers on both key promises.
Pro Tips For Making Kiki’S Chicken Fries
- Soak Overnight: Let the chicken strips marinade in buttermilk and hot sauce for at least 8 hours—I learned this the hard way after my first batch came out dry and bland.
- Double Dredge: Dip the marinated chicken in flour, then back in buttermilk, then flour again for that extra crispy crust that actually stays put.
- Hot Oil Test: Drop a pinch of flour in the oil first—if it sizzles immediately, it’s ready; if not, wait. After burning three batches, I finally figured out this simple check.
- Rest Before Serving: Give the fries 5 minutes on a wire rack after frying to keep them crisp instead of soggy—my grandmother swore by this, and she was right.
Pro Cooking Tips for Great kikis chicken fries
Oil Temperature Control
Maintaining 350°F oil temperature is non-negotiable for that perfect crunch. I use a deep-fry thermometer clipped to the pot—it’s the only way to ensure accuracy. If the oil dips below 325°F, the coating absorbs grease instead of crisping.
Breading Adhesion Trick
Let the breaded strips rest on a wire rack for 10 minutes before frying. This step sets the coating, preventing it from sliding off during cooking. I learned this the hard way after my first few batches ended up bare in spots.
Avoid Overcrowding
Fry only 3-4 strips at a time in a 5-quart Dutch oven. Overcrowding drops the oil temp too fast, leading to soggy results. I use my Lodge enameled cast iron for even heat distribution.
Double-Fry for Extra Crisp
For restaurant-level crunch, fry once at 325°F for 3 minutes, rest for 5 minutes, then fry again at 375°F for 2 minutes. This double-fry method locks in juiciness while maximizing crispiness. 🔥
Drain Properly
Always drain on a wire rack, never paper towels. The rack allows air circulation, keeping the coating crisp on all sides. Paper towels trap steam, making the bottoms soggy—trust me, I’ve ruined batches this way.
Rest Before Serving
Let the fries rest for 2-3 minutes after frying. This brief pause lets the juices redistribute, ensuring that promised juicy bite. Serve immediately for peak crunch.
Nutrition Facts
Frequently Asked Questions
Can I bake these instead of frying?
Yes! Bake at 400°F for 15-20 minutes, flipping halfway. Use a wire rack on a baking sheet for even air circulation. The texture won’t be as crispy, but it’s a healthier option.
What’s the best oil for frying?
Vegetable, canola, or peanut oil work best due to their high smoke points. Avoid olive oil—it burns at frying temps. Always use fresh oil for the crispiest results.
How do I keep them warm while frying batches?
Place cooked fries on a wire rack in a 200°F oven. This maintains crispiness without overcooking. Never stack them—it traps steam and makes them soggy.
Can I make these ahead of time?
Bread the strips and refrigerate uncovered for up to 2 hours before frying. For longer storage, freeze breaded strips on a tray first, then transfer to a bag. Fry from frozen, adding 1-2 minutes.

- Jollof Rice Sauce Recipe: West African Tomato and Spice Infusion - September 25, 2026
- Japanese Rice Soup Recipe: Umami-Rich Comfort in a Bowl - September 25, 2026
- Homemade Cream Of Rice Recipe: Silk-Smooth Breakfast in Minutes - September 25, 2026