
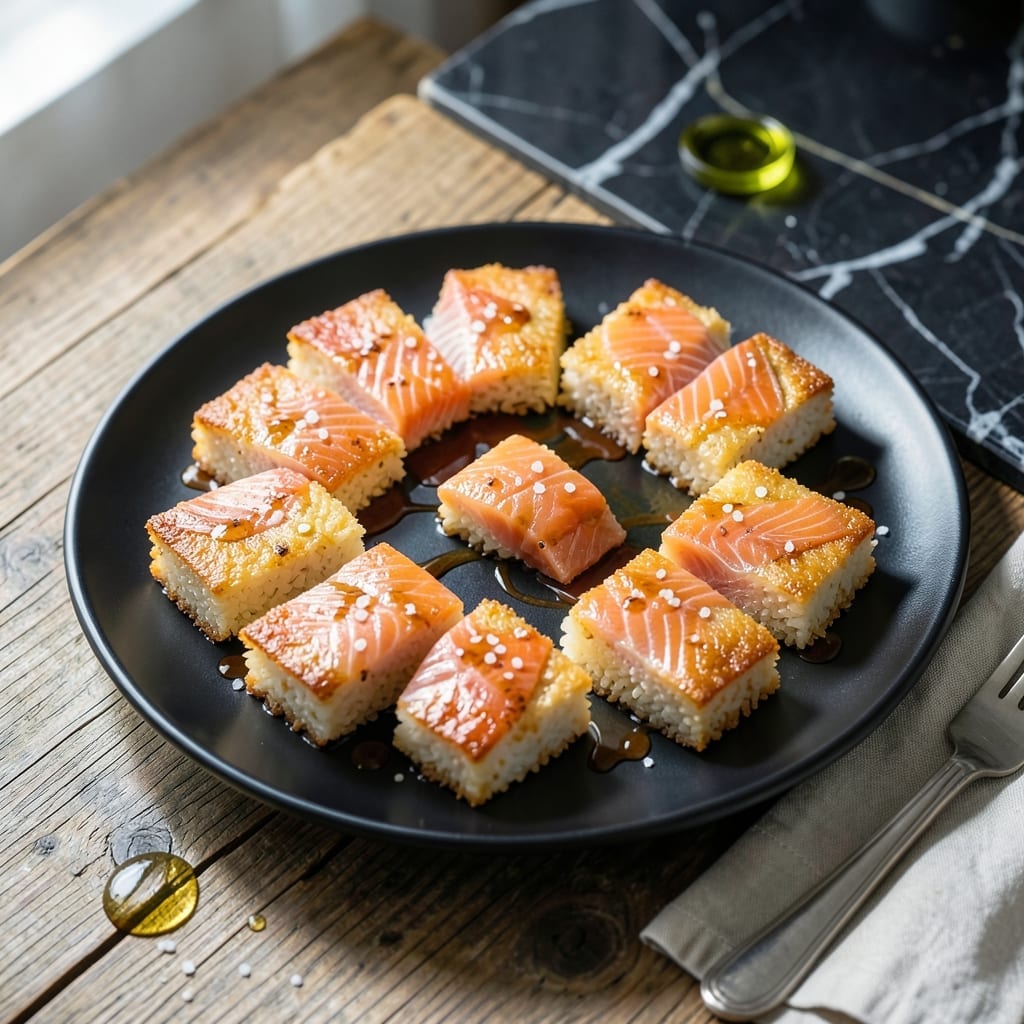
This recipe transforms everyday rice into a crispy, golden masterpiece with layers of umami flavor.
I developed this method to achieve the perfect balance between a shatteringly crispy exterior and tender center. The secret lies in pressing and chilling the rice before frying.
What emerges from the pan is a dish with incredible texture contrast—crunchy edges giving way to soft, flavorful rice inside. The umami depth comes from a combination of soy sauce and dashi.
Serve these as an elegant appetizer or alongside your favorite Asian-inspired main course. Here’s how to create this restaurant-quality dish at home.
Ingredients for Koi Crispy Rice
Short list of ingredients, mostly pantry staples, for that perfect crispy texture and umami kick.
| Ingredient | Amount | Notes |
|---|---|---|
| Sushi Rice 🍚 | 2 cups | Short-grain, uncooked, rinsed well |
| Water 💧 | 2 ½ cups | For cooking rice |
| Rice Vinegar 🍶 | 3 tbsp | Seasoned rice vinegar preferred |
| Granulated Sugar 🍚 | 1 tbsp | Dissolved in vinegar |
| Kosher Salt 🧂 | 1 tsp | Divided for rice and seasoning |
| Dashi Stock 🍲 | ½ cup | Japanese fish stock concentrate |
| Low-Sodium Soy Sauce 🥄 | 3 tbsp | Divided for seasoning and drizzling |
| Neutral Oil 🫒 | ½ cup | For frying, high smoke point |
| Unsalted Butter 🧈 | 2 tbsp | Optional for richness |
| Scallions 🧅 | 3 whole | Thinly sliced for garnish |
| Sesame Seeds 🌿 | 1 tbsp | Toasted, for garnish |
| Nori Sheets 🍣 | 2 sheets | Cut into thin strips |
| Sriracha 🌶️ | 1 tbsp | For spicy drizzle, optional |
| Mayonnaise 🥄 | 2 tbsp | For spicy mayo, optional |
The rice is everything here. Short-grain sushi rice is non-negotiable—jasmine or basmati won’t give you that sticky base needed for pressing. Koshihikari or Nishiki brands are my go-tos (both at Asian markets or Whole Foods). Don’t skip rinsing the rice—removes excess starch so it crisps up right. For dashi, instant granules work fine, but liquid dashi has deeper flavor.
No dashi? Chicken or vegetable stock with a pinch of MSG gets you 80% there. Out of rice vinegar? Apple cider vinegar at half the amount works, but the flavor shifts slightly. Skip the butter if you want it lighter (still delicious). The nori strips can be swapped for furikake seasoning—same umami punch, less effort. Sriracha not your thing? Gochujang thinned with a little water adds a different kind of heat.
Pressed rice blocks keep in the fridge for 2 days before frying—perfect for prep ahead. Fried rice crisps best fresh, but leftovers reheat in a dry pan for 2-3 minutes. Store garnishes separately so they stay crisp. The spicy mayo? Make extra—it’s great on everything from burgers to fries.
Why You’ll Love This Recipe
- 5-Minute Mix: I dump the sushi rice, vinegar, sugar and salt in one pot—no chopping, no fuss.
- Crispy Sweet Bite: That sugar-kissed vinegar tang with the golden crust is honestly ridiculous.
- Snack or Meal: I pack the pan for lunchboxes or serve it warm as a quick dinner base.
- Stretches Far: One batch feeds us for two days and costs less than takeout.
Step-by-Step Instructions for Koi Crispy Rice
Here’s the method that delivers that addictive crunch and deep umami flavor every time.
Step 1: Cook and Season the Sushi Rice
Rinse the 2 cups Sushi Rice under cold water until the water runs clear, then drain well. Combine it with the 2.5 cups Water in a rice cooker or pot. Cook until tender and the water is absorbed—about 20 minutes for most rice cookers.
While the rice is hot, gently fold in the 3 tbsp Rice Vinegar, 1 tbsp Granulated Sugar, and ½ tsp Kosher Salt. The vinegar should be warm to help it absorb evenly. Spread the rice on a baking sheet and let it cool to room temperature. This prevents it from turning mushy when fried.
Step 2: Shape and Chill the Rice
Once cooled, wet your hands lightly and shape the rice into 8 small rectangles (about the size of a sushi roll). Press firmly so they hold together—this compact shape ensures even crisping. Place them on a parchment-lined tray and refrigerate for at least 1 hour.
Chilling is non-negotiable here. Cold rice fries up crispier and holds its shape better in the hot 0.5 cup Neutral Oil. I like to make these the night before if I’m prepping for a crowd, as the texture improves with a longer chill.
Step 3: Fry to Golden Perfection
Heat the 0.5 cup Neutral Oil in a deep skillet over medium-high heat until shimmering—you want it hot enough that a pinch of rice sizzles vigorously. Carefully add the rice rectangles in a single layer, working in batches if needed to avoid crowding.
Fry for 2-3 minutes per side until deep golden brown and crispy. You’ll see the edges turn translucent first—that’s your cue to flip. Add the 2 tbsp Unsalted Butter during the last minute for extra richness and a glossy finish.
Step 4: Drizzle and Garnish
Drain the crispy rice on a paper towel-lined plate. While still hot, drizzle with 2 tbsp Low-Sodium Soy Sauce and 0.5 cup Dashi Stock reduced by half. The rice will soak up these flavors like a sponge.
Garnish with thinly sliced 3 whole Scallions, 1 tbsp Sesame Seeds, and strips of 2 sheets Nori Sheets. For a spicy kick, mix the 1 tbsp Sriracha with the 2 tbsp Mayonnaise and drizzle over the top. Serve immediately while the contrast between the crispy exterior and tender interior is at its peak.
Pro Tips For Making Koi Crispy Rice
- Rinse the Rice: Wash the sushi rice under cold water until the water runs clear—this removes excess starch so your crispy rice gets that perfect crunch without turning gummy.
- Press It Hard: When shaping the rice into the pan, press down firmly with a spatula or your hands (wet them first!) to compact it—this guarantees even browning and that satisfying crispy layer.
- Skip Wet Tools: I learned this the hard way—use dry utensils when handling the rice after seasoning, or the vinegar mixture will slide right off instead of sticking where it belongs.
- Rest Before Frying: Let the seasoned rice sit for 10 minutes before crisping it in the pan—this helps the grains firm up so they hold together instead of falling apart.
Make-Ahead Tips for This Recipe
Press Ahead
You can shape and chill the rice rectangles up to 2 days before frying. Press them firmly into rectangles, wrap the tray tightly with plastic, and refrigerate. This actually improves the texture as the rice dries out slightly. 💡
Prep Garnishes Early
Slice the 3 whole Scallions and toast the 1 tbsp Sesame Seeds up to 1 day ahead. Store them in separate airtight containers at room temperature. The nori strips can be cut and kept in a sealed bag with a paper towel to absorb moisture.
Make Sauces in Advance
Mix the 1 tbsp Sriracha and 2 tbsp Mayonnaise for the spicy mayo up to 3 days ahead. Keep it covered in the fridge. Reduce the 0.5 cup Dashi Stock by half and store it in the fridge for up to 5 days.
Day-Of Efficiency
Fry the rice just before serving for the best texture. Have all your garnishes and sauces ready to go. I like to set up a small assembly line with everything prepped and within reach. This makes the final step quick and stress-free.
Reheating Leftovers
If you have leftovers, reheat them in a dry skillet over medium heat for 2-3 minutes per side. This helps restore some crispiness. Avoid the microwave, as it will make them soggy. Serve with fresh garnishes for the best experience.
Nutrition Facts
Frequently Asked Questions
Can I use a different type of rice?
Stick with short-grain sushi rice for best results. Long-grain varieties won’t hold together as well when pressed and fried. The sticky nature of sushi rice is key for achieving that perfect crispy exterior.
How do I know when the oil is hot enough?
Test by dropping a small piece of rice into the 0.5 cup Neutral Oil. If it sizzles immediately and floats to the surface, it’s ready. Aim for medium-high heat to avoid burning the outside before the inside cooks.
Can I bake these instead of frying?
Yes, but the texture will differ. Bake at 400°F for 15-20 minutes, flipping halfway. You’ll get a crispier result with frying, though. Baking works if you’re avoiding deep frying.
Why did my rice fall apart when frying?
This usually means the rice wasn’t cold enough or pressed firmly enough before frying. Ensure you chill for at least 1 hour and press the rice rectangles tightly when shaping.

- Mujadara Rice and Lentils Recipe: Earthy Spiced Lentils With Caramelized Onions - November 1, 2026
- Naija Fried Rice Recipe: Street-Style Spice With Veggie Crunch - November 1, 2026
- Mushy Rice Recipe: Fluffy Grains Transformed in Minutes - November 1, 2026