
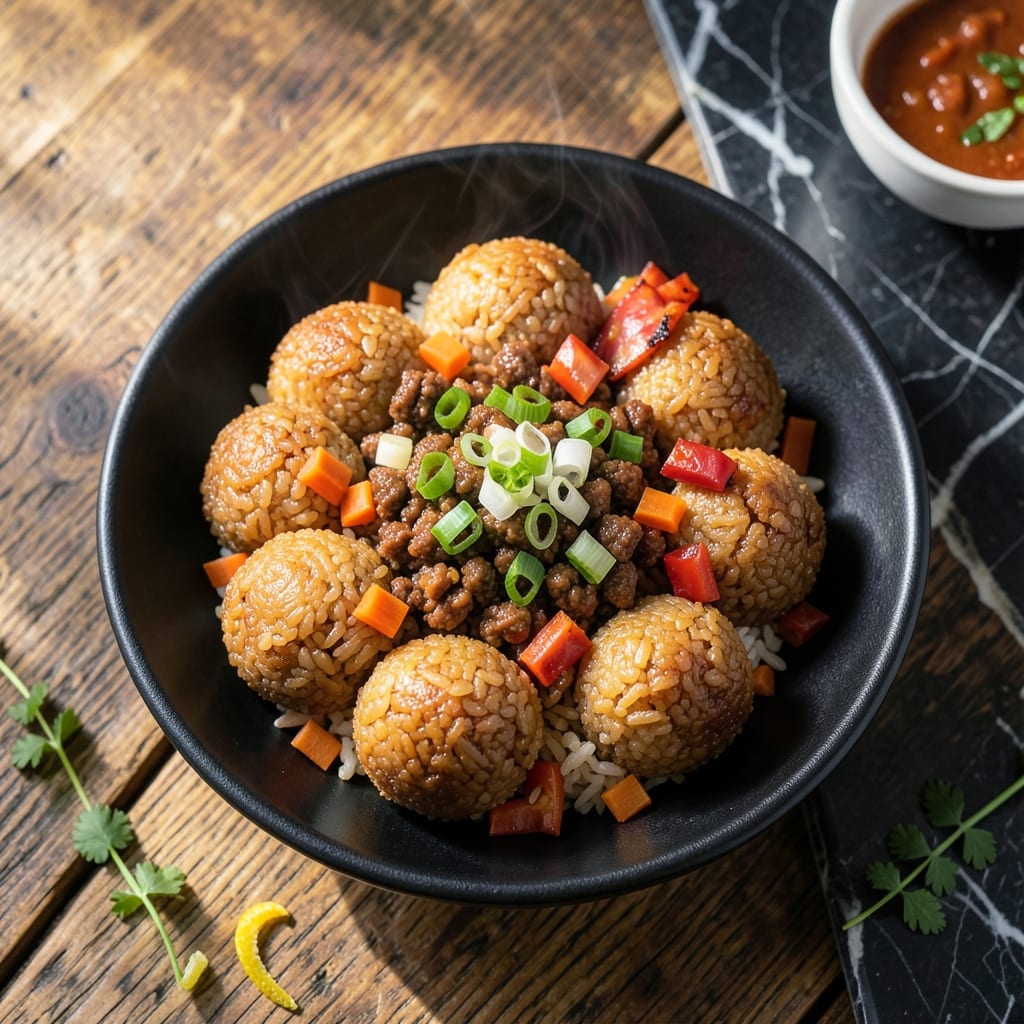
This Korean-inspired dish transforms leftover rice into golden, crispy orbs with savory centers. I developed this recipe after discovering how street vendors in Seoul create these addictive bites with minimal ingredients.
The secret lies in chilling the rice overnight and using a starch coating before frying. This ensures the exterior stays shatteringly crispy while the inside remains tender and packed with flavor.
Each bite delivers a perfect contrast: the outer crunch gives way to a warm, seasoned rice filling. The technique is simple but requires attention to temperature control for professional results.
Serve these as an appetizer or side dish. The method works with various fillings, from kimchi to bulgogi, while maintaining that signature crispy texture.
Ingredients for Korean Fried Rice Ball
Transform leftover rice with these Korean pantry staples into crispy, addictive bites.
| Ingredient | Amount | Notes |
|---|---|---|
| Cooked White Rice 🍚 | 4 cups | Day-old, chilled overnight |
| Kimchi 🥬 | 1 cup | Chopped, well-fermented preferred |
| Ground Pork 🥩 | ½ lb | Or substitute ground beef |
| Carrot 🥕 | 1 whole | Finely diced for filling |
| Green Onions 🧅 | 4 whole | Thinly sliced, separated |
| Garlic Cloves 🧄 | 3 cloves | Minced for seasoning |
| Soy Sauce 🫒 | 2 tbsp | Low-sodium for balance |
| Sesame Oil 🫒 | 1 tbsp | Toasted for depth |
| Gochujang 🌶️ | 1 tbsp | Korean chili paste, adjust to taste |
| Cornstarch 🌾 | ½ cup | For crispy coating |
| Large Eggs 🥚 | 2 whole | Beaten for binding starch |
| Neutral Oil 🫒 | 2 cups | For deep frying, vegetable or canola |
| Sesame Seeds 🌰 | 1 tbsp | Toasted for garnish |
| Kosher Salt 🧂 | 1 tsp | Adjust to taste |
| Black Pepper 🌶️ | ½ tsp | Freshly ground preferred |
The rice is critical here—day-old, fully chilled rice holds its shape and fries up crispier than fresh. For the kimchi, seek out napa cabbage kimchi at an Asian market or the refrigerated section at H Mart. The gochujang adds essential depth; Sempio or Kochukaru are reliable brands. Ground pork is traditional, but ground chicken or tofu works for variation. Always use toasted sesame oil—the untoasted variety lacks complexity.
No kimchi on hand? Sauerkraut with a dash of sriracha mimics the tang and heat. Out of gochujang? Miso paste plus chili flakes gets you close. For a vegetarian version, mushrooms or zucchini replace the pork beautifully. The cornstarch coating is non-negotiable for that shatteringly crispy exterior—arrowroot powder works in a pinch. Fresh rice will fall apart, so plan ahead.
The formed rice balls can rest in the fridge for up to 2 hours before frying. Once cooked, they’re best served immediately but reheat in an air fryer at 375°F for 5 minutes (worth the extra minute). Store any leftovers in the fridge for 2-3 days, though the texture softens slightly. Freezing isn’t recommended—it ruins that perfect crunch.
Why You’ll Love This Recipe
- 20-Minute Meal: I can get these from fridge to table faster than takeout arrives. Just mix, shape, and pan-fry.
- Umami Bomb: The kimchi and pork create this deep, tangy-savory flavor that hits all the right notes with every bite.
- Lunchbox MVP: My kids actually eat their leftovers cold the next day. Between us, I pack them for myself too.
- Pantry Magic: Uses up that leftover rice and half-empty kimchi jar. Honestly, it’s my favorite way to clean out the fridge.
Step-by-Step Instructions for Korean Fried Rice Balls
Master the technique for achieving an ultra-crispy exterior while keeping the filling moist and flavorful.
Step 1: Prepare the Savory Pork Filling
In a skillet over medium-high heat, cook the 0.5 lb ground pork until browned, breaking it into small crumbles. Add the finely diced carrot, minced 3 cloves garlic cloves, and white portions of the 4 whole green onions.
Once the pork is cooked through, stir in the 2 tbsp soy sauce, 1 tbsp gochujang, 1 tbsp sesame oil, 1 tsp kosher salt, and 0.5 tsp black pepper. Cook for 2-3 minutes until the mixture is fragrant and the sauce has thickened slightly. Remove from heat and fold in the 1 cup kimchi.
Let the filling cool completely. This prevents it from steaming the rice when assembled and maintains the structural integrity of your rice balls.
Step 2: Form and Coat the Rice Balls
In a large bowl, combine the 4 cups cooked white rice with the remaining green onion slices. The rice should be cold and slightly firm—day-old rice works best for this. Divide the rice into 8 equal portions (about ½ cup each).
Flatten a rice portion in your palm, creating a small well in the center. Add 1-2 tablespoons of the cooled pork filling, then gently mold the rice around it to form a sealed ball. The rice should completely encase the filling with no gaps.
Roll each ball in the 0.5 cup cornstarch until fully coated. Press lightly to ensure the cornstarch adheres—this is your first layer for achieving that promised crispy texture.
Step 3: Apply the Egg Wash and Second Coating
Beat the 2 whole large eggs in a shallow bowl until well combined. Dip each cornstarch-coated rice ball into the egg mixture, ensuring full coverage. Let any excess drip off before rolling it in the cornstarch again for a double coating.
This dual-layer technique creates an extra-crispy shell. Place the coated balls on a parchment-lined tray and refrigerate for 20 minutes to set the coating. Chilling firms up the structure, preventing breakage during frying.
Step 4: Deep-Fry to Golden Perfection
Heat the 2 cups neutral oil in a deep, heavy pot to 350°F. Use a thermometer for precision—this temperature ensures even cooking without burning the exterior before the inside warms through.
Fry the rice balls in batches for 4-5 minutes, turning occasionally, until they’re deep golden brown and crispy all over. Don’t overcrowd the pot; maintain the oil temperature by frying in small batches.
Remove with a slotted spoon and drain on a wire rack or paper towels. The exterior should be shatteringly crisp while the inside remains hot and moist.
Step 5: Garnish and Serve Immediately
Sprinkle the hot rice balls with the 1 tbsp sesame seeds while still glistening from the fryer. The residual heat will help the seeds adhere. Serve immediately—the contrast between the crispy exterior and the savory, warm filling is best enjoyed fresh.
For presentation, arrange on a platter with extra green onions if desired. The sesame seeds add a nutty aroma and visual appeal, signaling the dish is ready to be enjoyed.
Pro Tips For Making Korean Fried Rice Ball
- Chill the Rice: Use day-old, cold rice straight from the fridge—freshly cooked rice is too moist and will turn your rice balls into a gummy mess. I learned this the hard way after my first batch fell apart mid-fry.
- Squeeze the Kimchi: Drain and squeeze out excess liquid from the kimchi before mixing it in, or your filling will be watery and hard to shape. About 30 seconds of squeezing does the trick.
- Pre-cook the Pork: Brown the ground pork first and drain the fat, then mix it with the other filling ingredients. Skipping this step leaves the pork raw in the center and greasy on the outside.
- Wet Your Hands: Keep a bowl of water nearby and dip your hands in it before shaping each rice ball—this prevents sticking and makes the process way less frustrating.
Troubleshooting This Recipe
Filling Leaks Out
If your filling escapes during frying, the rice mixture was likely too warm when assembling. Always chill the pork filling for 30 minutes before using. Also, press the rice edges tightly to seal completely—think of it like wrapping a burrito. 💡
Coating Falls Off
This happens when the egg wash doesn’t adhere properly. Pat the rice balls dry before dipping in egg, and use a fork to roll them in cornstarch for even coverage. The double coating needs 20 minutes in the fridge to set properly.
Uneven Browning
Inconsistent oil temperature is the culprit. Use a deep-fry thermometer and maintain 350°F throughout. Fry in small batches to prevent temperature drops. Turn the balls occasionally for even color development.
Rice Balls Break Apart
Fresh rice is too moist for this recipe. Always use day-old chilled rice—it’s firmer and holds shape better. Also, don’t overfill; stick to 1-2 tbsp of filling per ball. Chill formed balls for 20 minutes before frying. 🔥
Soggy Exterior
This occurs when draining on paper towels too long. Use a wire rack instead to allow air circulation. Also, ensure oil is hot enough before frying—test with a bread cube that should sizzle immediately.
Filling Undercooked
If the center isn’t warm, your oil temperature might be too low. Increase to 375°F and extend frying time to 6 minutes. Alternatively, microwave the filling for 30 seconds before assembling.
Nutrition Facts
Frequently Asked Questions
Can I use fresh rice instead of day-old?
No, fresh rice is too moist and will fall apart. Day-old chilled rice holds its shape better and creates a crispier exterior. If you’re in a pinch, spread freshly cooked rice on a tray and refrigerate for 1-2 hours to dry it out.
What can I use instead of pork?
Ground chicken, beef, or tofu work well. For a vegetarian version, try finely chopped mushrooms or zucchini. Each alternative brings its own texture and flavor, so adjust seasoning accordingly.
How do I keep them crispy after frying?
Drain on a wire rack, not paper towels, to maintain airflow. Serve immediately for the best texture. If reheating, use an air fryer at 375°F for 5 minutes to restore crispiness.
Can I bake instead of deep-frying?
Yes, but the texture will differ. Bake at 400°F for 20-25 minutes, turning halfway. Brush with oil for extra crispiness. The result won’t be as crispy as deep-frying but is a healthier alternative.

- Mujadara Rice and Lentils Recipe: Earthy Spiced Lentils With Caramelized Onions - November 1, 2026
- Naija Fried Rice Recipe: Street-Style Spice With Veggie Crunch - November 1, 2026
- Mushy Rice Recipe: Fluffy Grains Transformed in Minutes - November 1, 2026