
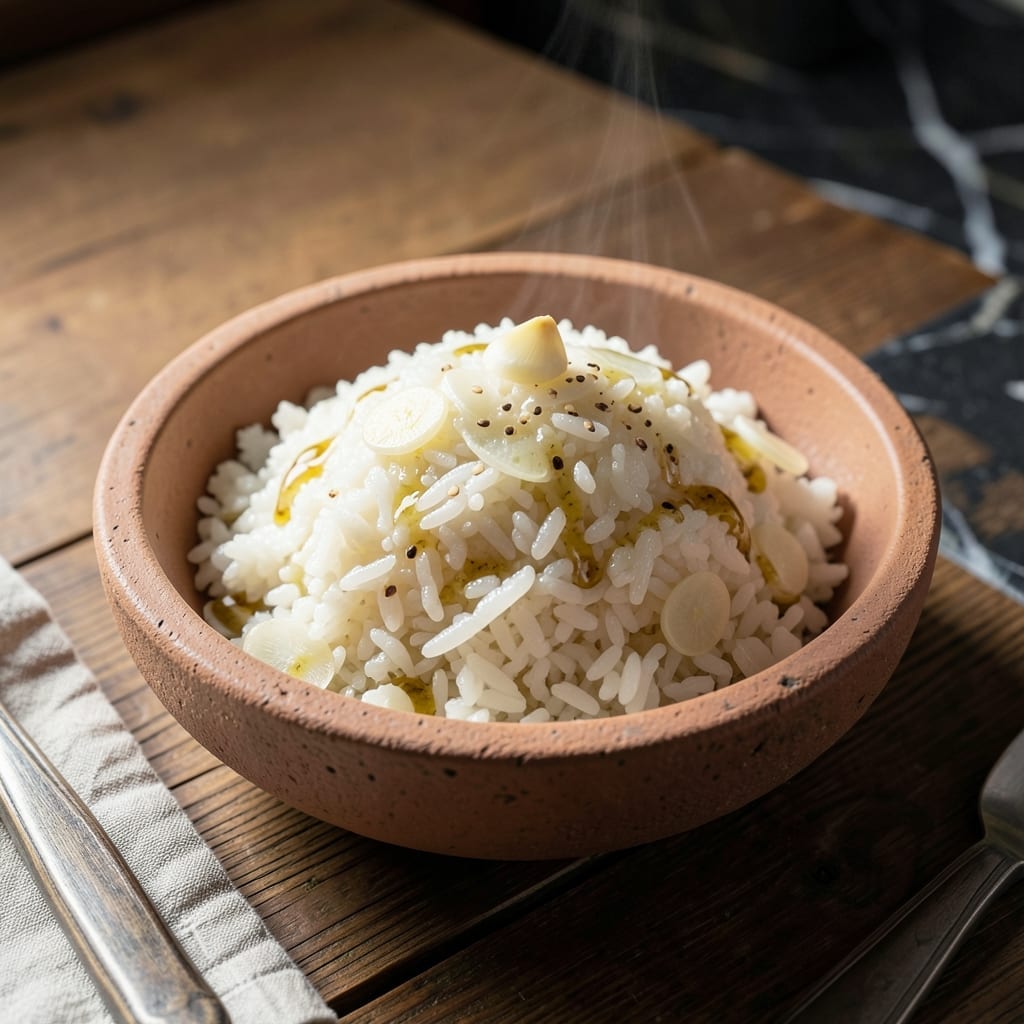
There’s a reason Korean white rice is the foundation of so many meals—its fluffy texture and subtle nutty flavor elevate every dish it accompanies. This method uses short-grain rice and precise water ratios for consistent results.
Whether cooked in a rice cooker or on the stovetop, the technique ensures perfectly tender grains every time. Serve as a base for stews, grilled meats, or enjoy it plain with a drizzle of sesame oil.
Ingredients for Korean White Rice
Short-grain rice and precise ratios create the fluffy, nutty foundation for countless meals.
| Ingredient | Amount | Notes |
|---|---|---|
| Short-Grain White Rice 🌾 | 2 cups | Rinsed until water runs clear |
| Water 💧 | 2 ½ cups | Filtered for best texture |
| Kosher Salt 🧂 | ½ tsp | Diamond Crystal preferred |
| Toasted Sesame Oil 🫒 | 1 tsp | For finishing drizzle |
| Vegetable Oil 🫒 | 1 tsp | Neutral flavor, for rice cooker bowl |
| Garlic Cloves 🧄 | 2 cloves | Minced, optional for aroma |
| Green Onions 🧅 | 2 whole | Thinly sliced, for garnish |
| Sesame Seeds 🌰 | 1 tbsp | Toasted, for garnish |
Short-grain rice is non-negotiable here—Korean brands like Ssanggyesa or Nishiki deliver authentic texture. Look for labels specifying ‘short-grain’ or ‘sushi rice’ at H Mart or well-stocked Asian markets. The water ratio of 1.25:1 (water to rice) is critical for that signature tenderness. Rinsing removes excess starch, preventing gummy results. I recommend a fine-mesh strainer for this step to avoid losing grains down the drain.
No short-grain rice? Jasmine rice works in a pinch but yields slightly firmer grains. For the sesame oil, Kadoya or Ottogi offer authentic Korean flavor. If avoiding oil, skip the vegetable oil but keep the sesame oil finish—it’s essential. The garlic and green onions are optional but highly recommended for depth. Frozen pre-minced garlic (the kind in oil) works if fresh isn’t available.
Uncooked rice keeps indefinitely in a sealed container. Once cooked, it stays fresh for 3-4 days refrigerated or 1 month frozen. Reheat with a splash of water and a tight lid to restore moisture. For meal prep, portion while warm—the grains separate more easily when fresh.
Why You’ll Love This Recipe
- Set and Forget: It’s just rice, water, and a pinch of salt—then the rice cooker does all the work while I do literally anything else.
- Nutty Depth: That drizzle of toasted sesame oil at the end turns plain rice into something rich and aromatic.
- Pairs with Everything: I serve it under bulgogi one night and fry it up for kimchi fried rice the next.
- Stretches Far: A big batch costs pennies and feeds us for days, reheating perfectly every time.
Step-by-Step Instructions for Korean White Rice
Master the technique for perfectly fluffy grains with authentic aroma and texture.
Step 1: Rinse the Short-Grain White Rice Thoroughly
Place the 2 cups Short-Grain White Rice in a fine-mesh strainer and rinse under cold running water. Agitate the grains with your hand, swirling gently until the water runs completely clear. This removes excess starch that could make the rice gummy.
I recommend rinsing at least 4-5 times—you’ll notice the water becomes progressively clearer with each rinse. Drain well, then let the rice sit in the strainer for 5 minutes to remove any lingering moisture. Proper rinsing ensures each grain remains distinct and fluffy.
Step 2: Combine Rice with Water and Salt in Cooker
Transfer the rinsed Short-Grain White Rice to your rice cooker bowl. Add the 2.5 cups Water and 0.5 tsp Kosher Salt, then stir gently to distribute the salt evenly. The water level should sit about ½ inch above the rice when settled.
Add the 1 tsp Vegetable Oil and stir once more—this prevents sticking and adds subtle richness. For best results, use filtered water as specified in the ingredients; minerals in tap water can affect texture. Close the rice cooker lid securely and proceed to cooking.
Step 3: Cook Until Water Absorbs and Rice Steams
Start the rice cooker on its standard white rice setting. The cooker will automatically adjust temperature, but expect the cycle to take about 20-25 minutes. Avoid opening the lid during cooking—releasing steam interrupts the process and can lead to uneven texture.
You’ll know it’s nearing completion when you hear a subtle shift in the cooker’s hum and see steam escaping from the vent. The cooker will typically switch to “keep warm” mode automatically once done. Let it sit in this mode for an additional 10 minutes to allow residual steam to finish cooking the grains.
Step 4: Fluff and Season with Aromatics
After the resting period, open the lid and use a rice paddle to gently fluff the rice from the bottom up. This separates the grains and releases excess moisture. If using, stir in the 2 cloves Garlic Cloves (minced) at this stage—their aroma will infuse beautifully into the hot rice.
Drizzle the 1 tsp Toasted Sesame Oil evenly over the surface. This adds the signature nutty depth characteristic of Korean rice. Fold it in gently with the rice paddle, distributing the oil without breaking the grains.
Step 5: Garnish and Serve Immediately
Transfer the rice to a serving bowl. Top with the 2 whole Green Onions (thinly sliced) and 1 tbsp Sesame Seeds (toasted). The green onions add freshness while the sesame seeds provide textural contrast and visual appeal.
Serve while hot—the grains should be tender yet firm, with a subtle sheen from the sesame oil. Each bite should deliver the rice’s natural sweetness enhanced by the nutty aroma. This preparation yields enough for 4 servings, perfect as a base for any Korean meal.
Pro Tips For Making Korean White Rice
- Rinse the Rice: Wash the short-grain rice under cold water until it runs clear—this removes excess starch so your grains stay separate and fluffy, not gummy.
- Soak 30 Minutes: After rinsing, let the rice soak in water for at least 30 minutes; I learned this the hard way—it shortens cook time and guarantees even texture.
- Use Less Water: For Korean rice, the ratio is usually 1:1.1 (rice to water), not the 1:2 you might use for other types—any more and you’ll get mush.
- Add Oil Last: Stir in the toasted sesame oil and a pinch of salt after cooking, not before, to keep the aroma sharp and prevent the rice from turning greasy.
Flavor Customization for These Flavors
Savory Umami Boost
Stir 1 tbsp soy sauce and 1 tsp gochujang into the cooked rice while fluffing for a deep, complex flavor. This Korean pantry staple combo adds saltiness and mild heat. I use Kikkoman soy sauce and Sempio gochujang for authentic taste.
Herb-Infused Rice
Add ¼ cup chopped cilantro and 1 tbsp minced chives after cooking for a fresh, herbaceous twist. These herbs brighten the dish without overpowering its natural sweetness. The aroma is incredible when served warm.
Nutty Crunch
Fold in ¼ cup toasted pine nuts or cashew pieces before serving for added texture. Lightly toast them in a dry pan over medium heat for 2-3 minutes first. This creates a delightful contrast with the soft rice grains. 💛
Citrus Zing
Finish with 1 tsp grated orange zest and 1 tbsp orange juice for a subtle citrus note. This works especially well with grilled meats or spicy dishes. The acidity cuts through the richness beautifully.
Cheesy Fusion
Mix in ½ cup shredded mozzarella while the rice is hot for a Korean-Italian fusion. The cheese melts into creamy pockets throughout. Top with extra sesame seeds for crunch. This is my kids’ favorite variation.
Spicy Kick
Drizzle with 1-2 tsp sriracha or Korean red pepper flakes for heat lovers. Adjust to taste—I find 1 tsp gives a pleasant warmth without overwhelming. Pair with kimchi for maximum flavor impact. 🔥
Nutrition Facts
Frequently Asked Questions
Why rinse the rice so many times?
Rinsing removes excess starch that can make rice gummy. Aim for 4-5 rinses until water runs clear for perfectly separate grains. This step is crucial for authentic texture.
What if I don’t have a rice cooker?
Use a heavy pot with a tight lid on the stovetop. Combine rice and water, bring to boil, then reduce to low heat for 15 minutes. Let sit covered for 10 minutes off heat.
Can I use jasmine rice instead?
Yes, but it yields firmer grains. Stick to the same 1.25:1 water ratio and 20-25 minutes cook time. Short-grain is ideal for authenticity though.
How do I store leftovers?
Keep in an airtight container in the fridge for 3-4 days or freeze for 1 month. Reheat with a splash of water to restore moisture.

- Mujadara Rice and Lentils Recipe: Earthy Spiced Lentils With Caramelized Onions - November 1, 2026
- Naija Fried Rice Recipe: Street-Style Spice With Veggie Crunch - November 1, 2026
- Mushy Rice Recipe: Fluffy Grains Transformed in Minutes - November 1, 2026