
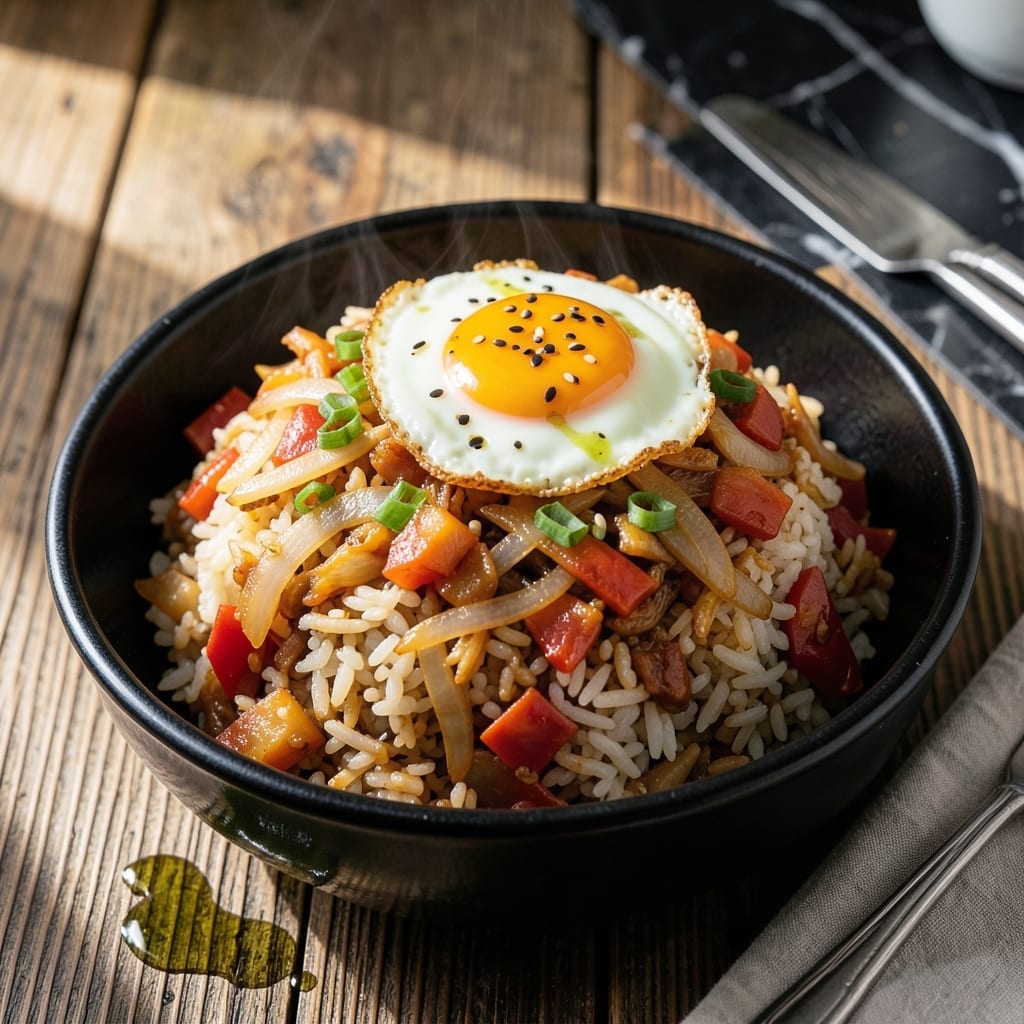
This kimchi fried rice delivers bold, spicy heat with perfectly crispy edges that make every bite unforgettable. I’ve refined this method to balance fermented kimchi tang with savory depth.
The secret is high heat and patience—letting the rice develop a golden crust while keeping the inside tender. Add protein like pork or egg, or keep it plant-based for dietary flexibility.
Ingredients for Korean Kimchi Fried Rice
Bold flavors start with fermented kimchi, crispy rice, and just a few pantry staples for this dish.
| Ingredient | Amount | Notes |
|---|---|---|
| Cooked White Rice 🍚 | 4 cups | Day-old, chilled preferred |
| Kimchi 🥬 | 1 ½ cups | Well-fermented, chopped |
| Kimchi Juice 💧 | ¼ cup | Reserved from kimchi |
| Vegetable Oil 🫒 | 2 tbsp | High smoke point preferred |
| Onion 🧅 | ½ whole | Yellow or white, diced |
| Garlic Cloves 🧄 | 3 cloves | Minced for best flavor |
| Gochujang 🌶️ | 1 tbsp | Korean chili paste |
| Soy Sauce 🫒 | 2 tbsp | Low-sodium if preferred |
| Sesame Oil 🫒 | 1 tsp | Toasted, for finishing |
| Large Eggs 🥚 | 4 whole | Optional, for topping |
| Green Onions 🧅 | 3 whole | Thinly sliced for garnish |
| Sesame Seeds 🌿 | 1 tsp | Toasted, for garnish |
| Sugar 🍚 | 1 tsp | Balances kimchi acidity |
| Salt 🧂 | ½ tsp | Adjust to taste |
| Black Pepper 🌶️ | ¼ tsp | Freshly ground preferred |
The kimchi is non-negotiable here. Look for well-fermented napa cabbage kimchi at an Asian market or H Mart—it has the right tang and spice. The rice needs to be day-old and chilled (fresh rice turns mushy). For the gochujang, Sempio or CJ brands are widely available and consistent in quality. Vegetable oil with a high smoke point, like avocado or peanut oil, handles the heat without burning.
No gochujang? Sriracha plus a pinch of sugar approximates the flavor. Short on kimchi juice? A splash of rice vinegar plus chili flakes works. The eggs can be omitted for a fully plant-based version, or swap in tofu for protein. If using low-sodium soy sauce, taste before adding extra salt. The green onions are flexible—scallions or chives work too.
Leftovers keep 3-4 days in the fridge, though the rice loses some crispness. Reheat in a skillet to revive the texture. For meal prep, store components separately and fry just before serving. The gochujang and kimchi keep for weeks in the fridge.
Why You’ll Love This Recipe
- One Pan Wonder: I just dump everything in a hot pan—rice, kimchi, a splash of its juice, and onions—no fancy techniques needed.
- Flavor Bomb: The tangy kimchi and its juice turn plain rice into something ridiculously good, with that signature spicy-sour kick.
- Weeknight Hero: Honestly, it’s my go-to when I need dinner fast, especially on those nights I forgot to plan ahead.
- Stretches Leftovers: I always use leftover rice, and between us, it tastes even better the next day for lunch.
Step-by-Step Instructions for Korean Kimchi Fried Rice
Master the technique for achieving that coveted crispy texture while balancing bold kimchi flavors.
Step 1: Sauté Aromatics Until Fragrant
Heat the 2 tbsp vegetable oil in a large skillet or wok over medium-high heat. Add the 0.5 whole onion and cook for 3-4 minutes until it begins to soften and turn translucent around the edges.
Add the 3 cloves garlic cloves and stir constantly for 30 seconds until fragrant. The garlic should sizzle but not brown—this prevents bitterness. This base layer builds the foundation for the dish’s deep, savory profile.
Immediately add the 1.5 cups kimchi and cook for another 2-3 minutes, breaking it up with your spatula. You’ll notice the kimchi start to caramelize slightly at the edges, which intensifies its tangy, umami-rich flavor.
Step 2: Combine Rice and Seasonings
Add the 4 cups cooked white rice to the skillet, pressing it down firmly with your spatula to create maximum contact with the hot surface. This step is crucial for achieving those crispy edges promised in the title. Let it sit undisturbed for 1-2 minutes to develop a golden crust.
Drizzle the 0.25 cup kimchi juice and 1 tbsp gochujang over the rice. The juice adds moisture and a punch of fermented depth, while the gochujang delivers heat and a glossy sheen. Stir to distribute evenly, ensuring every grain gets coated.
Add the 2 tbsp soy sauce, 1 tsp sugar, 0.5 tsp salt, and 0.25 tsp black pepper. The sugar balances the kimchi’s acidity, while the soy sauce deepens the savory notes. Toss everything together for 2 minutes until the rice is uniformly colored and heated through.
Step 3: Finish with Eggs and Garnishes
Push the rice to one side of the skillet and crack the 4 whole large eggs into the empty space. Scramble them gently until just set, then fold into the rice. The eggs should be soft and slightly creamy, adding richness to every bite.
Remove from heat and stir in the 1 tsp sesame oil. This final touch imparts a nutty aroma that ties all the flavors together. Taste and adjust seasoning if needed—kimchi varies in saltiness, so trust your palate.
Transfer to serving plates and top with the 3 whole green onions (thinly sliced) and 1 tsp sesame seeds. The green onions add a fresh crunch, while the sesame seeds provide a subtle toasty note. Serve immediately while the edges are still crispy.
Pro Tips For Making Korean Kimchi Fried Rice
- Use Day-Old Rice: Fresh rice turns mushy—day-old, refrigerated rice holds its shape and fries up with that perfect chewy texture. I learned this the hard way after too many soggy batches.
- Sear the Kimchi: Cook the kimchi for 2-3 minutes before adding rice to deepen its flavor and drive off excess moisture—skipping this leaves the dish watery.
- Save the Juice: Don’t drain all the kimchi juice; add 2-3 tablespoons to the rice for that tangy, umami kick. My grandmother swore by this, and she was right.
- Crank the Heat: High heat is non-negotiable for getting those crispy, caramelized bits. About 2 tablespoons of oil in a screaming-hot pan does the trick.
Perfect Pairings for This Recipe
Beverage Pairings
Korean beers like Hite or OB cut through the spice beautifully—their crisp, clean profiles reset your palate between bites. For something non-alcoholic, try sikhye (sweet rice punch) for a cooling contrast. 🍺
Side Dish Ideas
A simple cucumber salad with sesame dressing adds a refreshing crunch. I toss 2 cups thinly sliced cucumbers with 1 tbsp rice vinegar, 1 tsp sesame oil, and ½ tsp sugar for balance.
Protein Add-Ons
For extra richness, top with bulgogi beef or crispy spam—both are Korean staples. If keeping it vegetarian, add pan-fried tofu with a drizzle of soy-garlic glaze for depth.
Condiment Boosters
Set out extra gochujang for heat lovers and pickled radish for tangy crunch. I also keep shredded seaweed on hand—just 1 tbsp adds umami without overpowering.
Dessert Follow-Up
End with bingsu (shaved ice dessert) to cool the palate. A mango or red bean version pairs especially well, balancing the meal’s bold flavors with sweet simplicity. 💛
Nutrition Facts
Frequently Asked Questions
Why use day-old rice for this dish?
Day-old rice is drier, which helps it crisp up in the pan instead of turning mushy. Fresh rice contains too much moisture and will steam rather than fry.
Can I make this without gochujang?
Yes! Substitute 1 tbsp sriracha plus ½ tsp sugar for similar heat and sweetness. The dish will still be flavorful, though slightly less complex.
How do I keep the rice from sticking?
Use high heat and a well-seasoned skillet or wok. Press the rice firmly into the pan and resist stirring too often to develop that crispy crust.
What’s the best way to store leftovers?
Store in an airtight container in the fridge for up to 3-4 days. Reheat in a skillet over medium heat to restore crispiness.

- Mujadara Rice and Lentils Recipe: Earthy Spiced Lentils With Caramelized Onions - November 1, 2026
- Naija Fried Rice Recipe: Street-Style Spice With Veggie Crunch - November 1, 2026
- Mushy Rice Recipe: Fluffy Grains Transformed in Minutes - November 1, 2026