
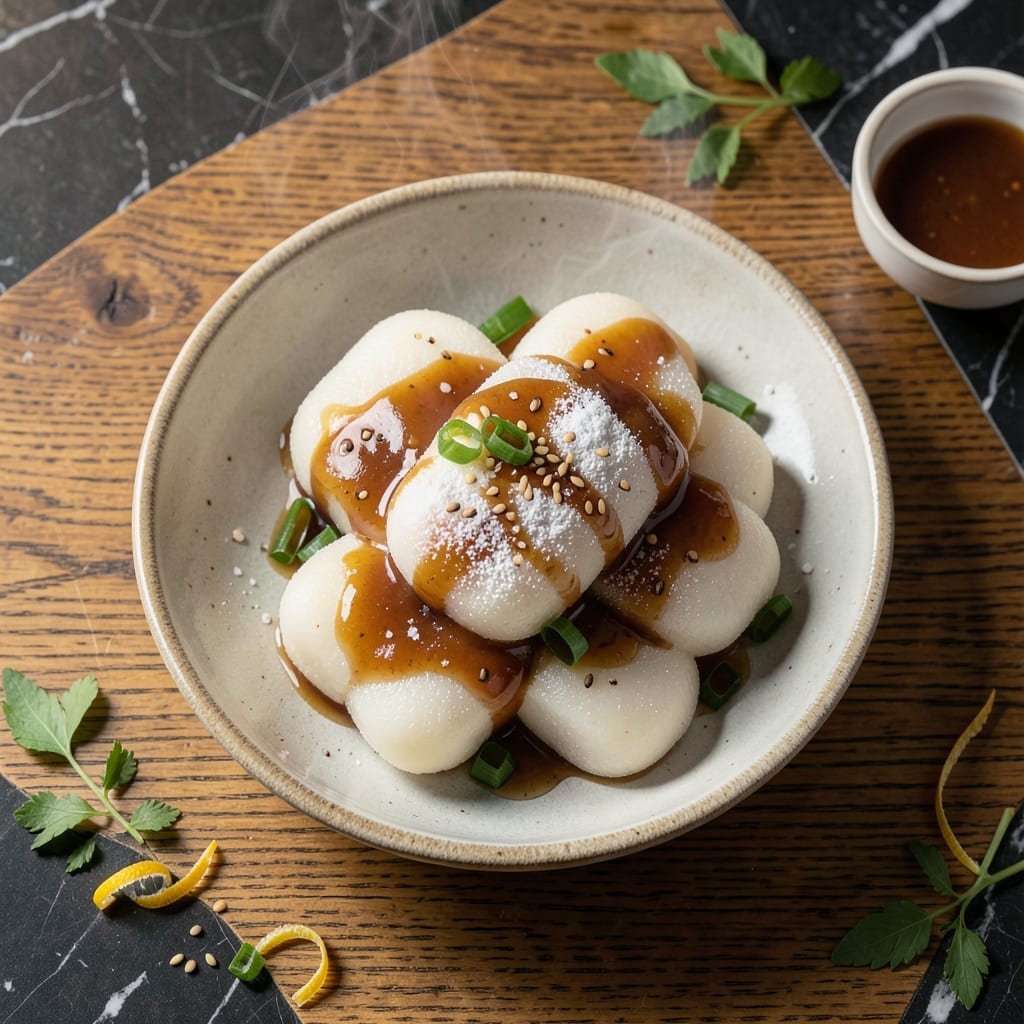
Crafting homemade Korean oval rice cakes delivers a chewy texture and mild sweetness that store-bought versions can’t match. This traditional method produces soft, pillowy tteok with the perfect bounce.
The process involves steaming a simple dough of rice flour and water, then shaping it into ovals. The key is using the right ratio of ingredients and precise steaming time to achieve the signature consistency.
What emerges is a batch of delicate rice cakes with a slightly sticky surface and subtle sweetness. They’re versatile for soups, stir-fries, or desserts, and keep well in the refrigerator.
This recipe stays true to authentic Korean techniques while using accessible ingredients. The result is restaurant-quality tteok you can make at home.
Ingredients for Korean Oval Rice Cake
Simple pantry staples create these pillowy, chewy rice cakes with authentic texture and flavor.
| Ingredient | Amount | Notes |
|---|---|---|
| Sweet Rice Flour 🌾 | 2 cups | Also called glutinous rice flour |
| Water 💧 | ¾ cup | Warm, for dough formation |
| Salt 🧂 | ½ tsp | Fine sea salt preferred |
| Sugar 🍚 | 1 tsp | Optional for subtle sweetness |
| Cornstarch 🌽 | 2 tbsp | For dusting and shaping |
| Neutral Oil 🫒 | 1 tsp | For steamer basket greasing |
| Sesame Oil 🫒 | 1 tsp | For finishing touch after steaming |
| Toasted Sesame Seeds 🌰 | 1 tbsp | Optional garnish for serving |
Sweet rice flour is non-negotiable here—look for brands like Bob’s Red Mill or Anthony’s at Whole Foods or Amazon. Avoid regular rice flour; it won’t give you that signature chew. The texture depends entirely on this ingredient, so splurge on the good stuff. Warm water helps the dough come together smoothly, and fine sea salt ensures even distribution without grittiness.
No sweet rice flour? Mochiko brand is identical and widely available at Asian markets. Skip the sugar if you prefer neutral flavor, but it does enhance the traditional taste. Cornstarch can be swapped for potato starch in a pinch. For the oil, any neutral option like avocado or grapeseed works—just avoid anything with strong flavor that might overpower the delicate rice cake.
Freshly made tteok keeps in the fridge for 3-4 days in an airtight container. Re-steam briefly to restore softness. For longer storage, freeze for up to 2 months—thaw at room temperature before using. Dusting with extra cornstarch prevents sticking during storage.
Why You’ll Love This Recipe
- 5-Minute Mix: I just stir sweet rice flour, water, and a pinch of salt—no fancy steps, no waiting.
- Chewy-Sweet Bite: The sugar caramelizes slightly when pan-fried, giving that addictive soft center with a crisp edge.
- Endless Pairings: I’ve served these with spicy stew, in soups, or just drizzled with honey for dessert.
- Pantry Staples Only: Sweet rice flour and cornstarch are all I need—both keep forever and cost pennies.
Step-by-Step Instructions for Korean Oval Rice Cake
Master the technique for achieving that signature chewy texture and subtle sweetness.
Step 1: Prepare the Dough Base
In a large mixing bowl, combine the 2 cups Sweet Rice Flour, 0.5 tsp Salt, and 1 tsp Sugar. I use fine sea salt for even distribution and better dissolution. Whisk these dry ingredients together thoroughly—this ensures uniform flavor throughout your rice cakes.
Gradually pour in the 0.75 cup Water while stirring with a wooden spoon. The water should be warm to the touch, which helps activate the glutinous properties of the flour. Continue mixing until a shaggy dough forms, then switch to kneading by hand for 5-7 minutes until smooth and elastic.
Step 2: Shape and Dust the Rice Cakes
Lightly dust your work surface with 1 tbsp Cornstarch from the 2 tbsp Cornstarch—this prevents sticking while you shape the dough. Divide the dough into 4 equal portions for consistent size, then roll each into a 1-inch thick cylinder. Use a sharp knife to cut each cylinder into 1-inch pieces.
Roll each piece between your palms to form smooth, oval-shaped rice cakes. Dust them lightly with the remaining 1 tbsp Cornstarch as you work to maintain their shape and prevent sticking. The texture should be firm but pliable—if it cracks, the dough needs more kneading.
Step 3: Steam to Perfection
Line your steamer basket with parchment paper and brush it lightly with the 1 tsp Neutral Oil. This prevents the rice cakes from sticking during the steaming process. Arrange the shaped rice cakes in a single layer, leaving ½ inch between each to allow for expansion.
Bring water to a rolling boil in your steamer pot, then place the basket over it. Cover and steam for 15-20 minutes until the rice cakes turn translucent and develop a slightly glossy sheen. Check at the 15-minute mark—they should be firm to the touch but still have a slight bounce when pressed.
Step 4: Finish and Serve
Carefully transfer the steamed rice cakes to a serving plate. While still warm, brush them lightly with the 1 tsp Sesame Oil to add a subtle nutty aroma and prevent sticking. This step enhances the flavor profile and gives the rice cakes a beautiful gloss.
Sprinkle with the 1 tbsp Toasted Sesame Seeds just before serving. The seeds add a delightful crunch and visual appeal. Serve warm for the best texture—they should be chewy with a slight resistance when bitten into, not hard or gummy.
Pro Tips For Making Korean Oval Rice Cake
- Knead Thoroughly: Work the dough for at least 8-10 minutes until smooth and elastic—this develops the chewy texture that makes Korean rice cakes so satisfying.
- Use Hot Water: Mix the sweet rice flour with hot water (about 160°F) to start—it hydrates the starch better and prevents a gritty texture.
- Dust with Cornstarch: Roll the rice cakes in cornstarch before shaping to prevent sticking, especially if you’re making them oval by hand.
- Steam, Don’t Boil: I learned this the hard way—steam the rice cakes for 15-20 minutes instead of boiling to keep them from turning gummy or falling apart.
Make-Ahead Tips for This Recipe
Prep Ahead Strategy
You can make the dough 1 day ahead and store it covered in the fridge. This actually improves the texture as the flour hydrates fully. Just bring it to room temperature before shaping. I often prep the dough in the morning to steam for dinner. ⏰
Shaping in Advance
Shape your rice cakes and place them on a cornstarch-dusted tray. Cover with a damp towel to prevent drying. They’ll keep this way for 2-3 hours before steaming. This is perfect for getting ahead before guests arrive.
Freezing Uncooked
For longer storage, shape the rice cakes and freeze them in a single layer on a tray. Once frozen, transfer to a freezer bag. They’ll keep for 2 months. Steam directly from frozen, adding 5 minutes to the cooking time. ❄️
Storing Cooked
Cooked rice cakes stay fresh in an airtight container for 3-4 days. Re-steam for 3-5 minutes to restore softness. Avoid microwaving, as it can make them gummy.
Reheating for Soups
For soups like tteokguk, add cold rice cakes directly to the hot broth. They’ll warm through in 2-3 minutes and absorb flavors beautifully. This prevents overcooking.
Pro Storage Tip
Dust with extra cornstarch before storing to prevent sticking. I use Bob’s Red Mill cornstarch for this—it’s finely ground and works like a charm. Always let them cool completely before sealing the container.
Nutrition Facts
Frequently Asked Questions
What flour works best for this recipe?
Sweet rice flour (also called glutinous rice flour) is essential for the authentic chewy texture. Brands like Bob’s Red Mill or Mochiko work perfectly. Avoid regular rice flour—it won’t give the right consistency.
Can I make these ahead of time?
Yes! Shape the rice cakes and freeze them for up to 2 months on a tray before transferring to a bag. Steam directly from frozen, adding 5 minutes to cooking time. Fresh ones keep 3-4 days refrigerated.
Why are my rice cakes gummy?
Over-kneading the dough or steaming too long can cause gumminess. Stick to 5-7 minutes kneading and check at 15 minutes steaming—they should be translucent with a slight bounce. Avoid microwaving when reheating.

- Jollof Rice Sauce Recipe: West African Tomato and Spice Infusion - September 25, 2026
- Japanese Rice Soup Recipe: Umami-Rich Comfort in a Bowl - September 25, 2026
- Homemade Cream Of Rice Recipe: Silk-Smooth Breakfast in Minutes - September 25, 2026