
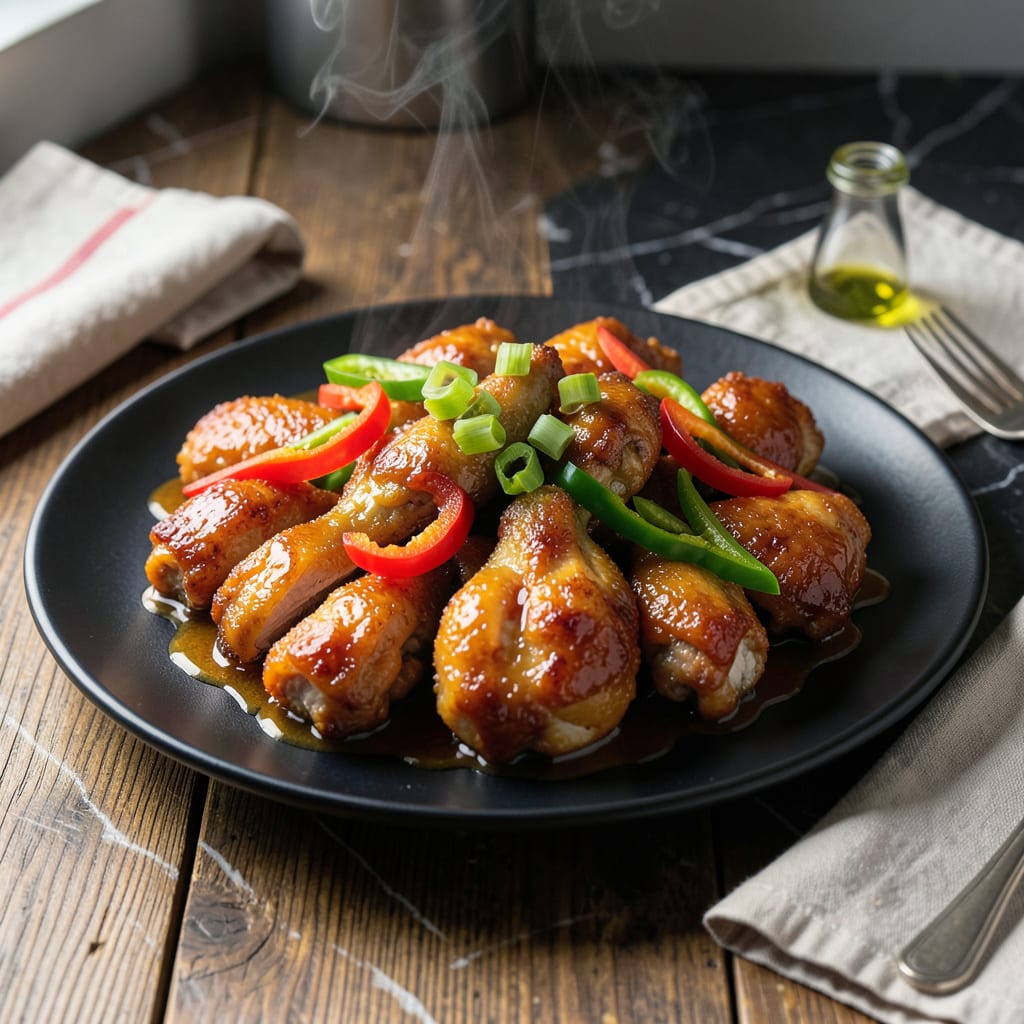
This recipe delivers crispy chicken pieces coated in a perfectly balanced sweet and tangy glaze. The secret lies in the double-frying technique that ensures a shatteringly crisp exterior while keeping the meat juicy inside.
Traditional Korean flavors shine through in the sauce, which combines vinegar, sugar, and a touch of soy for depth. The result is a dish that’s both addictive and authentic.
Ingredients for Korean Sweet and Sour Chicken
Crispy chicken meets sweet-tangy Korean glaze with these simple ingredients.
| Ingredient | Amount | Notes |
|---|---|---|
| Boneless Skinless Chicken Thighs 🍗 | 1 ½ lb | Cut into bite-sized pieces |
| Cornstarch 🌾 | ½ cup | For crispy coating |
| All-Purpose Flour 🌾 | ½ cup | For dredging chicken |
| Vegetable Oil 🫒 | 3 cups | For frying, high smoke point |
| Rice Vinegar 💧 | ⅓ cup | For tangy sauce base |
| Granulated Sugar 🍚 | ½ cup | Balances acidity in sauce |
| Soy Sauce 🫒 | ¼ cup | Adds umami depth |
| Garlic Cloves 🧄 | 4 cloves | Minced for sauce |
| Fresh Ginger 🌿 | 1 tbsp | Grated, for aromatic base |
| Ketchup 🍅 | ¼ cup | For sweetness and color |
| Gochujang 🌶️ | 1 tbsp | Korean chili paste, optional |
| Green Onions 🧅 | 3 whole | Thinly sliced for garnish |
| Sesame Seeds 🌿 | 1 tbsp | Toasted, for garnish |
| Salt 🧂 | 1 tsp | Kosher or sea salt |
| Black Pepper 🌶️ | ½ tsp | Freshly ground preferred |
[recipeingredientscaler]
The chicken is key here. Thighs stay juicier than breasts—look for skinless, boneless pieces with good marbling. Asian markets often have pre-cut chicken for stir-frying, which saves time. For the oil, any neutral variety with a high smoke point works; peanut oil is traditional but vegetable or canola oil are fine substitutes (and more affordable).
No rice vinegar? Apple cider vinegar at 1:1 ratio works in a pinch. Short on gochujang? Sriracha plus a pinch of sugar gets you close, though the flavor profile won’t be identical. The ketchup might seem unusual, but it’s crucial for that classic Korean sweet and sour balance—don’t skip it. For extra depth, add a splash of pineapple juice to the sauce.
Leftovers keep well in the fridge for 3-4 days but lose crispiness. Reheat in a toaster oven or air fryer to revive the crunch. Sauce can be made ahead and stored separately for up to 1 week.
Why You’ll Love This Recipe
- One Pan Wonder: I love that I only need a skillet and a bowl—no fancy equipment, just crispy chicken thighs coated in cornstarch and flour.
- Tangy Sweet Bite: The rice vinegar gives it that bright, addictive zing that balances the sugar perfectly.
- Weeknight Hero: Between us, this is my Tuesday night lifesaver when I need something fast but still crave-worthy.
- Stretches Further: Honestly, leftovers taste even better the next day, and the ingredients won’t break the bank.
Step-by-Step Instructions for Korean Sweet and Sour Chicken
Achieve perfectly crispy chicken with a glossy, tangy glaze using this tested method.
Step 1: Coat and Fry the Chicken
Pat the 1.5 lb boneless skinless chicken thighs dry with paper towels, then season with 1 tsp salt and 0.5 tsp black pepper. Cut into bite-sized pieces for even cooking. This step removes excess moisture so the coating adheres properly.
Dredge each piece first in 0.5 cup all-purpose flour, shaking off excess, then coat thoroughly in 0.5 cup cornstarch. The double coating creates an ultra-crispy exterior that holds up to the sauce. Heat 3 cups vegetable oil to 350°F in a deep pan.
Fry the chicken in batches for 4-5 minutes until golden brown and crispy. Use a slotted spoon to transfer to a paper towel-lined plate. Maintain the oil temperature between batches—if it drops too low, the chicken will absorb oil and become greasy.
Step 2: Prepare the Sweet and Sour Sauce
In a saucepan, combine 0.33 cup rice vinegar, 0.5 cup granulated sugar, 0.25 cup soy sauce, 0.25 cup ketchup, 1 tbsp gochujang, 4 cloves minced garlic cloves, and 1 tbsp grated fresh ginger. The vinegar provides the signature tang, while the sugar and ketchup balance it with sweetness.
Bring the mixture to a simmer over medium heat, stirring constantly until the sugar dissolves and the sauce thickens slightly, about 3-4 minutes. Watch for small bubbles around the edges—that’s your signal it’s ready. The sauce should coat the back of a spoon but still be pourable.
Step 3: Combine and Garnish
Add the crispy chicken to the saucepan and gently toss to coat evenly. Cook for an additional 1-2 minutes to allow the flavors to meld and the chicken to absorb some of the glaze. Avoid over-stirring at this point to preserve the crispy coating.
Transfer to a serving dish and garnish with 3 whole thinly sliced green onions and 1 tbsp toasted sesame seeds. The green onions add freshness, while the sesame seeds contribute a nutty crunch. Serve immediately while the chicken is still crispy and the sauce is glossy.
Pro Tips For Making Korean Sweet And Sour Chicken
- Double Fry the Chicken: Fry the chicken once at 325°F for 6 minutes, rest it, then fry again at 375°F for 2-3 minutes. I learned this the hard way—single frying leaves the coating soggy under the sauce.
- Use Thighs, Not Breasts: Boneless skinless chicken thighs stay juicy even after frying and soaking in the sweet-sour sauce. Breasts dry out and turn stringy—trust me, I’ve ruined batches trying to “healthify” it.
- Skip the Overcrowding: Cook the chicken in batches with at least an inch of space between pieces. Steer clear of dumping it all in at once, or you’ll end up with steamed, greasy lumps instead of crispy bites.
- Warm the Vinegar: Take the rice vinegar out of the fridge 10 minutes before mixing the sauce. Cold vinegar can make the sauce separate or taste harsh—sounds weird, but it works.
Health Benefits of This korean sweet and sour chicken
Protein Powerhouse
This dish packs a serious protein punch with 1.5 lb boneless skinless chicken thighs providing about 40 grams of protein per serving. Chicken thighs are rich in iron and zinc, essential minerals for immune function and energy metabolism. I always feel satisfied after this meal. 💪
Healthy Fats Balance
The vegetable oil used for frying contains heart-healthy unsaturated fats when used in moderation. While we’re not deep-frying daily, the 3 cups used here is split across multiple servings, keeping portions reasonable for an occasional treat.
Vitamin Rich Sauce
The sauce ingredients bring more than just flavor. Rice vinegar contains acetic acid that may support digestion, while garlic and ginger offer anti-inflammatory benefits. The 4 cloves garlic and 1 tbsp ginger provide immune-boosting properties.
Low-Calorie Garnishes
Toppings like 3 green onions and 1 tbsp sesame seeds add texture and nutrients without many calories. Green onions are rich in vitamin K, while sesame seeds provide calcium and healthy fats. These small additions make the dish more nutritious.
Antioxidant Boost
The 1 tbsp gochujang brings capsaicin from chili peppers, known for its metabolism-boosting properties. Combined with the 0.25 cup soy sauce, you get a fermented food benefit that supports gut health. These traditional Korean ingredients do more than just taste good. 🥗
Moderate Sugar Content
While the sauce contains 0.5 cup granulated sugar, remember this is spread across multiple servings. The vinegar and spices help balance the sweetness, making this a more complex carbohydrate source than simple sugary treats.
Nutrition Facts
Frequently Asked Questions
Can I use chicken breast instead of thighs?
Yes, but thighs stay juicier. If using breasts, reduce frying time to 3-4 minutes to prevent dryness. The crispy coating will still work, but the meat may be less tender.
How do I make the sauce thicker?
Simmer it longer after adding the chicken. For a quick fix, mix 1 tsp cornstarch with 1 tbsp water, stir into the sauce, and cook for 1 minute. This creates a glossier, stickier glaze.
Can I bake the chicken instead of frying?
Yes, but it won’t be as crispy. Toss coated pieces in 1 tbsp oil and bake at 400°F for 20-25 minutes, flipping halfway. Broil for 2 minutes at the end for extra crunch.

- Jollof Rice Sauce Recipe: West African Tomato and Spice Infusion - September 25, 2026
- Japanese Rice Soup Recipe: Umami-Rich Comfort in a Bowl - September 25, 2026
- Homemade Cream Of Rice Recipe: Silk-Smooth Breakfast in Minutes - September 25, 2026