
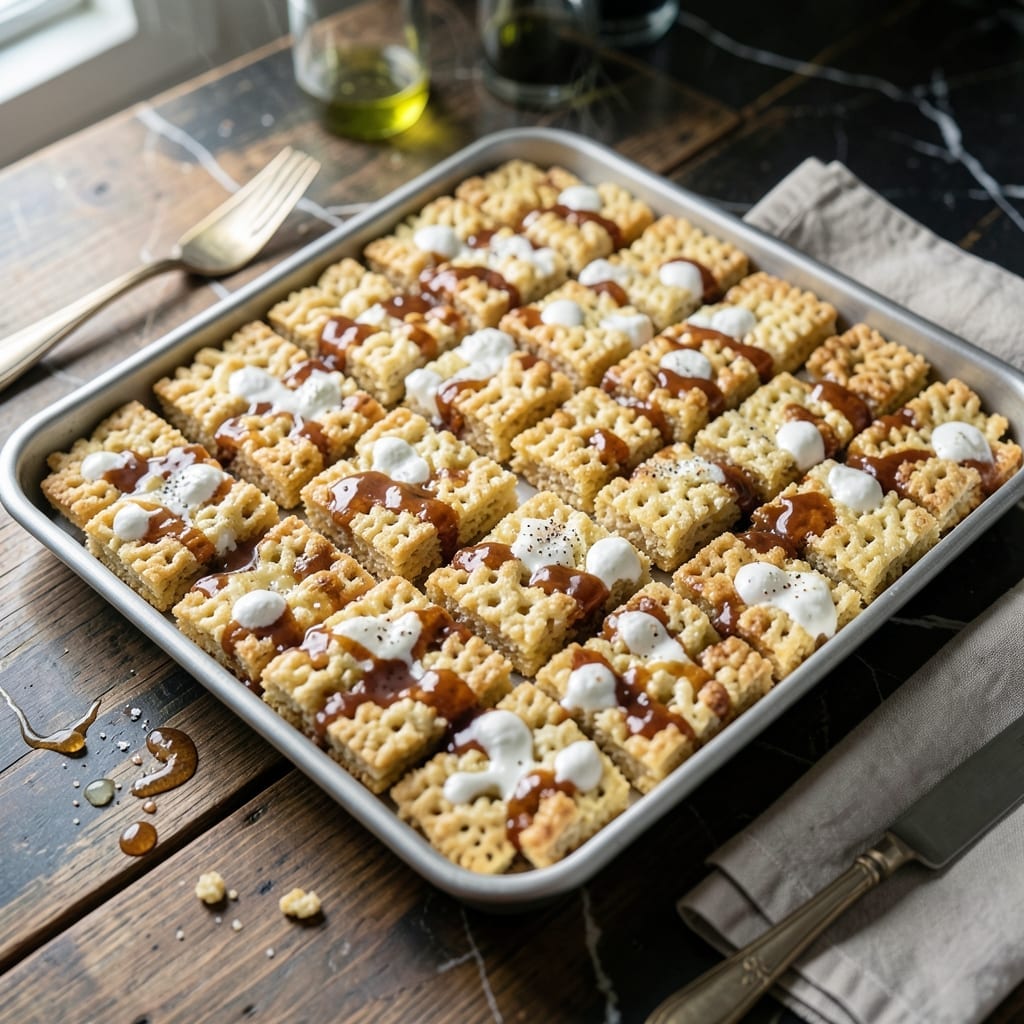
When you need to feed a crowd, this scaled-up version of the classic treat delivers perfectly chewy results every time. I developed this method after one too many birthday parties where the first batch disappeared before everyone got a taste.
The key is using a large stockpot and wooden spoon to handle the double batch of melted marshmallows and butter. This ensures even mixing without burning, even when working with larger quantities. The cereal incorporates effortlessly when you use this approach.
You’ll end up with dozens of uniform squares that maintain that signature crispy-chewy texture. The recipe scales cleanly, so you can adjust for any party size without compromising quality or consistency.
Cut into individual portions while still slightly warm for clean edges. This method guarantees professional results for any gathering.
Ingredients for Large Batch Rice Krispie Treat
Seven simple ingredients transform into chewy, crispy squares for your party crowd.
| Ingredient | Amount | Notes |
|---|---|---|
| Rice Krispies Cereal 🥣 | 12 cups | Standard variety preferred |
| Mini Marshmallows ⚪ | 20 oz | Fresh for best melt |
| Unsalted Butter 🧈 | 1 cup | Cut into cubes first |
| Vanilla Extract 🌿 | 1 tsp | Pure extract recommended |
| Fine Sea Salt 🧂 | ½ tsp | Balances sweetness perfectly |
| Light Corn Syrup 💧 | ½ cup | Optional for extra chew |
| Cooking Spray 🧴 | 1 can | For greasing pot and pan |
The marshmallows are doing most of the work here. Jet-Puffed or Kraft brands melt the smoothest—avoid the store brands that turn gummy. I always grab the mini size (they melt faster and more evenly than the big ones). The butter should be real unsalted—salted can make the whole batch taste oddly savory. A large stockpot is non-negotiable for this volume; my 12-quart handles it perfectly.
No corn syrup? Honey or maple syrup works in a pinch (though the texture changes slightly). Out of vanilla? Skip it—it’s not essential. Need to make this gluten-free? Swap in gluten-free crispy rice cereal. The salt might seem odd, but it cuts the sweetness beautifully. If you’re doubling this for an even bigger crowd (I’ve done 48 servings), just use two pots and combine at the end.
These keep beautifully at room temperature in an airtight container for 3 days. For longer storage, wrap individual squares in parchment and freeze for up to 6 weeks. Cut them while still slightly warm—wait too long and they’ll crumble. Pro tip: dampen your knife between cuts for cleaner edges.
Why You’ll Love This Recipe
- One Pot Wonder: I melt the butter, toss in the marshmallows, and stir in the cereal—no extra bowls, no fuss.
- That Vanilla Magic: The vanilla extract turns the buttery-sweet marshmallow base into something crave-worthy.
- Feeds a Crowd: I make one batch for the bake sale and still have enough to stash in the pantry for midnight snacks.
Step-by-Step Instructions for Large Batch Rice Krispie Treats
Here’s the method. Straightforward, tested, works every time for your party needs.
Step 1: Prepare Your Workspace and Ingredients
Generously coat a large baking sheet and a silicone spatula with the cooking spray. I prefer a 12×17-inch half-sheet pan for this quantity—it gives you the perfect thickness for easy cutting into 24 squares. The non-stick surface from the spray prevents sticking and makes cleanup a breeze.
Measure out all your ingredients before you start cooking. Cut the unsalted butter into cubes so it melts evenly and quickly. Having everything ready to go is crucial because once the marshmallows melt, you need to work fast to maintain that perfect chewy texture.
Step 2: Melt the Butter and Marshmallows
In a large pot (at least 5-quart capacity), melt the 1 cup unsalted butter over low heat. As soon as it’s completely melted, add the 20 oz mini marshmallows. Stir constantly with a silicone spatula to prevent burning.
The marshmallows will take 5-7 minutes to melt completely. Once melted, remove from heat and immediately stir in the 1 tsp vanilla extract, 0.5 tsp fine sea salt, and 0.5 cup light corn syrup. The corn syrup adds extra chewiness that makes these treats stand out from the classic version.
Step 3: Combine with Rice Krispies Cereal
Working quickly, add all 12 cups Rice Krispies cereal to the pot. Use your spatula to fold the cereal into the marshmallow mixture, pressing gently to ensure every piece is evenly coated. This step requires some elbow grease—the mixture will be thick and sticky.
Continue folding until you don’t see any dry cereal pieces. Be thorough but gentle—you want to maintain the shape of the cereal pieces while ensuring complete coverage. The mixture should look glossy and uniform, with no visible dry spots.
Step 4: Press and Shape the Treats
Transfer the mixture to your prepared baking sheet. Use your spatula (or buttered hands if you prefer) to press it evenly into the pan. Apply firm, consistent pressure to create an even layer about 1.5 inches thick.
For perfectly clean cuts later, resist the urge to press too hard—this can compact the treats and make them dense. Instead, spread the mixture evenly and let it cool naturally. The treats will set up as they cool, reaching the ideal chewy texture within 30-45 minutes.
Step 5: Cut and Serve
Once completely cooled and set, use a sharp knife coated with cooking spray to cut into 24 squares. I like to make the first cut down the center, then divide each half into thirds lengthwise and fourths crosswise for even portions.
Store leftovers in an airtight container at room temperature for up to 3 days, though they rarely last that long at a party. For best results, serve at room temperature—they’ll be perfectly chewy and easy to handle without falling apart.
Pro Tips For Making Large Batch Rice Krispie Treat
- Melt Butter Low: Use medium-low heat when melting the butter and marshmallows—high heat can scorch the sugar, leaving a bitter taste that ruins the whole batch.
- Use Fresh Marshmallows: I learned this the hard way—stale mini marshmallows don’t melt as smoothly, so check the bag’s date and give them a quick squeeze to test softness.
- Don’t Overmix: Stir just until the cereal is fully coated, then stop; overworking the mixture crushes the Rice Krispies and turns your treats dense instead of light.
- Butter Your Tools: Grease your spoon, spatula, and even your hands with a little butter before pressing the mixture into the pan—it prevents sticking and makes shaping a breeze.
Make-Ahead Tips for This Recipe
Prep Ahead Strategy
Measure all dry ingredients the night before and store in airtight containers. I keep 12 cups Rice Krispies in a large ziplock and pre-measure the 20 oz marshmallows into a separate bowl. This saves 15 minutes of prep time on party day. 💡
Marshmallow Melting Prep
Cube the 1 cup unsalted butter and keep it chilled until use. Cold butter melts more evenly than room temperature. I place it in a small bowl covered with plastic wrap in the fridge. The cubes will melt faster and more consistently when you start cooking.
Pan Prep Shortcut
Spray your 12×17-inch pan and spatula the morning of the event. Let the cooking spray dry completely—this creates a better non-stick surface. I learned this trick after one too many batches stuck to the pan. It makes cleanup effortless.
Assembly Timeline
Mix and press the treats 4-6 hours before serving—they need time to set completely. I often make them after breakfast for an afternoon party. This timing ensures they’re firm enough to cut but still fresh. ⏰
Portion Control
Use a ruler to mark cutting lines on parchment paper before pressing in the mixture. This guarantees 24 equal squares without guessing. I lay the parchment directly on my counter and use a pencil to sketch the grid.
Storage Ready
Line your storage container with parchment before adding the treats. This prevents sticking and makes removal easy. I use a large plastic container with a snap-tight lid for transporting to parties. They’ll stay fresh for 3 days at room temperature. ✨
Nutrition Facts
Frequently Asked Questions
What size pot do I need for a large batch?
Use at least a 5-quart pot, but a 12-quart stockpot works best. This gives you enough room to stir the marshmallow mixture without spilling as it expands.
Can I make these gluten-free?
Yes! Simply swap the regular cereal for gluten-free crispy rice cereal. The texture and taste remain identical, and all other ingredients are naturally gluten-free.
How do I keep them from sticking to the pan?
Generously coat your pan and spatula with cooking spray. For extra insurance, line the pan with parchment paper before pressing in the mixture.
Can I double this recipe for an even bigger crowd?
Use two separate pots to melt the marshmallow mixtures, then combine them with the cereal in a very large bowl or clean pot. This prevents uneven melting or burning.

- Mujadara Rice and Lentils Recipe: Earthy Spiced Lentils With Caramelized Onions - November 1, 2026
- Naija Fried Rice Recipe: Street-Style Spice With Veggie Crunch - November 1, 2026
- Mushy Rice Recipe: Fluffy Grains Transformed in Minutes - November 1, 2026