
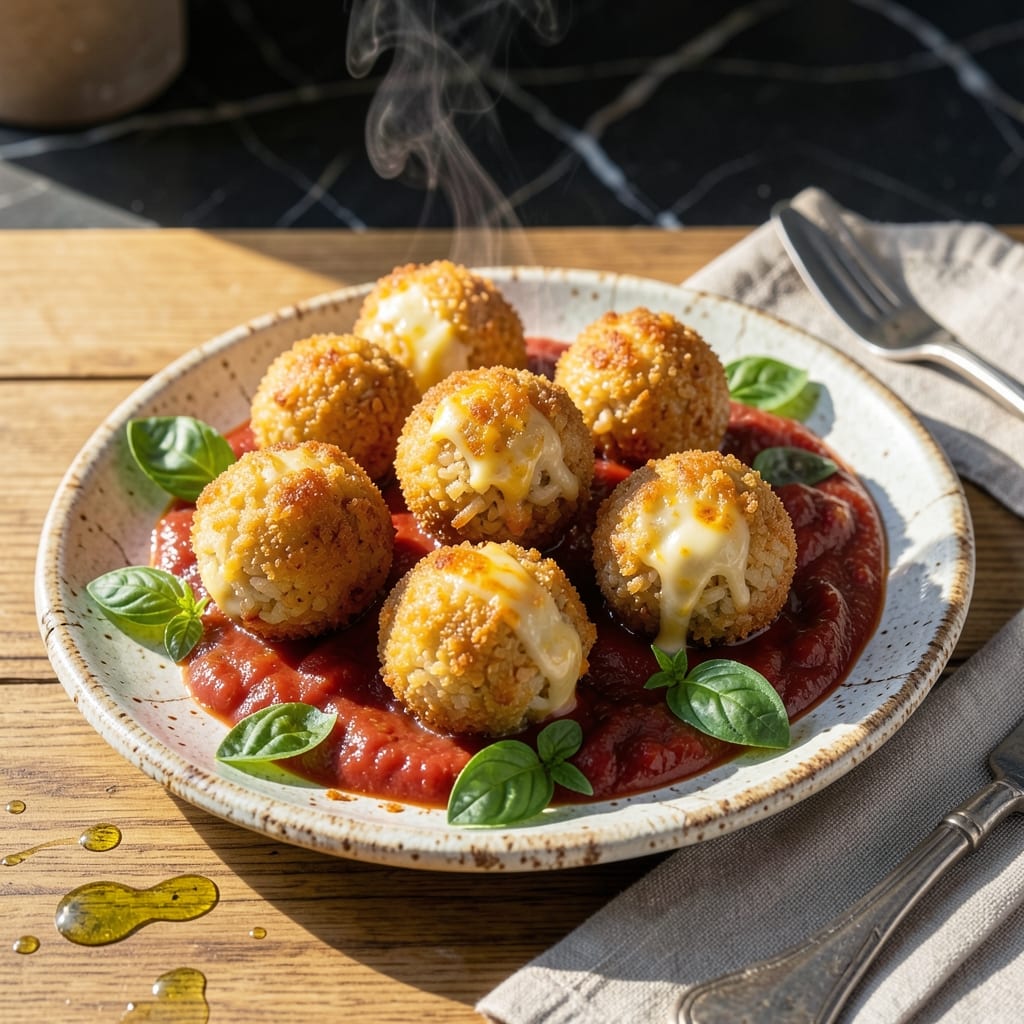
Traditional Italian arancini come to life in this proven recipe for crispy, golden-fried rice balls with perfectly chewy centers. The method stays true to Lidia’s approach—simple ingredients, precise technique, and results that never disappoint.
Using leftover risotto as the base ensures the right texture: firm enough to hold shape, yet tender inside. A light breadcrumb coating and hot oil create that signature crispy shell that gives way to a creamy, flavorful interior.
The process is straightforward but requires attention to detail. Maintain the oil temperature, work in batches, and resist the urge to overcrowd the pan. These steps guarantee consistent, professional-quality results every time.
Serve warm for the best contrast between the outer crunch and the soft, savory center. This dish delivers authentic flavor without complication.
Ingredients for Lidia Rice Ball
Leftover risotto transforms into golden, crispy arancini with a few key additions. Nothing complicated here.
| Ingredient | Amount | Notes |
|---|---|---|
| Leftover Risotto 🍚 | 4 cups | Cooled, firm enough to shape |
| Arborio Rice 🌾 | 1 cup | Uncooked, for fresh risotto base |
| Parmesan Cheese 🧀 | ½ cup | Freshly grated, aged Parmigiano-Reggiano |
| Mozzarella Cheese 🧀 | 4 oz | Fresh, diced into small cubes |
| Large Eggs 🥚 | 2 whole | Beaten, for binding |
| Italian Breadcrumbs 🍞 | 1 ½ cups | Fine, dry breadcrumbs |
| All-Purpose Flour 🌾 | ½ cup | For dredging rice balls |
| Vegetable Oil 🫒 | 2 cups | Neutral flavor, for deep frying |
| Garlic Cloves 🧄 | 2 cloves | Minced, for risotto base |
| Yellow Onion 🧅 | ½ whole | Finely diced, for risotto |
| Dry White Wine 🍷 | ½ cup | For deglazing risotto |
| Chicken Stock 🍲 | 3 cups | Warm, for risotto cooking |
| Unsalted Butter 🧈 | 2 tbsp | For enriching risotto |
| Salt 🧂 | 1 tsp | Diamond Crystal kosher salt |
| Black Pepper 🌶️ | ½ tsp | Freshly ground |
The risotto base is non-negotiable—it must be cold and firm to hold shape during frying. Arborio rice is essential for proper texture in the risotto. For the cheeses, Parmigiano-Reggiano and fresh mozzarella from Whole Foods or your local Italian market deliver authentic flavor. The breadcrumbs should be fine and dry (I prefer Progresso brand) for even coating. Maintain oil temperature at 350°F for optimal crispiness.
No leftover risotto? Make a fresh batch with Arborio rice, chicken stock, and white wine (Pinot Grigio works well). Pecorino Romano can substitute for Parmesan at one-third the amount due to its stronger flavor. For a lighter version, panko breadcrumbs create extra crunch. If avoiding dairy, use vegan mozzarella (though texture differs). The eggs bind the mixture—no suitable substitute maintains the same integrity.
Assemble rice balls just before frying to prevent drying. Store cooked arancini in a single layer on paper towels to maintain crispness. Best served immediately, but can be kept warm in a 200°F oven for up to 30 minutes. Leftovers reheat in a toaster oven for 5-7 minutes to revive the crust.
Why You’ll Love This Recipe
- No-Fuss Assembly: I just mix leftover risotto with egg and cheese, roll, and bake—no fancy steps.
- Cheesy Revelation: That gooey mozzarella center with the crispy parmesan edge? Ridiculously good.
- Party or Lunchbox: Honestly, they’re my go-to for picnics, packed lunches, or even a quick snack.
- Zero Waste: I love turning last night’s risotto into something new instead of tossing it.
Step-by-Step Instructions for Lidia Rice Balls
Transform your risotto into golden, crispy spheres with chewy centers using this proven method.
Step 1: Prepare and Shape the Risotto Base
Begin with 4 cups Leftover Risotto that has been thoroughly cooled and is firm enough to hold its shape. If starting from scratch, cook 1 cup Arborio Rice with 2 cloves Garlic Cloves, 0.5 whole Yellow Onion, 0.5 cup Dry White Wine, 3 cups Chicken Stock, 2 tbsp Unsalted Butter, 1 tsp Salt, and 0.5 tsp Black Pepper until creamy, then spread on a tray to cool completely.
Once cooled, stir in 0.5 cup Parmesan Cheese and 2 whole Large Eggs for binding. The mixture should hold together when pressed but not be sticky. Using damp hands, form the risotto into 1.5-inch balls, pressing a small cube of 4 oz Mozzarella Cheese into the center of each. This creates that signature molten cheese surprise.
Step 2: Bread the Rice Balls for Maximum Crispness
Set up a breading station with three shallow dishes. Place 0.5 cup All-Purpose Flour in the first, 2 whole Large Eggs beaten with 1 tablespoon water in the second, and 1.5 cups Italian Breadcrumbs in the third. The water in the egg wash helps create a thin, even coating that adheres better to the rice.
Roll each risotto ball in the flour, shaking off excess, then dip in the egg wash, allowing any excess to drip off. Finally, roll in the breadcrumbs, pressing gently to ensure full coverage. Place the breaded balls on a parchment-lined tray and refrigerate for 30 minutes to set the coating—this prevents the breadcrumbs from falling off during frying.
Step 3: Fry to Golden Perfection
Heat 2 cups Vegetable Oil in a deep, heavy-bottomed pot to 350°F. Use a thermometer for accuracy; the oil is ready when a breadcrumb dropped in sizzles immediately. Working in batches to avoid overcrowding, carefully lower the rice balls into the hot oil using a slotted spoon.
Fry for 4-5 minutes, turning occasionally, until they are deep golden brown on all sides. The breadcrumbs should be crisp and the cheese inside fully melted. Drain on a paper towel-lined plate and season immediately with a pinch of 1 tsp Salt while still hot. Serve warm for the best texture contrast between the crisp exterior and creamy interior.
Pro Tips For Making Lidia Rice Ball
- Chill the Risotto: I learned this the hard way—warm risotto falls apart when shaping. Spread leftover risotto on a tray and refrigerate for at least 1 hour before forming balls.
- Grate Cheese Fresh: Pre-shredded parmesan has anti-caking agents that make the filling grainy. Grate your own for that melty, cohesive center.
- Skip Overfilling: Stuffing too much mozzarella causes leaks during frying. Use just 1 teaspoon per ball—enough for a gooey surprise without the mess.
- Use Cold Eggs: Warm eggs can make the breading slide right off. Keep them ice-cold when dipping to help the coating stick better.
Flavor Customization for This lidia rice ball
Cheese Variations
Swap mozzarella for fontina or provolone for richer, more pungent flavor. I love adding ¼ cup Gorgonzola to the center for a bold blue cheese kick. For a vegetarian option, use Taleggio—it melts beautifully and adds depth.
Herb Infusions
Stir 2 tbsp chopped fresh basil or 1 tbsp fresh oregano into the risotto base before shaping. A pinch of red pepper flakes adds subtle heat. I often mix in 1 tsp lemon zest for brightness that cuts through the richness. 💫
Meat Additions
Brown ¼ lb Italian sausage or diced pancetta and fold into the risotto before forming balls. For extra indulgence, add 2 tbsp crispy prosciutto bits to the center along with the cheese. The saltiness pairs perfectly with the creamy rice.
Saucy Dippers
Serve with warm marinara sauce or a creamy Alfredo for dipping. I make a quick garlic-herb aioli by mixing ½ cup mayo with 1 minced garlic clove and 1 tbsp chopped parsley. A drizzle of balsamic glaze adds sweetness.
Crunch Enhancers
For extra texture, roll breaded balls in chopped pistachios or toasted panko before frying. I’ve also had success with crushed cornflakes for a nostalgic twist. Press firmly to ensure the toppings adhere during cooking.
Spice It Up
Add ½ tsp smoked paprika to the breadcrumbs for a subtle smokiness. A pinch of cayenne in the risotto base brings gentle heat. For a Sicilian touch, stir 1 tbsp tomato paste into the risotto before shaping. 🔥
Nutrition Facts
Frequently Asked Questions
Can I use fresh risotto instead of leftover?
Fresh risotto is too warm and sticky to shape properly. Spread it on a tray and refrigerate for 2-3 hours until cold and firm. This ensures the rice balls hold together during breading and frying.
Why did my rice balls fall apart while frying?
This usually happens if the risotto isn’t cold enough or the breading didn’t set. Chill breaded balls for 30 minutes before frying, and ensure oil is at 350°F to create a quick, firm crust.
How do I keep them crispy after frying?
Drain on a paper towel-lined plate, then transfer to a wire rack. Avoid stacking or covering, which traps steam. For serving later, reheat in a 375°F oven for 5-7 minutes.
Can I bake instead of fry?
Yes! Place breaded balls on a parchment-lined tray, brush with oil, and bake at 400°F for 20-25 minutes, flipping halfway. They’ll be less crispy but still delicious.

- Mujadara Rice and Lentils Recipe: Earthy Spiced Lentils With Caramelized Onions - November 1, 2026
- Naija Fried Rice Recipe: Street-Style Spice With Veggie Crunch - November 1, 2026
- Mushy Rice Recipe: Fluffy Grains Transformed in Minutes - November 1, 2026