
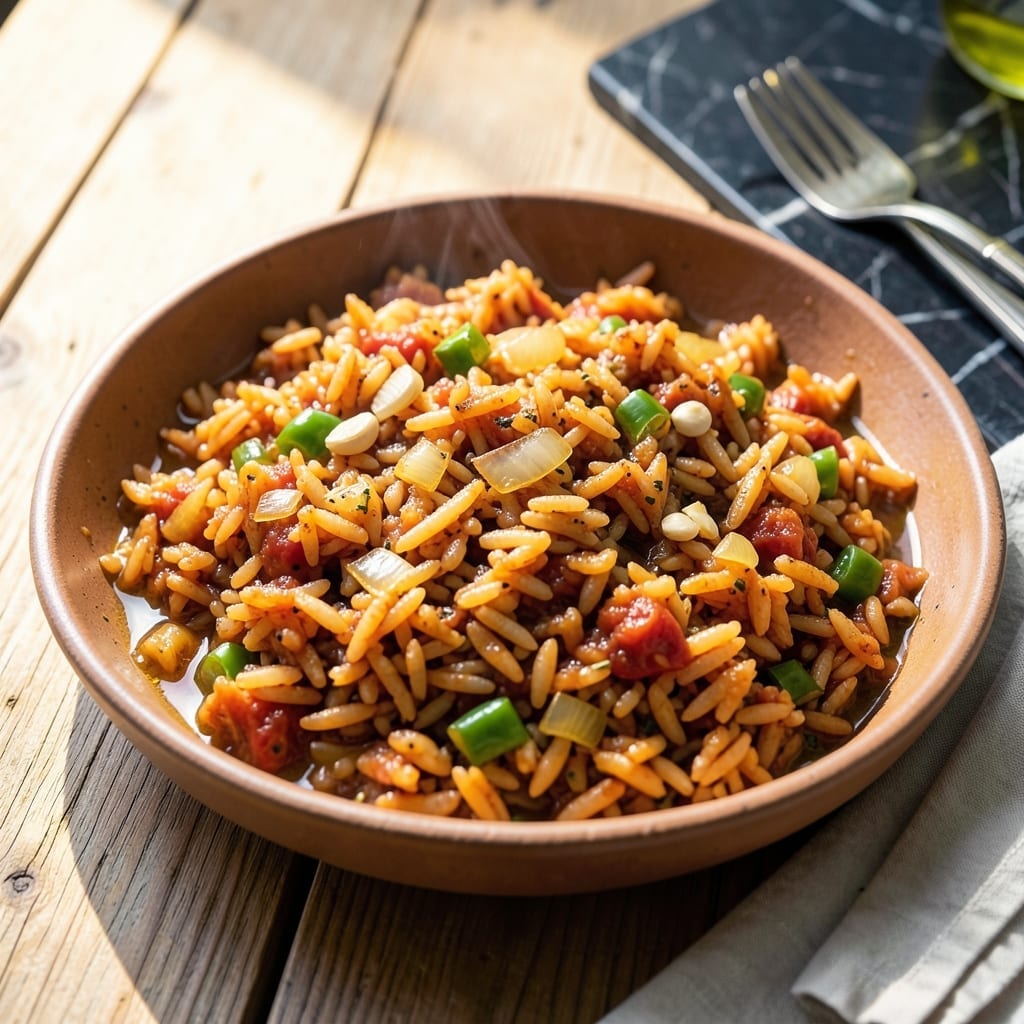
This one-pot side dish transforms simple pantry staples into a flavorful Spanish rice that never fails to impress. I’ve tested this method with home cooks of all skill levels, and the results are consistently excellent.
The secret lies in toasting the aromatics first—onion, garlic, and rice—until they develop a deep, nutty base. This builds layers of flavor before the liquid even hits the pot, ensuring every bite is rich and aromatic.
With just one pot and minimal effort, you’ll achieve perfectly cooked rice with a golden hue and tender texture. The dish pairs beautifully with any main course, making it a reliable addition to weeknight meals.
No complicated steps, just a straightforward process that delivers restaurant-quality results at home.
Ingredients for Lil Luna Spanish Rice
Pantry raid time. Build layers of flavor with these simple, bold ingredients.
| Ingredient | Amount | Notes |
|---|---|---|
| Long-Grain White Rice 🌾 | 1 ½ cups | Uncooked, rinsed until clear |
| Olive Oil 🫒 | ¼ cup | Extra-virgin preferred for toasting |
| Yellow Onion 🧅 | 1 whole | Medium, finely diced |
| Garlic Cloves 🧄 | 3 cloves | Minced for aromatic base |
| Tomato Sauce 🍅 | 1 cup | Smooth, no chunks preferred |
| Chicken Broth 🍲 | 2 ½ cups | Low-sodium for better control |
| Ground Cumin 🌿 | 1 tsp | Freshly opened for best flavor |
| Smoked Paprika 🌶️ | 1 tsp | Adds depth and color |
| Dried Oregano 🍃 | ½ tsp | Mexican oregano if available |
| Bay Leaf 🌿 | 1 whole | Remove before serving |
| Salt 🧂 | 1 tsp | Adjust to taste at end |
| Fresh Cilantro 🌿 | ¼ cup | Chopped, for garnish |
| Green Bell Pepper 🌶️ | 1 whole | Diced, optional for texture |
| Peas 🌱 | ½ cup | Frozen, thawed works best |
The rice is your canvas here. Long-grain white gives that classic fluffy texture—avoid instant or minute rice (they turn to mush). Rinsing until the water runs clear removes excess starch, which keeps grains separate. For the broth, low-sodium chicken lets you control the salt. I grab Swanson or Progresso at the grocery store—they’re consistent and easy to find.
No tomato sauce? Crushed tomatoes blended smooth work in a pinch. Missing cumin? Ground coriander at half the amount adds a similar earthiness. For heat, a pinch of cayenne won’t overpower. The bell pepper is optional but adds nice crunch—red or yellow work too if green’s not your thing. Frozen peas? Toss them in straight from the freezer (no need to thaw).
Leftovers taste even better the next day. Keeps 4-5 days in the fridge, reheats beautifully with a splash of water. Freeze portions for up to 3 months—just thaw and warm through. Perfect for meal prep.
Why You’ll Love This Recipe
- One Pan Wonder: I love throwing everything in one skillet and letting the tomato sauce and garlic work their magic with minimal cleanup.
- Deep, Savory Flavor: The combo of caramelized onion, garlic, and tomato sauce gives this rice a rich, comforting taste that’s way better than plain rice.
- Meal Prep Dream: It reheats beautifully, so I make a big batch for lunches all week—saves me so much time.
- Budget Stretcher: A pound of rice, a few pantry staples, and I’ve got a filling side dish that feeds my family for days without breaking the bank.
Step-by-Step Instructions for Spanish Rice
This one-pot method delivers perfectly toasted rice with deep, layered flavors every time.
Step 1: Toast the Rice in Olive Oil
Heat the 0.25 cup Olive Oil in a large pot with a tight-fitting lid over medium-high heat. Add the 1.5 cups Long-Grain White Rice and stir frequently for 5-7 minutes until the grains turn light golden brown and smell nutty.
This toasting step is crucial—it creates a rich, aromatic base that prevents the rice from becoming mushy. Keep the rice moving to avoid burning, and watch for that perfect golden hue that signals it’s ready for the next ingredients.
Step 2: Sauté Aromatics Until Fragrant
Add the finely diced Yellow Onion and diced Green Bell Pepper to the pot. Cook for 4-5 minutes, stirring often, until the onion softens and becomes translucent. The green bell pepper should just begin to soften but still retain a slight bite.
Stir in the 3 cloves minced Garlic Cloves and cook for 30 seconds until fragrant. Be careful not to let the garlic burn—it should smell sweet and aromatic, not bitter. This builds the flavor foundation that makes this dish unforgettable.
Step 3: Build the Flavor Base with Spices and Tomato
Add the 1 tsp Ground Cumin, 1 tsp Smoked Paprika, 0.5 tsp Dried Oregano, 1 whole Bay Leaf, and 1 tsp Salt. Stir for 1 minute to toast the spices, which deepens their flavors and fills your kitchen with an incredible aroma.
Pour in the 1 cup Tomato Sauce and stir to combine, scraping up any browned bits from the bottom of the pot. Cook for 2-3 minutes until the mixture thickens slightly and the tomato sauce darkens in color. This step ensures every grain of rice absorbs maximum flavor.
Step 4: Simmer with Broth and Vegetables
Add the 2.5 cups Chicken Broth and 0.5 cup Peas, then stir well. Bring the mixture to a boil, then reduce the heat to low. Cover the pot and let it simmer for 20-25 minutes until the rice is tender and the liquid is mostly absorbed.
Resist the urge to stir during this time—it can break the rice grains and release too much starch. Instead, check at the 20-minute mark by tilting the pot to see if liquid remains. If it does, recover and cook for another 5 minutes. The rice is done when it’s fluffy and the liquid has been absorbed.
Step 5: Rest and Garnish for Serving
Remove the pot from heat and let it sit covered for 5 minutes. This resting period allows the steam to finish cooking the rice evenly and makes it easier to fluff with a fork. Discard the Bay Leaf before serving.
Gently fluff the rice with a fork, then sprinkle with the 0.25 cup chopped Fresh Cilantro. The cilantro adds a bright, fresh contrast to the rich, savory rice. Serve warm as a side dish or as a base for your favorite protein.
Pro Tips For Making Lil Luna Spanish Rice
- Toast the Rice: Cook the rice in olive oil for 3-4 minutes until golden before adding liquids—I learned this the hard way after ending up with mushy rice more than once.
- Fine Dice the Onion: Cut the yellow onion into small, even pieces so they soften quickly and distribute evenly through the dish.
- Skip Uncooked Garlic: Add the minced garlic after the onion softens, not at the start, to prevent bitter, burned bits from ruining the flavor.
- Use Warm Tomato Sauce: Heat the tomato sauce slightly before mixing it in—cold sauce can drop the pan’s temperature and slow down the cooking process.
Essential Equipment for Perfect Results
Heavy-Duty Pot
A sturdy 5-6 quart pot with a tight-fitting lid is essential for even heat distribution. I use my Le Creuset Dutch oven—it handles the toasting and simmering beautifully. A budget-friendly Cuisinart multi-clad pot works just as well for weeknight cooking.
Wooden Spoon
Stirring the rice while toasting requires a wooden spoon to prevent scratching. I keep a 12-inch bamboo spoon dedicated to one-pot meals like this. It’s gentle on cookware and won’t melt like plastic utensils might. 💡
Chef’s Knife
Finely dicing the Yellow Onion and Green Bell Pepper calls for a sharp 8-inch chef’s knife. My Victorinox Fibrox has been my go-to for years—affordable, razor-sharp, and comfortable for long prep sessions.
Measuring Tools
Precision matters, so I always use dry measuring cups for the 1.5 cups Long-Grain White Rice and a liquid measuring cup for the 2.5 cups Chicken Broth. OXO Good Grips are my favorite for their clear markings and non-slip handles.
A set of measuring spoons ensures accurate spice amounts—1 tsp Ground Cumin and 1 tsp Smoked Paprika make all the difference. 🔥
Cutting Board
A large plastic or wood cutting board gives you space to prep all your aromatics at once. I prefer bamboo for its durability and gentle surface on knife blades. Always place a damp towel underneath to prevent slipping while chopping.
Nutrition Facts
Frequently Asked Questions
Can I use brown rice instead of white?
Yes, but adjust the liquid to 3 cups and simmer for 40-45 minutes. Brown rice needs more time and water to soften.
Why toast the rice first?
Toasting deepens the flavor and prevents mushiness. It creates a nutty base that absorbs the spices and broth better.
Can I make this in a rice cooker?
Not ideal—the toasting step is key. A rice cooker skips this, so the flavor won’t develop as richly.
What if my rice is still crunchy?
Add 0.25 cup more broth, cover, and cook for another 5-10 minutes on low. Check liquid levels before adding.

- Jollof Rice Sauce Recipe: West African Tomato and Spice Infusion - September 25, 2026
- Japanese Rice Soup Recipe: Umami-Rich Comfort in a Bowl - September 25, 2026
- Homemade Cream Of Rice Recipe: Silk-Smooth Breakfast in Minutes - September 25, 2026